How to Grow an Amazing Flower Garden
To have an amazing, vibrant garden full of flowers that are in bloom all year round, there are many things to take into consideration. It is important not only to know what type of plants and flowers you want but also where they should be planted, the conditions needed for their survival, and protection from pests or other problems.
This article will help walk you through each step so that your flower garden can be the envy of everyone else’s. Keep reading to learn more.

Image Credit: http://gardendesign.com
How to grow an amazing flower garden
1. Make sure your soil is healthy
One of the most important things to consider when planting flowers is the quality of the soil. All plants need some type of nutrients to grow and thrive, and the soil provides these essentials.
If your soil is poor or has a lot of clay in it, you will need to add organic matter such as compost, peat moss, or manure to make it more hospitable for plant growth. You can also purchase fertilizer specifically designed for flower gardens, which will provide everything your plants need.
2. Choose the right type of flowers for your garden
Not all plants are suited for every climate or growing condition. Some flowers thrive in full sun while doing better in partial shade. Some like to grow in rocky, sandy, or clay soil while others prefer rich, moist dirt. Before you start planting your garden, choose some plants that are appropriate for your area of the country so they can get all of the nutrients they need to survive.
The best evergreen plants to grow in a flower garden are:
- Morning glory (Ipomoea purpurea) – A vigorous vine that is easy to grow and produces lovely trumpet-shaped flowers in shades of blue, purple, pink, or white. It blooms all summer long and can be grown as a climbing plant or trained to grow on a trellis.
- Confederate Jasmine (Trachelospermum jasminoides) – This vine produces clusters of fragrant white flowers that bloom all summer long. It grows best in full sun or partial shade and can be used to cover an ugly fence or wall.
- Trumpet Creeper (Campsis radicans) – This fast-growing vine is covered with large, trumpet-shaped flowers in shades of red, orange, or yellow in the summer. It thrives in full sun but can grow in partial shade as well. It needs a structure to climb on and will need regular pruning to look its best.
The best shade-loving plants to grow in a flower garden are:
- Coral Bells (Heuchera spp.) – This easy-to-grow perennial produces pretty blooms and is an excellent choice if you want to color in your shade garden. It blooms in spring and fall with shades of red, pink, white, or coral and will tolerate just about any soil type.
- Jacob’s Ladder (Polemonium caeruleum) – A delicate, foliage plant with beautiful bell-shaped flowers that come in shades of blue, purple, or sometimes even pink. It tolerates partial sun but prefers shade and moist soil where the roots can spread out.
3. Planting flowers in a pattern can create an amazing design
There are many ways to plant flowers in patterns and designs so that you get beautiful results without having to try too hard. You can line plants up along paths or sidewalks with different colors of blooms at each end for a simple but impressive decoration. If your garden is on slopes, you might want diagonal rows following the hill instead of side-by-side lines. These kinds of flower gardens will add interest to any outdoor setting.
4. Mulch around plants to keep them healthy and prevent weeds from growing
Mulching is the process of adding a layer of organic or inorganic material around plants to protect their roots, retain moisture and suppress weed growth. It is especially important to mulch around newly planted flowers until they are well established. You can use shredded bark, straw, leaves, grass clippings, or any number of other materials for mulching.
5. Add some water into the ground to help with plant growth, but don’t over-water.
Container gardens need more frequent watering than those planted in the ground since the soil in containers dries out more quickly. But be careful not to overwater, as this can cause root rot and kill your plants.
TIP: One of the best ways to water flowers in a container is to water from below by setting the flower pot in a larger container filled with water. This way, the roots won’t sit in soggy soil which can also cause them harm.
6. Design your garden around something special
If there’s a favourite place you’d like to highlight or a particular view that you want to enjoy while tending your garden, think about how you can bridge it into your design so that it becomes an integral part of the overall look. Flower gardens work well when they are set near benches or loungers where people can relax among nature and admire their hard work.
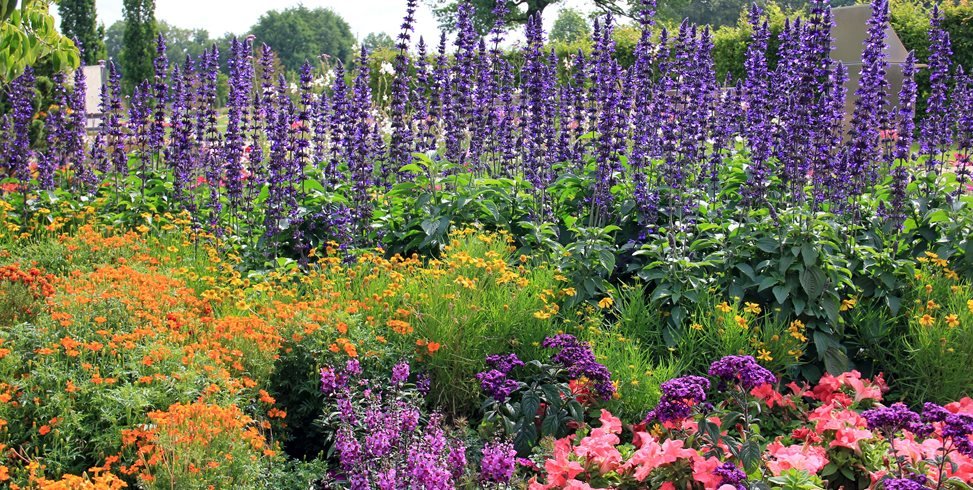
Image Credit: http://gardendesign.com
Other factors to consider
When designing a flower garden, there are a few other factors to take into account, such as:
- The amount of sunlight the area gets – Flowers need at least 6 hours of sunlight per day to grow and bloom properly.
- The soil type – Not all flowers do well in all types of soil. Make sure to check the requirements of the plants you choose.
- Drainage – Poor drainage can kill plants quickly, so make sure your flower garden has good drainage before planting.
All of this information can help you create a beautiful and unique flower garden that will be enjoyed for years to come. With a little bit of planning and some thoughtful design, you can have the garden of your dreams.
How To Grow An Amazing Flower Garden – FAQ
What type of soil should I use to garden with flowers?
Good-quality topsoil is always a great option when planting any kind of flower. If you don’t have access to topsoil, you can also create your mix by combining equal parts of compost, sand, and clay.
What are some good flowers to start a garden with?
There are a lot of different flowers that can be planted in a garden, but some of the most popular varieties include roses, lilies, sunflowers, and daisies. Be sure to choose flowers that are suited for your climate and growing conditions.
How often should I water my flower garden?
It’s important to keep your flower garden well-watered, but you don’t need to water it every day. A good rule of thumb is to water your plants when the top inch of soil feels dry to the touch.
What should I do if I see pests or diseases in my flower garden?
If you notice any pests or diseases affecting your flowers, take action immediately to get rid of them. You can usually treat pests and diseases with organic or chemical pesticides, or by using natural methods such as soap spray or garlic oil.
Final thoughts on how to grow an amazing flower garden
In conclusion, there is so much more that goes into a flower garden than just planting seeds and watching the flowers grow. Even if you have green fingers, there’s still some planning and preparation involved to get those beautiful blooms that we yearn for. Remember that each plant has specific needs, whether it be water or sunlight, and provide them with what they need.
The post How to Grow an Amazing Flower Garden appeared first on Kitchen Infinity.
Did you miss our previous article…
https://www.conduithardware.com/?p=912
10 Best Oven Cleaners of 2022
If you’re a baker, you already know how annoying baked messes can be. Not only do they make your kitchen look cluttered, but they can also be difficult to clean. This is especially true if you have a built-in oven.
Luckily, there are a few oven cleaners on the market today that can help make this process a lot easier. In this article, we’ll be discussing the best oven cleaners of 2022. But before that, let’s have a look at some of the things you need to look for when buying an even cleaner.
What to Consider When Buying an Oven Cleaner
Intended Use
Most oven cleaners are designed to be used on a variety of oven surfaces. However, some might require you to perform a spot check first before applying it. This is especially true for products that aren’t particularly friendly with the environment.

Brand Reputation
When choosing an oven cleaner, try to pick one from a reputable brand. Sure, getting a cheaper product might seem like a good idea, but in the long run, you’ll only be disappointed with the results.
Ease of Use
Some oven cleaners can be a bit difficult to use. If you’re not particularly handy, it’s best to choose easy to apply. Also, consider a cleaning solution that can work on spot cleaning.
Formulation
The formulation of an oven cleaner can affect its effectiveness. If you want to get the best results, it’s important to use a non-toxic and eco-friendly product.
With all of this in mind, let’s take a look at some of the best oven cleaners on the market today:
1. Fume-Free Oven Cleaner
If you’re looking for an environmentally friendly oven cleaner, the Fume-Free Oven Cleaner is a great option. This product is made with biodegradable ingredients so that it won’t harm your skin or the environment. It also comes with a non-toxic formulation, making it safe to use around your home.
The Fume-Free Oven Cleaner is also easy to use. All you have to do is spray it on the desired oven surface and let it sit for a few minutes. After that, you can easily wipe it away with a cloth or sponge.
Pros
- -Environmentally friendly
- -Non-toxic
- -Easy to use
Cons
- -May not be as effective on tough stains
- -Can leave a residue behind if not rinsed off properly
Overall, the Fume-Free Oven Cleaner is a great choice for those who want an environmentally friendly and non-toxic oven cleaner.
2. Astonish Oven Cleaner 128 Ounce
If you’re looking for a powerful oven cleaner, the Astonish Oven Cleaner is a great option. This product comes with a 128-ounce bottle, so it’s perfect for those who have a large oven to clean.
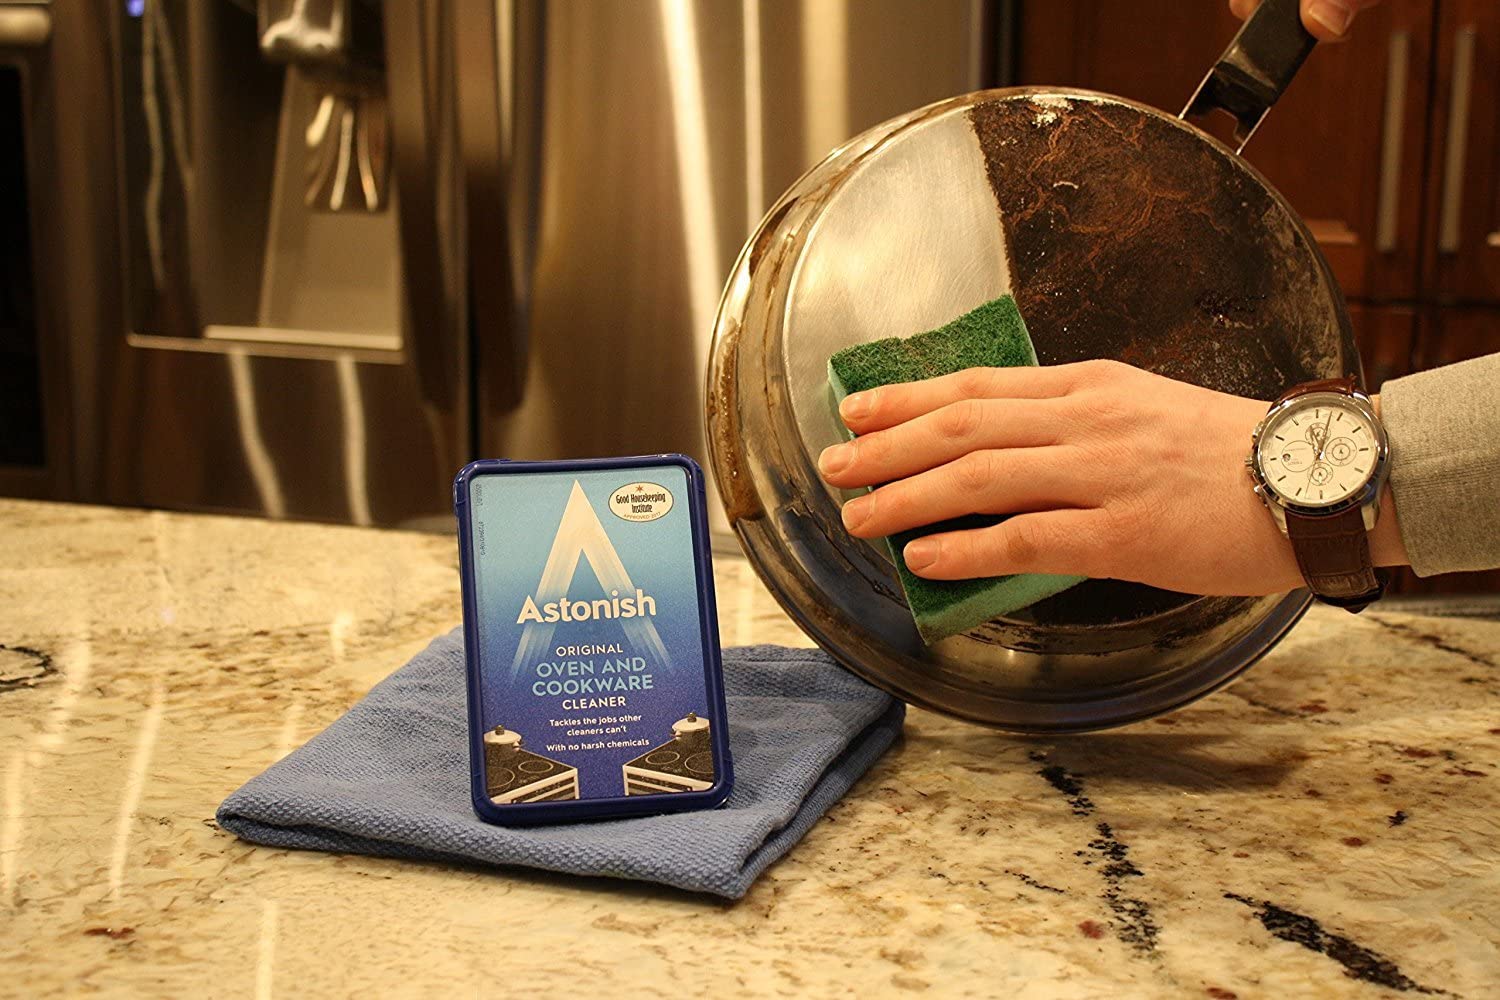
The Astonish Oven Cleaner is also easy to use. All you have to do is spray it on the desired surface and then let it sit for a few minutes. After that, wipe it off with a damp cloth or sponge and your oven will be sparkling clean.
Pros
- Large 128-ounce bottle
- Easy to use
Cons
- Can leave some residue behind if not rinsed off properly
The Astonish Oven Cleaner is a great option for those who want a powerful oven cleaner with an easy-to-use formulation.
3. Trisodium Phosphate Cleaner, 56 Ounce
If you’re looking for something eco-friendly, then the Trisodium Phosphate Cleaner is perfect for you. This product does not contain harsh chemicals or additives that can harm the environment or your skin.
This Trisodium Phosphate Cleaner also works great on ovens and grills so that you can use it on a wide variety of surfaces. All you have to do is spray the desired oven’s interior surface with the product, wait for it to sit for a few minutes, then rub away with a damp cloth or sponge.
Pros
- Eco-friendly
- Works great on ovens and grills
- Safe to use around your home
Cons
- It may not be as effective on tough stains
- Can leave a residue behind if not rinsed off properly
The Trisodium Phosphate Cleaner is a great choice for those who want an eco-friendly oven cleaner.
4. Oven & Grill Cleaner, Non-Toxic, Biodegradable
If you’re looking for a non-toxic and biodegradable oven cleaner, then the Oven & Grill Cleaner is a great option. This product is made with all-natural ingredients, so it’s safe to use around your home.
The Oven & Grill Cleaner is also easy to use. All you have to do is spray it on the desired surface and then let it sit for a few minutes. After that, wipe it off with a damp cloth or sponge.
Pros
- Non-toxic
- Biodegradable
- Easily applied
Cons
- You must protect your skin
The Oven & Grill Cleaner is a great choice for those who want an environmentally friendly oven cleaner.
5. Magic Eraser Extra Durable Scraber
This is another great oven cleaner from Mr. Cleaner. This product comes with an extra-durable scrubber, so it’s perfect for those tough, baked on food.
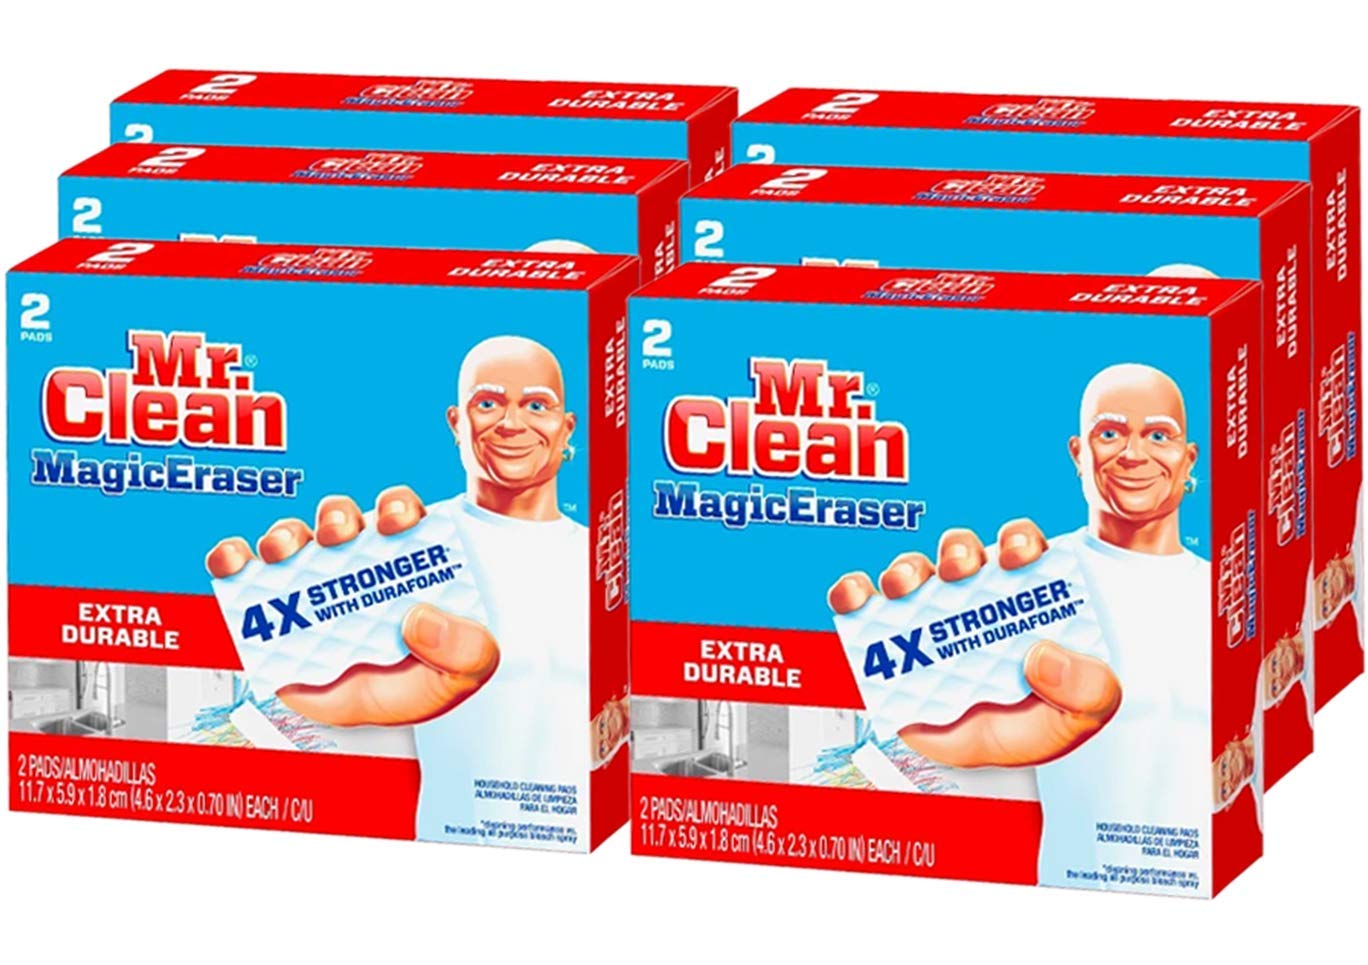
The Magic Eraser Extra Durable Scrubber is also easy to use. All you have to do is wet the scrubber and then rub it against the desired oven’s interior surface. After that, just rinse it off or wipe it away.
Pros
- Extra durable scrubber
- Easily applied
Cons
- Ensure extra scrubbing
The Magic Eraser Extra Durable Scrubber is a great choice for those who want an easy-to-use oven cleaner with a durable scrubber. It works great on all oven surfaces including the oven door.
6. Goo Gone Oven and Grill Cleaner
The Goo Gone Oven and Grill Cleaner is a great choice for stubborn baked-on grease. This product comes with a spray bottle, so it’s easy to apply. The Goo Gone Oven and Grill Cleaner are also non-toxic and biodegradable. Plus, it’s safe to use around your home.
All you have to do is spray the desired surface generously with the Goo Gone Oven and Grill Cleaner, let it sit for a few minutes, then wipe away.
Pros
- Effective on removing tough stains
- Non-toxic
- Biodegradable
- Non-abrasive and surface clean
Cons
- It comes in a small bottle
7. ARM & HAMMER Pure Baking Soda
Baking soda is a great natural cleaner that you can use on various surfaces. If you’re looking for an all-purpose oven cleaner, then the ARM & HAMMER PURE BAKING SODA is a great option. This product comes in a 4-pound bag, so it’s perfect for those who want to save money and buy in bulk.
The ARM & HAMMER PURE BAKING SODA is also very easy to apply. All you have to do is sprinkle the desired amount on the surface, let it sit for a few minutes, then wipe away.
Pros
- It comes in a large bag
- Natural cleaner
- Easy to apply
- Preserves the polish and finish of ovens
Cons
- The packaging is too bulky
The ARM & HAMMER PURE BAKING SODA is a great choice for those who want an all-purpose oven cleaner.
8. Magic Stainless Steel Cleaner Aerosol
If you have a stainless steel oven, then the MAGIC STAINLESS STEEL CLEANER AEROSOL is a great choice. This product comes in a spray can, so it’s easy to apply. Plus, it’s made with all-natural ingredients and essential oils, so it’s safe to use around your home.
To use this product, all you have to do is spray it directly on the desired surface and then let it sit for a few minutes. After that, just wipe it away with a damp cloth or sponge.
Pros
- All-natural ingredients
- Easy to apply
- Best for aluminum and chrome surfaces
- Adds a protective coat after cleaning
Cons
- Non-abrasive; hence not good on tough stains
- Leaves strikes
9. Oven Pride Complete Oven Cleaning Kit
The Oven Pride Complete Oven Cleaning Kit is one of the best commercial oven cleaners on the market. Not only does it come with everything you need to clean your oven, but it’s also very effective at removing tough stains.
This product comes with a scrubbing pad, chemical cleaner, and degreaser. So all you have to do is follow the included directions to clean your oven. The product also comes with a money-back guarantee, so you can be sure that you’re making a smart purchase.
Pros
- It comes with everything you need
- Features a clean-up bag
- Chemical-free product
- Very effective at removing tough stains
- Money-back guarantee
Cons
- Follow the included directions carefully
- Don’t use in cast iron surfaces
The Oven Pride Complete Oven Cleaning Kit is a great choice for those who want an easy-to-use oven cleaner that’s effective at removing tough stains.
10. Elbow Grease All Purpose Degreaser
For those who want an oven cleaner that’s made with natural ingredients, the Elbow Grease All-Purpose Degreaser is a great choice. This product comes in a 16-ounce jar, so it’s perfect for resale or home use. Plus, it can be used on multiple surfaces–not just your oven!
To apply the Elbow Grease All-Purpose Degreaser, all you have to do is squirt it directly on the desired surface. Then, let it sit for a few minutes before wiping it away with a damp cloth or sponge.
Pros
- Natural ingredients
- It can be used on multiple surfaces
- Easy to apply
- Safe for cooking surfaces
- Works well on grease stains
Cons
- Must be diluted before use (according to the instructions)
The Elbow Grease All-Purpose Degreaser is a great choice for those who want an oven cleaner that can be used on multiple surfaces. Plus, it has natural ingredients, so it’s safe to use around your home and even near food.
FAQs on Best Oven Cleaners
What’s the best oven cleaner?
The right oven cleaner is the one that fits your specific needs. It all narrows down to what you’re looking for in your oven cleaner. Do you want something that can remove tough stains or a chemical-free cleaner? You must consider these when buying one.
How often should you clean your oven?
It all depends on how often you use your oven. If you aren’t using it that much, go for at least once a month cleaning. If you’re using it regularly, more than twice a month, consider biweekly cleaning of the oven.
How do I get rid of the odor in my oven?
You can use charcoal to get rid of odor in your oven. Just fill up an aluminum pan with the charcoal, place it inside your oven, close the oven door, and wait for a few hours. The accumulated heat from the activated charcoal will get rid of bad odors. Afterward, you can remove the pan and let everything cool down before using your oven again.
Our Verdict on Best Oven Cleaners
Buying the best oven cleaner in 2022 boils down to what you’re looking for in an oven cleaner. Do you want something easy to apply with natural ingredients or a heavy duty oven cleaner that can remove tough stains? Whichever one you choose, be sure to read the instructions carefully before use.
The post 10 Best Oven Cleaners of 2022 appeared first on Kitchen Infinity.
Did you miss our previous article…
https://www.conduithardware.com/?p=907
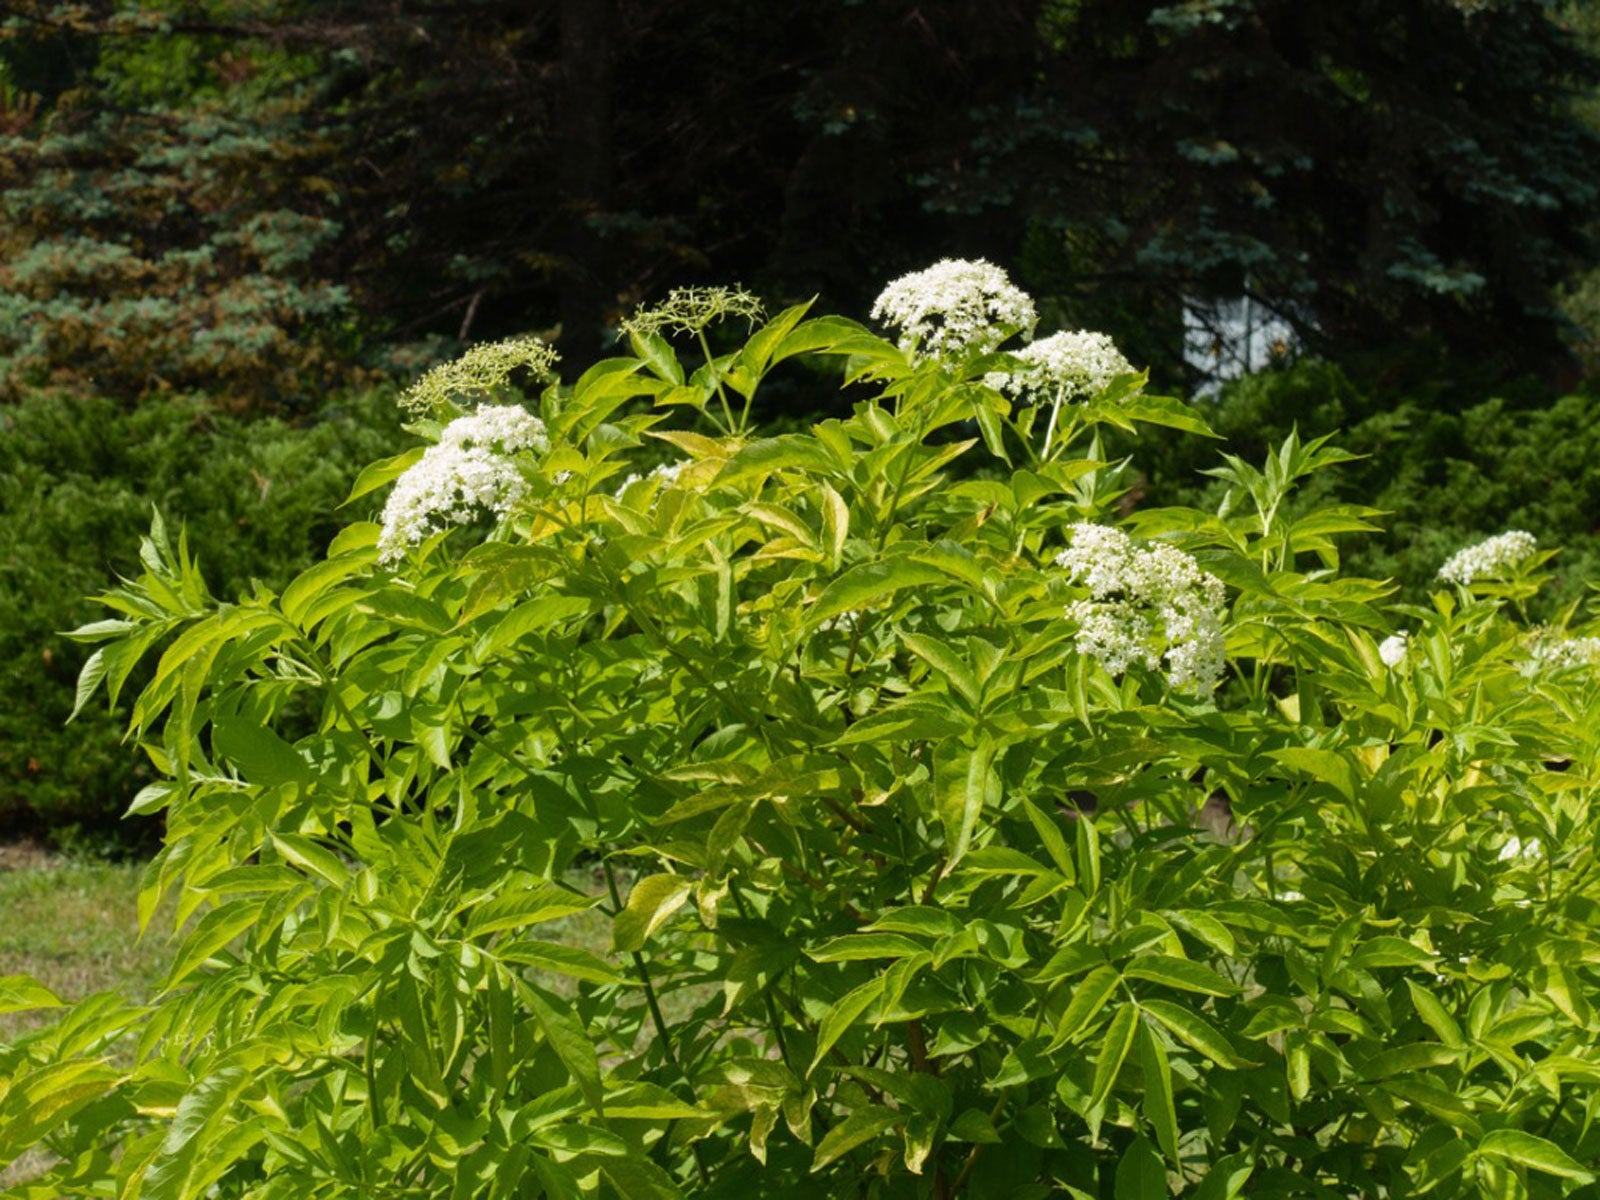
How To Grow Black Lace Elderberry
If you are looking for a beautiful and unique ornamental plant, black lace elderberry is an excellent choice. It has dark purple foliage and blackberries, making for a dramatic landscape focal point during the growing season. This beautiful shrub goes by many names, including black lace, elderberry, common elderberry, black elder, European elderberry, Judas tree, and blue or black elderberry.
This versatile plant provides year-round beauty without much effort on your part. Whether you’re looking for a new ornamental shrub or simply want fresh fruit at your fingertips, this variety of Sambucus canadensis is sure to please. In this article, we’ll talk about everything you need to know about growing black lace elderberry.
Uses of Black Elderberry
Elderberry plants have gained popularity thanks to their lovely appearance and important uses in traditional industries, culture, and medicine. They fall under early spring flowers since they bloom creamy pink flowers in the spring. These are followed by blackish-red fall berries, which can be harvested for making elderberry wine and jam. You can also leave the elderberry wine on the plant to attract birds and other wildlife.

Black lace berries are also edible and high in vitamin C. If you want to plant them for food and drink, then the American elderberry, also known as Sambucus canadensis, is the better choice than the European type known as Sambucus nigra.
The intense purple black foliage is finely cut, giving it an effect similar to Japanese Maple, also known as Acer palmatum. Some designers are even using it in the more tender maple varieties since black lace is extremely durable and adaptable.
It can also be used as a dramatic accent plant, planted en masse for a troublesome high hedge, or incorporated into the mix or perennial border. Black lace is also suitable for use in woodland gardens, rain gardens, and attracting birds and butterflies to the yard. You can also plant a black lace next to a shrub with brightly colored leaves to create contrast and interest.
This is a very cold hardy, and easy-to-grow plant adaptable to most sites. In addition, this plant is deer resistant, drought tolerant, fall heat tolerant, and a landscape plant. It can also be used as a potted shrub on the patio. It’s good in groupings or masses or perennial and shrub borders.
Common elderberry plants are deciduous plants or small trees that can reach up to 20 feet in height and width. Some specimens have grown as tall as 33 feet in their natural habitat.
Planting Black Lace Elderberry (Sambucus racemosa ssp. melanocarpa)
Black lace elderberry can grow in USDA plant hardiness zones 4-7 but is susceptible to winter damage. It is best planted in fertile, loamy soil with excellent drainage and receives full sun or partial shade. If planting specimens near homes or other structures, it is a good idea to place a barrier of mulch or fencing around the plants to protect them from being damaged by lawnmowers, mower debris, and deer.

They are relatively easy to grow. They can be propagated from seeds, softwood cuttings, or semi-hardwood cuttings. Seeds need cold stratification. Seeds should be sown in the autumn and kept moist for 60 days before planting. A thin layer of vermiculite on top of the soil helps retain moisture. It also does well in wet soils.
These plants also do well in acidic to alkaline soils, but it’s also important to look for slightly acidic soil. Before planting this shrub, amend the soil with compost to ensure healthy growth. You can easily make your compost to use for the purpose. After that, it will benefit from regular fertilizing with compost once every year in the spring.
Due to their sporadic growth, elderberry plants tend to form a lot of suckers. So prune it regularly if you want to maintain size and shape for your shrubs. Pruning involves removing unhealthy, damaged, old, or dead branches in early spring.
Black Lace Elderberry Care
Black lace elderberry is self-pollinating, but if you wish to have as many berries as possible, you can plant another cultivar near your black lace elderberry for increased pollination.

Light Requirement
In the North, while black lace elderberry will tolerate partial shade, it will produce more flowers and a more attractive foliage color if grown in full sun. At the southern end of its range, it will benefit from afternoon shade.
Soil Requirements
Black lace elderberry grows best in slightly acidic, loamy soil that is moist but well-drained. The black lace elderberry bush also tolerates clay soil types better than many shrubs, but it performs better over time if planted in soil that drains well. Black lace does best in moist soil, although it will tolerate dry soils. It thrives under acid or alkaline soils.
Watering Common Elderberry
Black lace elderberry is a drought-resistant shrub and does not require large amounts of water to thrive. However, it benefits from supplemental watering during dry periods and in hot summer climates. The plant prefers evenly moist soil. And since elderberry shrubs often grow near wetlands, it tolerates wet soil better than many other plant species.
Fertilizer and Transplanting
This deciduous shrub needs to be fertilized in early spring by applying a slow-release fertilizer specialized for trees and shrubs. If you wish to transplant an existing plant, do so in spring or early summer while the soil is moist and warm. Elderberry shrubs do not recover well from root disturbance, so take care when moving them. You may harm or kill the plant with poor planning or execution.
When growing elderberry bushes in the home garden, plant them near a water source such as a drip irrigation system or pond, especially if rainfall is infrequent. Ensure that the roots get at least 1 inch of water weekly and keep an eye on soil moisture levels so you can provide supplemental watering during dry spells.
Pruning Elderberry
Best if pruned immediately after blooming. The correct time for pruning this plant is late winter or early spring. Pruning will keep it attractive, vigorous and check its spread. As the woody stems become older, they become weaker and less attractive. So, remove the older stems to direct more energy into the newer, more attractive ones.
Propagating Common Elderberry
Cutting the branches of the elderberry bush back to four inches gives you a convenient place to collect cuttings.
To propagate common elderberry, remove the smaller tip shoots from grown branches’ end and dip them into rooting hormone. The best time for this operation is fall or early winter. Remove all leaves on the cutting except the top two pairs. This makes it easier to dip into rooting hormone and reduces the chances of disease spores falling into any open cuts.
Shorten all side branches by half their length to direct energy into the main stem. Root the cuttings in a pot filled with sand, peat moss, and perlite at a ratio of 1:1:1. Water sparingly until roots form.
After three weeks, the cuttings should be ready to plant in your garden or for overwintering. Select a location that gets at least six hours of sun per day and has well-drained soil.
Common Pests and Diseases
Prone to a number of diseases, including canker, leaf spot, and powdery mildew. Apply Neem oil once pollination begins for best results. Also, make sure there is proper spacing to promote good air circulation, irrigate at soil level, and keep mulch six inches away from the main stems of the bush.
FAQs on How to Grow Black Lace Elderberry
What plants are compatible with black lace elderberry?
White pine trees and quaking aspen are good elderberry companion plants, especially if you’re looking for something taller than the shrubs.
Final Thought on How to Grow Black Lace Elderberry
Elderberry plants are very popular plants that you can never miss. Not only do these shrubs look splendid and very familiar, but they’re also low maintenance in almost any environment and growing conditions.
The post How To Grow Black Lace Elderberry appeared first on Kitchen Infinity.
Did you miss our previous article…
https://www.conduithardware.com/?p=903
Peat Moss: What It Is and How To Use It
Peat moss is a natural growing medium with many applications, but it can be hard to know how to use it in your garden. But what exactly is peat moss? How does it differ from other types of soil or mulch?
This guide covers everything from the types of peat moss available to how much water each type holds. We’ll cover everything from planting trees and shrubs with peat moss as a potting medium or using it as alternative mulch material in vegetable gardens. You’ll also find out which kinds of plants grow best when grown directly in peat moss without any additional soil mixed into the mix. Let’s get started!
What Is Peat Moss?
Peat moss is a soil amendment that is harvested from peat bogs. Many of these peat bogs are found in wet areas of Canada. Peat bogs are formed over a long period as organic materials partially decompose.

Although sometimes referred to as peat, peat moss and peat are not the same things. Peat moss is one of the products harvested from peat bogs. Other types of peat moss come from the partial decomposition of other organic materials. If you know how to make compost then you must know this type of peat moss. The moss in peat moss refers to sphagnum moss.
Where Does Peat Moss Come From?
Peat moss comes from your flower pot or garden from wetlands or bogs. It’s not decomposed material because the surface of the blogs doesn’t allow oxygen and air to filter underground. This makes the fibers of the sphagnum moss remain intact.
Types of Peat Moss
Sphagnum Peat Moss
The most commonly used type of peat moss is sphagnum peat moss. Sphagnum peat moss has a high ability to absorb moisture and holds ten times its dry weight in water. After it’s harvested and dried, sphagnum peat moss is light in color, making it retain 10-12 times its weight in water.
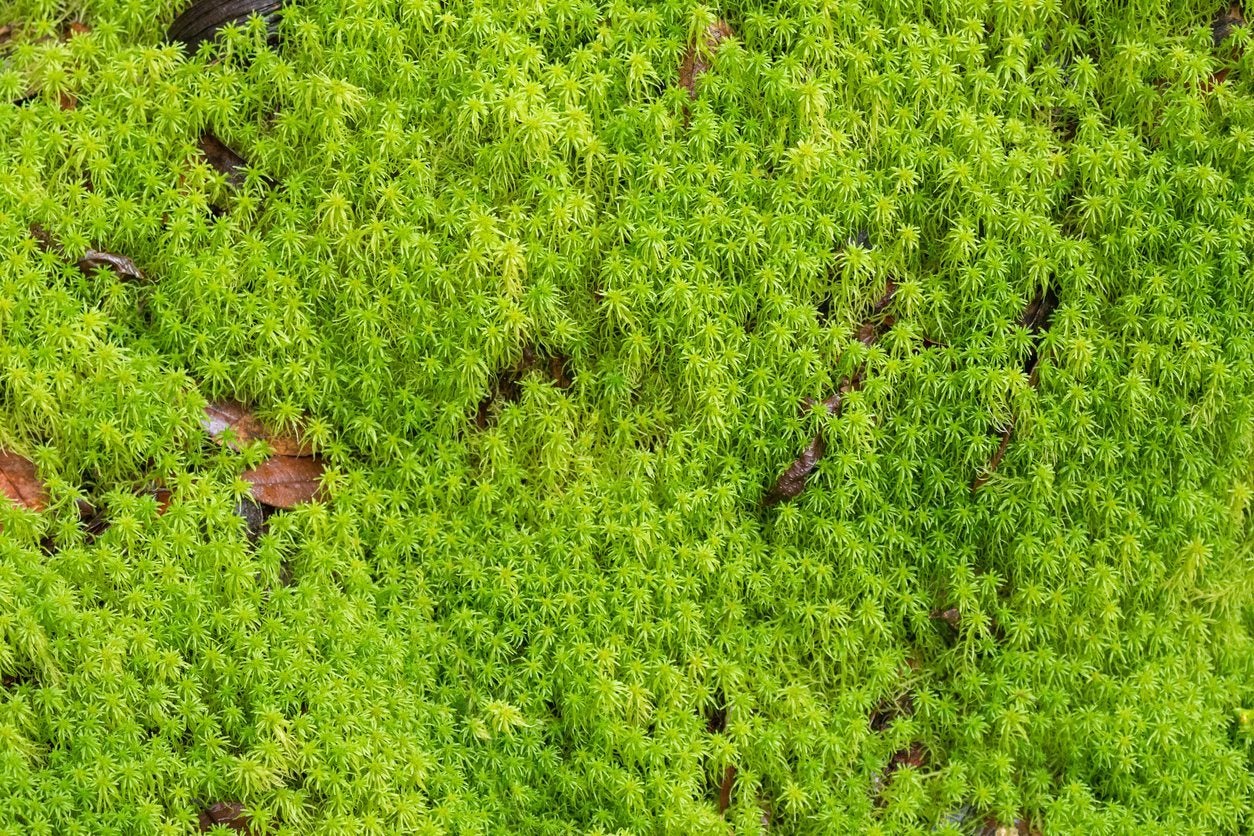
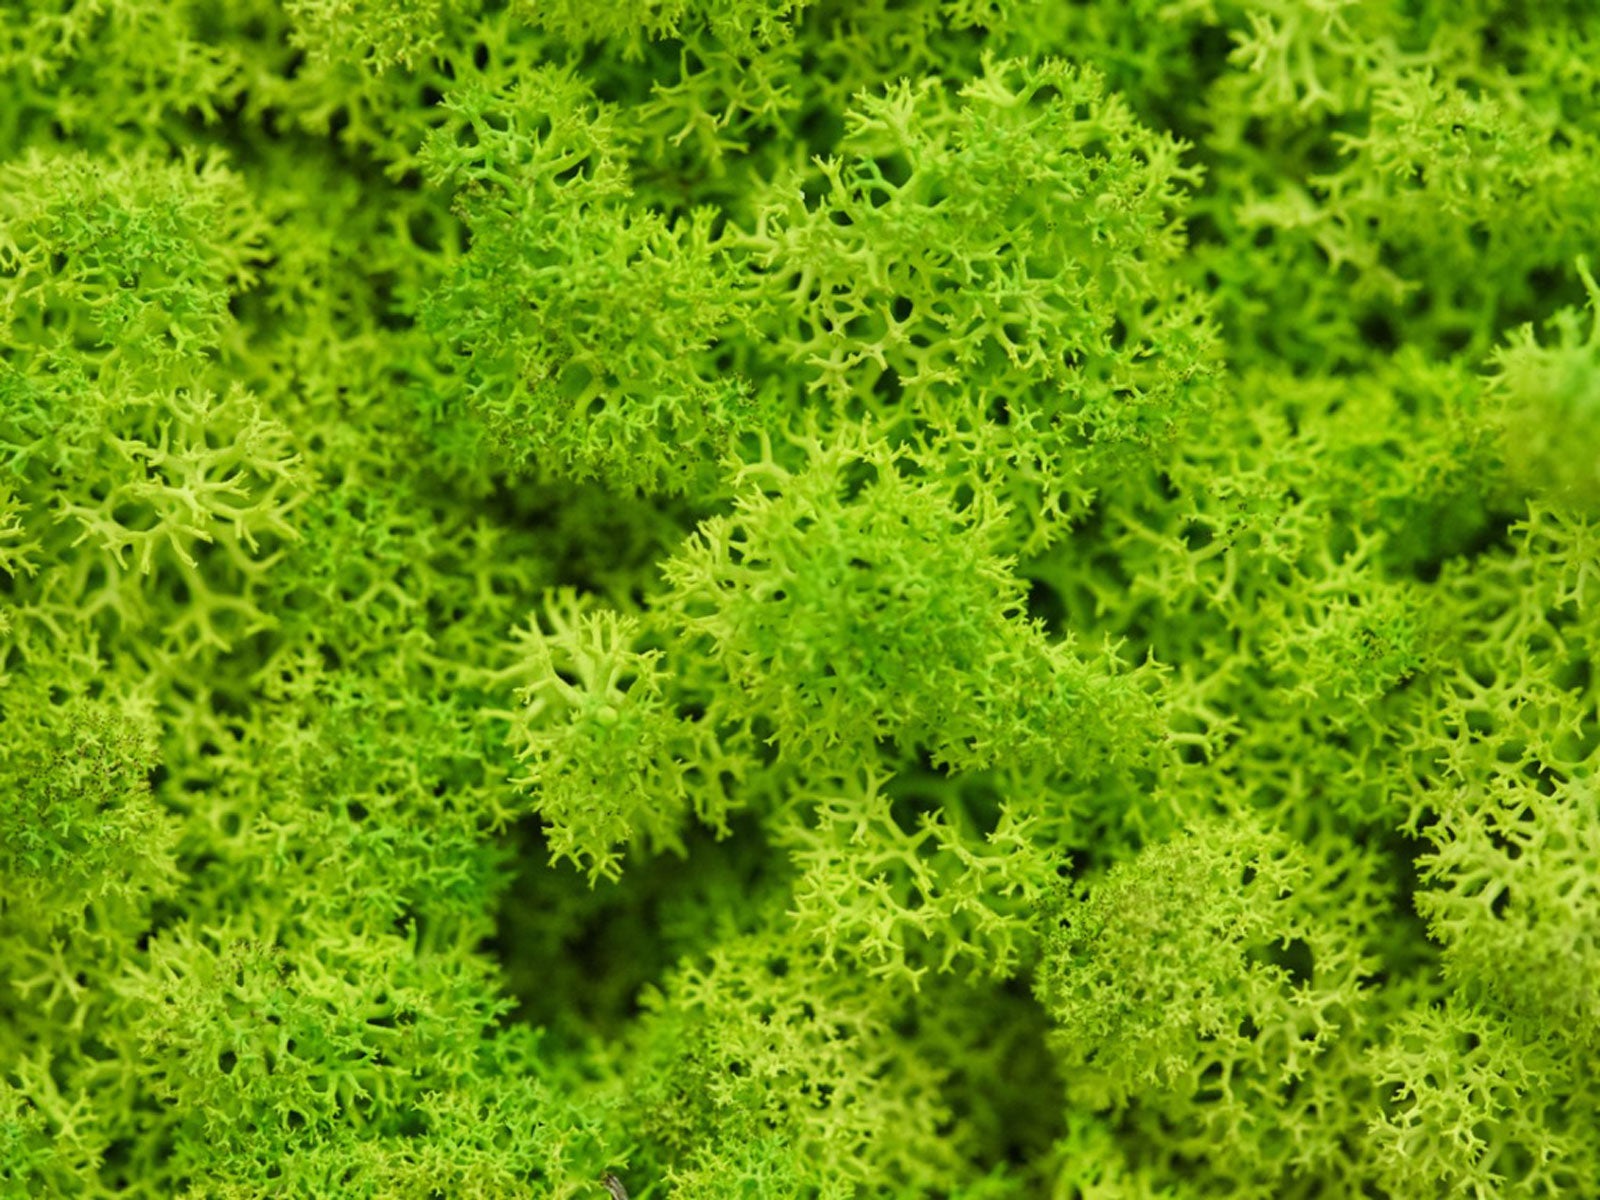
Don’t confuse sphagnum peat moss with sphagnum moss, even if their names are similar. Sphagnum moss refers to the plant material harvested when still alive and growing above water. The end product is the light, fibrous material often used to decorate line wire baskets.
Black Peat Moss
This is an important type of peat because it has high nutrient content, making it useful in growing orchids because orchids like organic material in their soil. It’s also used for potted flowering plants and nurseries that produce bedding plants. It’s a little more acidic than sphagnum peat moss and holds more water.
Black peat is harvested differently than sphagnum peat moss in a way that preserves the living plant. It’s cut from Sphagnum bogs in Canada and is probably black because of its high carbon content. It requires more processing before it’s sold but has less dust and fewer contaminants than brown peat moss.
History of Peat Moss
Peat was dried and used as a source of fuel in some countries for centuries. This is because it’s rich in carbon dioxide, just like other fossil fuels. It was until the 1940s that peat had a place in horticulture. Today, it’s used as a soil amendment, soilless mix, seed starting, and mushroom casting.
Availability of Peat Moss
Peat mosses are commonly found in bogs and wetlands of the earth’s northern hemisphere. It’s sold in gardening stores, online, hardware stores, and even supermarkets.
Mining Peat Moss
Before peat moss becomes a useful gardening product, it must be harvested by digging the ground and recomposing the bog’s ecosystem. When it comes to mining peat moss, the process is as follows:
Dig a network of ditches along the peatland to drain the water. Second, remove the native vegetation to get the peat exposed. Third, level the harvest to prevent drainage of the surface runoff. Fourth, harrow the top layer to speed up the drying process of peats. Fifth, suck up the dry peat layer using a large vacuum harvester.
Lastly, the harvested peats will be transported to a processing firm for cleaning, drying, and screening into different labels and packaging.
Pros of Peat Moss
Sterile
Peat moss has a natural ability to kill weed seeds and insects. When peat moss is added to the soil, it leaves no chance for mosquitoes and larvae to grow in your garden. This attribute can be very important if you want to avoid diseases such as malaria.
Cleanliness
Most of the growing materials are not clean. However, that’s not the case with peat moss. If you drop some wet moss, pick it up, get it dried or sweep it up.
Moisture Retention
Peat moss is believed to retain water for longer than other composts. This means that you will need less watering of your plants during dry seasons.
Peat Moss Has Slightly Acidic pH
Peat moss has a pH of 4.9 to 6.5, slightly acidic. This makes it better for soil mix because the acidity helps break down other compounds in the soil. This also makes it a good corrector, especially with plants that cannot stand alkaline soil.
It’s Fully Organic
If you are looking for an organic material to improve the content of your soil, using peat moss is a good option. It comes from bogs and is fully natural. The best part is that it’s now harvested at its optimal stage, further adding that this is an organic ingredient. Also, quarrying and transportation do burn a lot of fossil fuels, so if it’s produced organically, it’s not harvested and delivered organically.
Peat Moss Doesn’t Compact
Even though peat moss absorbs water well, it doesn’t compact, unlike soil. Compaction makes it hard to create space for the water and air to pass through. But if you add peat moss to any compact material, you’ll have solved the compaction problem and made the growing mix drain better.
The Drawbacks of Peat Moss
Poor in Nutrients
Some growers consider peat moss to be nutrient-poor. It doesn’t contain much nitrogen, potassium, or phosphorus, but it does have calcium and magnesium, which are essential nutrients for the growth of cannabis plants. Unlike other organic materials such as manure compost, peat moss is very poor in nutrients.
Dryness Issue
Since peat moss is very dry, it’s not 100% suitable for soil. It can be combined with other organic materials to improve the water retention capacity of your growing medium. When starting seeds with peat moss alone, ensure they get enough moisture. It’s also good to mix it with soils and some other soilless media.
Non-Renewable Resource
Peat bogs are made up of wetland plants accumulating for thousands of years. They are only found in areas where the average annual temperature is lower than 64 degrees F (18C). Peat moss from North America or Canada comes from old-growth forests. In other words, it’s a non-renewable resource that has to be harvested. This is not the case for peat moss harvested in Ireland or Scotland. Their bogs are managed wetland areas that grow peat moss yearly, so they can be harvested without causing permanent damage.
Peat Moss is Expensive
Peat moss exceeds the price of comparable mediums such as coconut coir. If you use it in bulk and the price is an issue, a better alternative is compost.
How to Use Peat Moss in the Garden
Soil Amendment
Peat moss is available in several grades, with different particle sizes. The larger the particles are, the more expensive it is. Use peat moss as a soil amendment to lighten heavy soils and increase water retention. For clay and heavy soils that get compact easily, it softens the soil structure and improves the drainage.
Peat moss helps retain moisture and nutrients for plant roots for sandy soil. If you intend to use it as a soil amendment, you should know that it changes soil pH levels. Ensure you measure and watch out if the pH level drifts too much by testing the soil pH.
Hydroponic Growing
Peat moss is used in hydroponic systems because it creates a soil and nutrient solution barrier. This layer increases the stability of the system, keeping the plant roots away from harmful products that are designed to kill them.
People using it use it with other growing media like perlite and vermiculite to balance the moisture and aeration. When using peat moss for pure hydroponic growing, you should know some facts about it’s not appropriate.
Because it’s an organic matter, if provided with plenty of oxygen and nitrogen, it will start to decompose, making the material compress around plant roots and choke off your plants. So, better mix it with other materials.
Seed Starting
Peat moss is often used as a base layer to germinate and grow plants like vegetables and flowers. It provides aeration to the root zone, and it’s very easy to use for newcomers in hydroponics. When using peat moss for seed starting, you also need special trays with drain holes on the bottom because if you don’t, the peat moss will expand and block the water flow out of your seedling flat.
For this purpose, use the peat moss alone or in a mixture with some soils. You can also remove the hassle by getting the peat pellets sold on the market. Many people also prefer a soilless mix of peat moss, perlite, coconut coir, and others in different amounts. This prevents diseases, fungi, bacteria, weed seeds, and other bad things commonly found in the soil.
Peat Moss for Plant Transplants
Using peat moss granules is also the best way to transplant young trees and big plants. It can be easily handled since it is lightweight; you can use it with other components like the potting mix but make sure not to include any fertilizers or pesticides.
It provides nooks and crannies where new, tender roots can grow. Peat moss also keeps humidity high, essential when plants have a new home. It also corrects the acidity of the soil and breaks down the consistency and texture of the soil, especially if it’s clay soil.
Growing Acid-Loving Plants
Peat moss is also used to grow plants that prefer soil with low pHs, such as rhododendrons, gardenias, heathers, tomatoes, Pieris, azaleas, and camellias. These plants need a peat moss mixture for their acidic soil. When combined with the correct potting mix, these plants enjoy having an environment where they can take up essential nutrients from the soil and conserve water.
Peat Moss Alternatives
Compost
Compost can be used as peat moss alternatives. These are usually less expensive but do not have the pH balancing effects of peat moss, therefore it should be used in conjunction with other ingredients to create the correct balance for acid-loving plants.
Compost is made from decayed organic materials like rotted plants, leaves, vegetable scraps, and animal manures. It has a lot of commonalities with compost peat, like excellent water holding capacity and great material for soil amendment.
Compost is cheaper than peat moss and fully sustainable in that you can easily make your own. On the other hand, compost won’t last long like peat moss, and you’ll have to add compost regularly. And lastly, compost will compact faster and easier than peat moss, but to have a comparable effect, you can add sand, shells, and eggshells to the soil to improve its texture.
Perlite
Perlite is a volcanic rock heated and expanded with steam to produce a fine white, shiny-type growing medium, which lets good drainage and aeration of the roots. It is also widely used as an additive for potting soil or seed starting mixes as it helps increase the porosity of the root environment.
It provides an excellent oxygen supply to plant roots and will not compact under heavyweight. Perlite is a good natural drainage layer for the bottom of your containers, and it will also help prevent any root rot problems that can occur from sitting water in the bottom of the container.
Coco Coir or Coco Fiber
Coco coir is the partially processed fiber of the coconut husk. It’s sold compressed into bricks or blocks or in a loose form that can be expanded by adding water. Coco produces excellent drainage and aeration qualities with good retention properties.
Coco provides an ideal air to water ratio – twice as much air space compared to water-holding capacity. Coco coir is a sustainable resource that has been used for centuries to protect the health of natural shorelines and reefs. It’s highly resistant to insect, microbial, and mold attacks, making it perfect as a growing medium for both hydroponics and soil applications.
Vermiculite
Vermiculite is a naturally occurring mineral heated to expand it into wormlike particles that absorb moisture and provide aeration. Vermiculite provides the nutritional requirements of plants while allowing for excellent drainage and aeration qualities.
Organic Matter
Organic matter is what makes the nutrients in your soil available to plants. It increases the number of good, healthy microorganisms in your soil by providing them with food and habitat. Organic matter also absorbs water during irrigation, reducing runoff.
What’s more, organic matter improves porosity in your soil by opening tiny spaces between soil particles for air and water, giving your plants room to grow.
Sand as Peat Moss Alternative
Sand has very coarse particles that do not release nutrients to plants easily. It does not change the pH of your soil, but it also doesn’t hold nutrients well, so adding sand on top of a peat moss/vermiculite mix is not ideal. Sand may be preferable if you are planting trees or other plants that don’t need consistent nutrients.
FAQs on Peat Moss
What is wrong with using peat moss?
Peat moss is not a natural substance. It is the partially decayed remains of plants that have been harvested from peat bogs and mires, an ecosystem formed by the incomplete decomposition of organic matter in wetlands. Peat bogs are fragile habitats that take thousands of years to form.
When should you use peat moss in your garden?
You should use peat moss as a soil amendment or potting mix, especially when growing fruits and vegetables such as tomatoes, blueberries, and camellias which are acid-loving plants.
Final Thought on Peat Moss
There you have it. Peat moss is harvested from bogs or mires and is used in planting or potting soil mixes for acid-loving plants. Peat moss is not a natural garden soil ingredient, but it will help your garden grow lovely flowers and delicious foods.
The post Peat Moss: What It Is and How To Use It appeared first on Kitchen Infinity.
Did you miss our previous article…
https://www.conduithardware.com/?p=900