How to Troubleshoot Your Clothes Dryer
Your clothes dryer is a very important appliance in your home. It helps you save money by drying the laundry at home instead of going to the Laundromat. However, there are times when it breaks down and stops working properly.
Since most people don’t know how to fix their broken clothes dryers, they will buy a new one or take their laundry elsewhere for drying. You don’t have to do that as fixing the clothes dryer is as easy as how to do laundry itself. Below is how to troubleshoot your clothes dryer without calling the repairman or buying a new one. Let’s get started.
Tools and Materials
- Voltage meter
- Long-handled bristle brush
- Rigid dryer vent
- New dryer fuse
- New dryer power cord
- Cotton swab
- Rubbing alcohol
- New dryer belt
Instructions
1. Check if the Dryer is Plugged In
Dryer problems happen because of power interruptions. Before you do any troubleshooting, make sure your dryer is plugged in. Check the voltage meter if there is electricity running through it.
If not, check the circuit breaker or fuse that provides energy to your dryer. Make sure that all electrical connections are tight and secure to avoid loose wiring. If you have an electric dryer, it runs on two circuits, including one for heating the element and one for the rest of the dryer.
So, if your dryer is getting hot but not drying, it could be that one of the two circuits is tripped. In this case, check the circuit breaker and reset the circuit as necessary. Also, learn how to install a dryer electric cord to avoid any electrical issues.
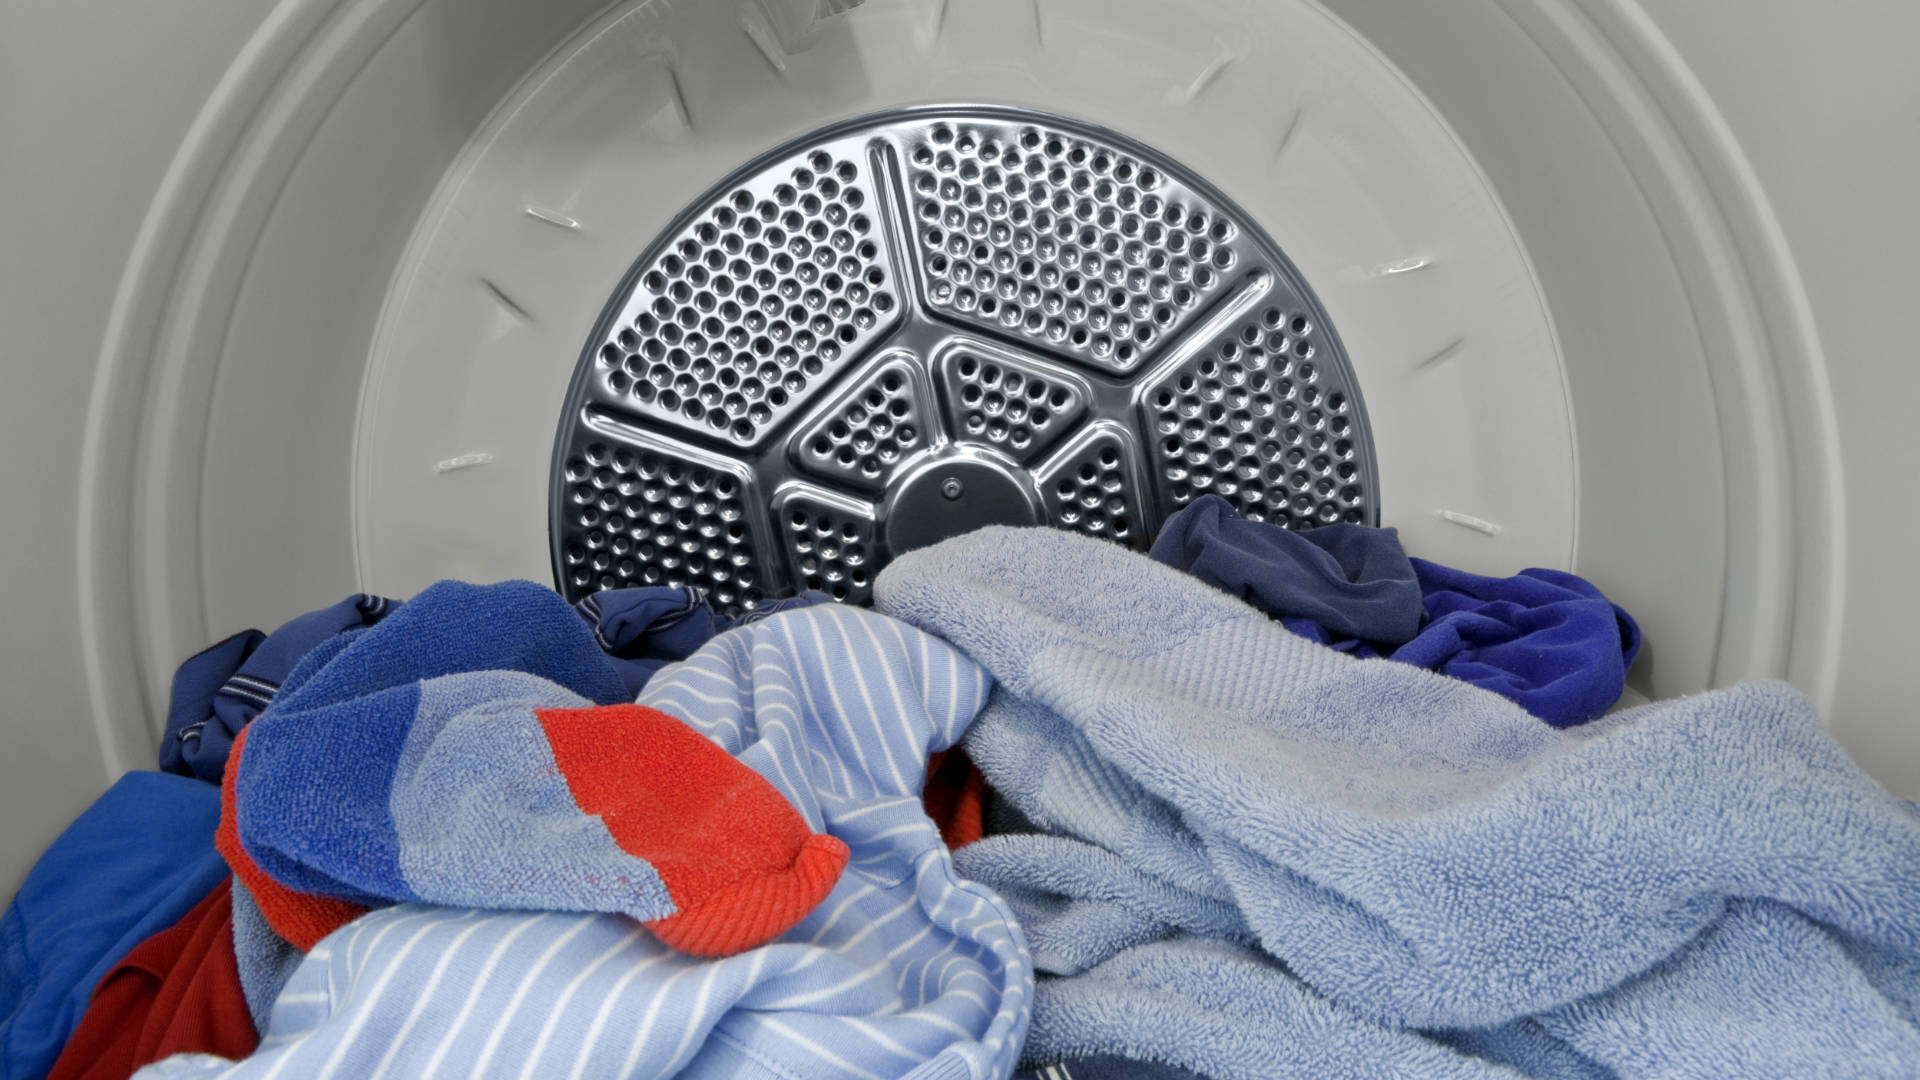
2. Make Sure Your Dryer is Not Overloaded
If you’re trying to dry a lot of clothes at once, your dryer might be too overloaded to function properly. In this case, try drying fewer items or use a larger dryer. Overloading the dryer can cause drying performance and noise issues when too much weight is inside the dryer.
When you squeeze too many clothes into your dryer, you decrease the airflow needed to dry clothes properly. Overloading also makes your dryer work harder, use more energy and increase drying time. Avoid filling your dryer drum more than three-quarters full.
3. Check the Breaker or Fuse
If your dryer is plugged in but won’t turn on, the power source is the first thing you want to check. It’s possible that the breaker has been tripped or the fuse needs to be replaced. Check the Breaker Box If you have an electric dryer, turn off the circuit with a tripped breaker switch and reset.
If you have a blown thermal fuse, replace it with the same amperage and rating. Also, check the voltage in the outlet using a voltage meter and make sure your outlet is functioning properly. If it’s not functioning, call the electrician immediately.
If you have a gas dryer, make sure the pilot light is lit and that you have an adequate supply of gas if the dryer is fueled with liquid propane. Both electric and gas dryers require 240 volts to operate. And if the dryer power cords fail, check the voltage and replace it if needed.
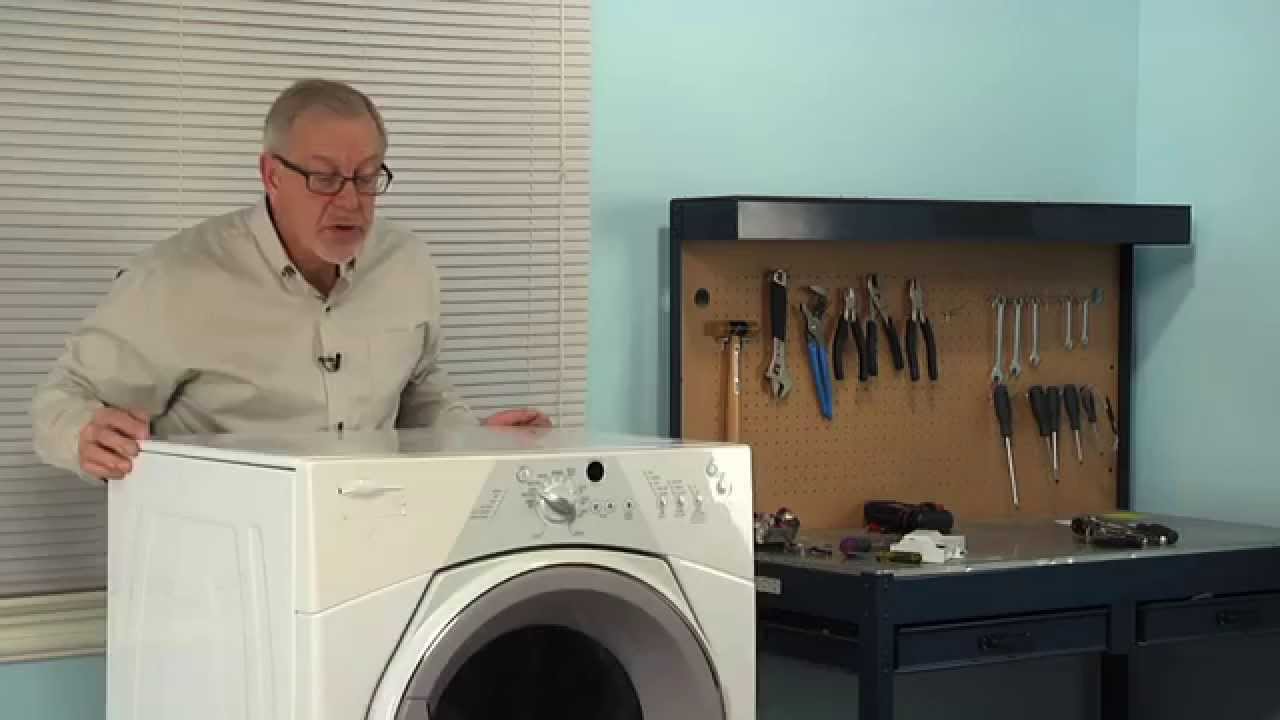
4. Inspect the Fuse, Switch, and Belt
If you have a power outage or surge in your home, it’s possible that the thermal fuse in the dryer control panel is damaged. Dryers also require a door switch to engage for the appliance to work. However, these switches can break.
You can get them coated with lint or use a cotton swab and a bit of rubbing alcohol to clean the contact areas. Check the rubber belt that connects the motor to the drum if your dryer heats up, but the drum doesn’t turn. If it’s loose or broken, replace it. It’s a good idea to inspect the fuse, switch, and belt before a service call.
The fuse is located on the dryer wall and is usually a small, round glass tube. If it’s blown, replace it with one of the same amperage and rating. The switch is located near the dryer door and is either a toggle or rocker switch. If it’s not working, replace it.
The belt is located around the dryer’s drum, and if it’s broken, worn, or loose, it will need to be replaced. After getting the new belt, place it on the drum where the old belt had been and wind it onto the idler pulley and the motor pulley.
5. Check and Clean the Temperature Sensor
If the sensor is dirty, it will not read the correct temperature, and your clothes will not dry properly. To clean it, unplug the dryer and remove the screws that hold the sensor in place. Clean it with a soft brush and replace it.
Test the dryer to see if it’s working properly. If your dryer turns on and shuts off very quickly, the problem could be either the thermostat or thermal resistor. The thermal fuse blows and turns off the dryer to prevent overheating.
Use a voltage meter to check the temperature sensor to determine if it’s working properly. Also, check the heating element and timer to be sure they’re receiving power. Check the user or repair manual.
6. Clean the Lint Trap
Clean the lint trap after every load of laundry to ensure your dryer is running properly and efficiently. A clogged lint trap can cause your clothes to take too long to dry. Hard lint buildup in the trap can cause your clothes to dry slowly, if not at all.
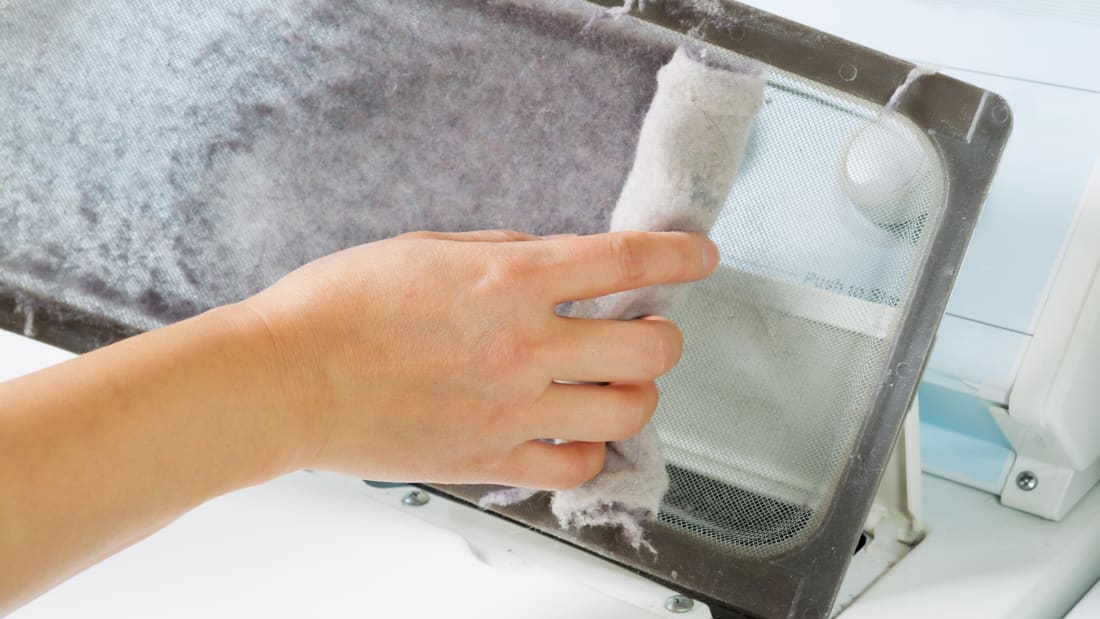
If your lint filter is full, the air is not flowing freely, and your machine is forced to work longer than necessary. After emptying your lint filter, wash with warm soapy water and let dry completely to remove any residue from the dryer sheets. Use a bit of rubbing alcohol to clean the electronic moisture sensors. This will leave your dryer working more efficiently and prevent a possible fire.
7. Check the Air Vent and Ducts
The air vent and exhaust duct play a key role in the drying process. Make sure they are clear of any debris or obstructions. If you have pets, their hair can clog up the vents and ducts, resulting in a clothes dryer that does not work properly.
If your dryer vent system is kinked, clogged, or disconnected, use a long-handled bristle brush to clean out the dryer vent. The vent should be as short as possible between the machine and the outside exhaust vent to prevent clogs. If your venting system is long and you can’t reach the entire length with a brush, use a leaf blower to clean the system or hire a professional.
If you still have a flexible white plastic dryer hose, replace it because this is a fire trap waiting for a disaster. And that’s why new building codes require a rigid dryer vent. Make sure you check the outside vent as well.
Most of them are designed with a trap door that only opens when dryer air and lint are blown out. The trap door won’t open if the vent hood gets coated with lint, especially in high humid climates.
8. Make Sure the Dryer is in a Ventilated Space
Your dryer needs to be in a well-ventilated space so the hot air can escape. If the dryer is too close to a wall, the air won’t circulate, and your clothes will take longer to dry. In fact, if the back of the dryer is against a solid surface, it can cause the motor to overheat.
If you’re installing your dryer in a closet, make closet doors have ventilation openings at the top and the bottom of the door. The front of your clothes dryer requires a minimum of three inches of airspace, one inch on the sides.
9. Check for the Heat Problem
If your clothes take too long to dry, first check the heat problem. The most common reason for clothes not drying is that the dryer isn’t getting hot enough. Hold your hand under the outside exhaust hood to check air movement. If the air movement is less than a hair dryer at high speed, clean the lint from the entire length of the system and exhaust hood.
The dryer isn’t heating if you can’t feel any air coming out. One way to test if the dryer is getting hot is to use a thermometer. Put the thermometer in the exhaust pipe and ensure it reads at least 130 degrees Fahrenheit. If it’s not reading that high, you need to troubleshoot your heat problem.
10. Check the Dryer Blower Wheel
Another common reason for the lack of heat is a blocked dryer blower wheel. This can happen if the lint screen isn’t cleaned often enough. To check if the blower wheel is blocked, open the dryer’s back panel and look at the blower wheel.
If it’s dirty, clean it with a vacuum cleaner. With the back panel open, check the blower wheel for cracks or obstructions that may be preventing it from spinning. To remove the blower wheel, open up the dryer by separating the top and front panels away from the main dryer cabinet. Pull the drum off the drum bearing to have full access to the motor and then unscrew the blower wheel from the motor.
11. Replace the Control Panel
If the dryer isn’t getting any power, you’ll need to replace the control panel. Before doing this, unplug the dryer and remove the back cover. During this step, you will find your thermal fuse, and its location will be dependent on where it is in your particular model of appliance. Read your owner’s manual for information about control panel components to order the correct replacement.
FAQs on Troubleshooting Your Clothes Dryer
What is the common problem with dryers?
Excessive noise is the most common problem with dryers. A new drum belt can help eliminate some of the noise during operation, but there could be other problems if it doesn’t work.
How do I know my dryer isn’t working?
If you have no power, your dryer isn’t working. Begin troubleshooting by unplugging it and checking the power at your electrical outlet to be sure.
Does my dryer need an electrical reset?
If your dryer is making some noise but isn’t tumbling, you can check to see if the drum needs to be reset by pulling the lint out of the back of the machine where you would normally clean it. There’s a small red button on the motor that you can push with a paperclip or something similar to reset it.
Final Thought on How to Troubleshoot Your Clothes Dryer
As you can see, troubleshooting your clothes dryer can be easy if you know what to look for. If you don’t, it can be difficult and time-consuming to learn while trying different things that may or may not work.
Before getting a new dryer, make sure you try these troubleshooting methods, and if you have no clue where the problem might be coming from, don’t hesitate to call a professional.
The post How to Troubleshoot Your Clothes Dryer appeared first on Kitchen Infinity.
Did you miss our previous article…
https://www.conduithardware.com/?p=767
How to Build a Wooden Gate for Your Yard
A wooden gate that is not maintained will look ugly and uninviting. It can also be a safety hazard for your family, pets, or guests. The good news is that you don’t need to hire a professional to build or repair your gate. You can do it yourself with the right tools and instructions.
You can build your good-looking wooden gate from start to finish and make it as durable as you like. Here’s how to do it.
The Tools and Materials Needed for the Job
Other than the gate, you’ll need a few common hand-held carpentry tools to get started. These include:
- Tape measure
- Wheelbarrow
- Screwdriver
- Pencil
- Miter saw
- Cordless drill
- Small diameter drill bit
- Carpenter’s glue
- Straight edge ruler
- Hammer
- Shovel
- Safety glasses
- Speed square
- Posthole digger
- Hearing protection
- One-handed bar clamps
Steps to Building a Wooden Gate
Step 1: Preparations
When planning the materials needed to build your gate, it’s important for you to do a little math to make sure that both of the posts will be at the same height. The idea is to set one post in concrete in one corner of your yard and then make another post on the opposite side of your yard match up with it. Think through the location and weigh out all the considerations and locations where you want to build your gate.
Step 2: Dig Holes and Plumb Posts
Take the time to dig your post holes to have the same depth and size. You will also want to make sure that your posts are plumb before you set them in the concrete. Use a level or speed square to test for plumb and adjust as needed.
Step 3: Measure and Cut the Tongue and Groove Boards
Once you have the posts in place and are sure of the height, it’s time to measure and cut the tongue and groove boards. You will want to cut four pieces that are each 72 inches long. Use a measuring tape to make a pencil mark at 72 inches on each tongue and groove board. After that, cut the boards 72 inches long using your miter saw.
The frame for a basic wooden fence gate should be a simple box with four sides, usually smaller than the gate opening. Typically, you would use the same variety of wood you used on the fence. If you want a different color, redwood is sometimes used for large gates.
Step 4: Measure and Cut the Horizontal Bases
Next, you will need to measure and cut the horizontal bases for your gate. You will need a measuring tape to measure three 42-inch segments on two of the 1×6 cedar boards and not tongue and groove boards. Cut these segments, so you have three boards that are 42 inches long.
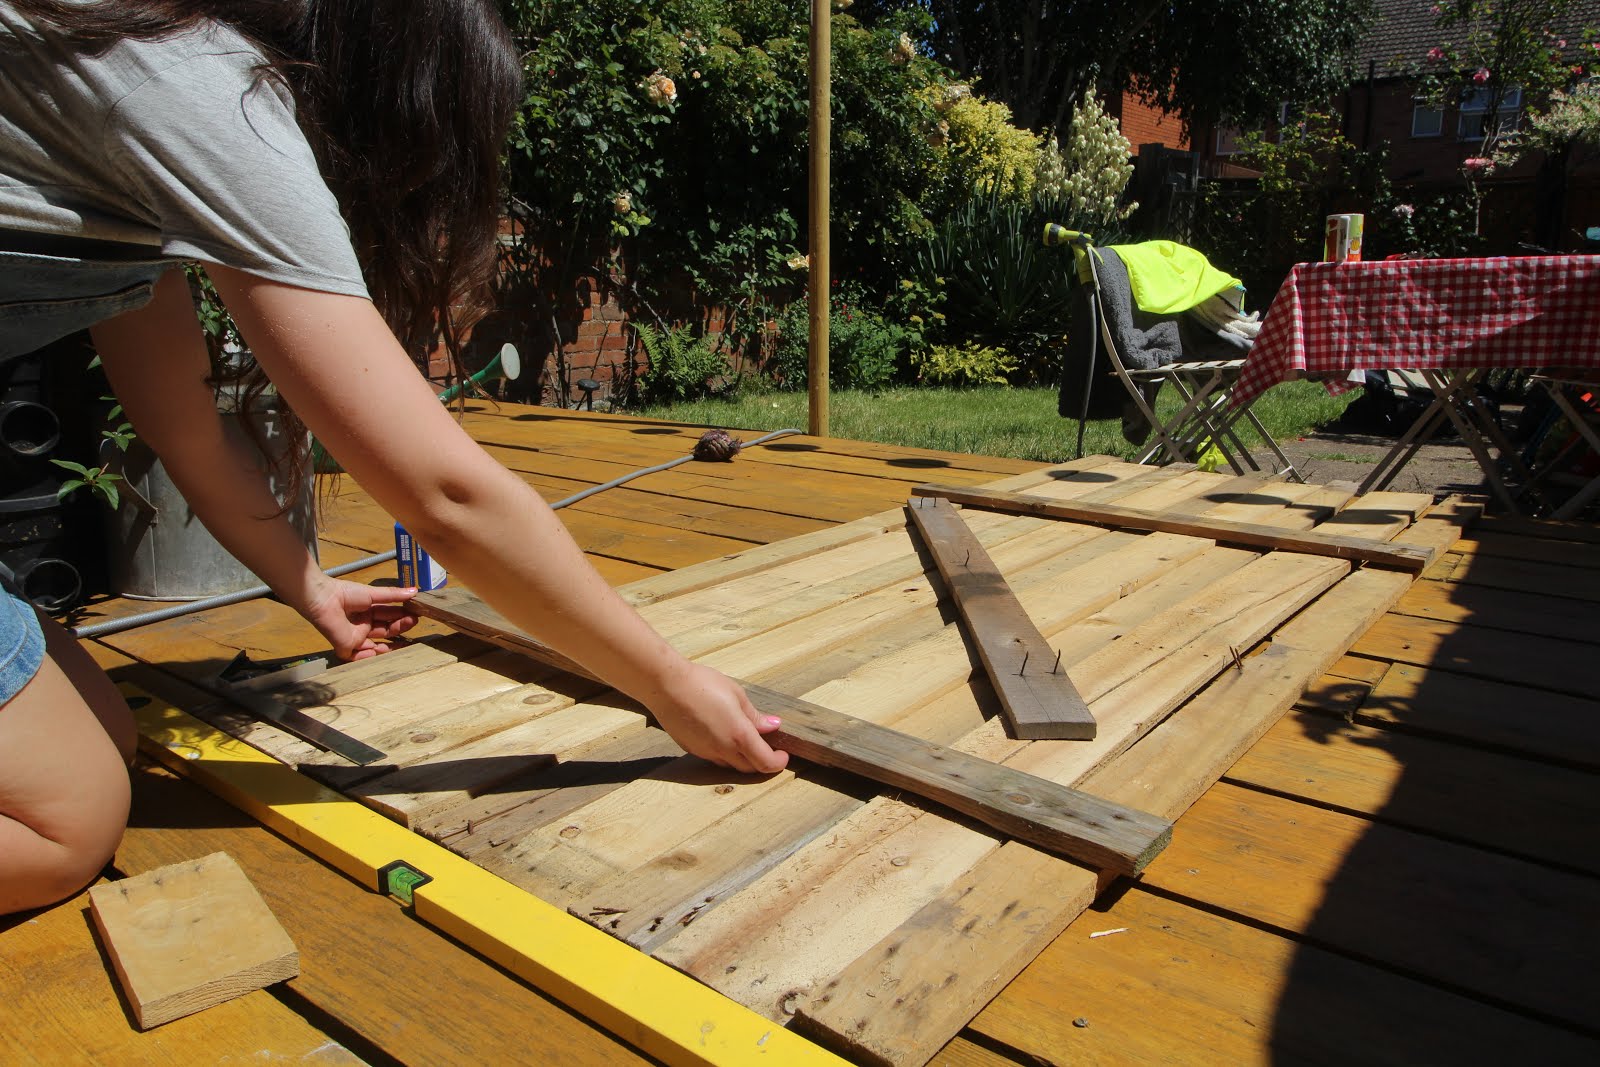
Step 5: Lay Out the Boards
Once you have your boards cut, lay them out on a flat surface and make sure they line up with each other. If the tongue and groove boards fall apart while doing this step, then move them to where they will not get in the way of your layout. This won’t be hard if you understand other carpentry work such as building a floating deck.
Step 6: Attach the Tongue and Groove Boards
You will need to clamp the boards together while attaching them with screws. This keeps the boards in place while you attach them. Attach them to the 1×6 horizontal brace boards underneath the 7/8-inch exterior screws. Pre-drill holes for the screws to eliminate splitting. Keep a close eye on the lower boards, so they don’t move out of position when you work.
Step 7: Anchor and Plumb the Brace Posts
You will want to make sure the posts are plumb or vertical. You can use a level to check this. To keep them in place, you will need to anchor them to the ground. If your soil is soft, you can use a post hole digger to make a hole deep enough for the post to be stable. Post length should be at least ⅓ longer than the planned height of your gate.
Pour some gravel into the bottom of the hole to allow for drainage and place a cement brick at the base of each post. Make sure your posts are tall enough to reach about three feet off the ground when they are all put together or tall enough to be bent around by hardware cloth. Cover with soil and tamp down until it is solid.
Take your next two posts and place them about a foot from each other. The closer they are, the more support you will have. Decide which direction you want your gate to swing, then place one of the corner posts in between them so that it is even on both sides. Use a level again to make sure this post is straight.
Step 8: Measure and Cut the Diagonal Brace
Next, use a measuring tape to measure the length of your hardware cloth and cut it so that it is just a bit longer than the width of your yard. You can use wire cutters for this task. Put the hardware cloth into place and attach it at each corner with hog rings, pushing them down on either side of the post.
Now it is time to install the diagonal brace. This will help keep the gate stable and prevent it from sagging. Measure from the top of one post to the opposite of the other post. Mark this spot on each post and then use a level to draw a line between the two marks. Lay your straight edge over this diagonal brace, staying parallel with the lines of the horizontal slats.
Make six pencil marks on a diagonal brace parallel to the top and bottom of each horizontal brace. Remove the temporary screws, then cut the diagonal brace with your miter saw at those six marks. Three cut pieces will be discarded, leaving two cut pieces that you’ll use as the diagonal brace.
Step 9: Attach the Diagonal Brace
Run a line of carpenter’s glue over the end of the diagonal brace, then drive in a 3-inch screw. Then, press the pieces on the gate in between the horizontal braces. Weigh down the two glued pieces with cinder blocks, rocks, and anything sufficiently heavy. Let the glue dry for about two hours, then remove the weight. Drive-in two more screws, one at each end of the diagonal brace.
Step 10: Cut Frame Pieces to Size with a Miter Saw
Using a miter saw, cut the pieces of the frame to size. You can start the gate by cutting the top and bottom pieces to the same width or length as you planned for, slightly smaller than the opening in the fence. Cut the upright side planks about 3 inches shorter than the height of the gate.
Step 11: Screw-in Top and Bottom Planks
Screw the top and bottom boards to the gate frame. Position the plank, so its edges are flush with the frame, then screw into place every 16 inches or so, using three screws per board. Drill a pilot hole for the screws before putting them in to not split to the wood. Fasten with deck screws, pre-drilling to keep the wood from splitting.
Measure from the top bend to the opposite bottom corner and make sure both sides are the same. As you start assembling the gate framing, it’s good to lay it out on a flat surface such as a patio or driveway. Attach the top and bottom rails to the side rails, ensuring it’s square.
Step 12: Cut an Angle Cross-Brace and Attach it to the Top and Bottom Rails
This will help to maintain strength and rigidity. Connect these to the frame boards that match the rest of the fence by using deck screws, pre-drilling. Use a miter saw to make your diagonal cut and place diagonally onto the box and trance with a pencil where the angles go. Place the cross-brace at a 45-degree angle extending from the bottom corner of the gate to the opposite corner of the top of the gate. But if it’s a rectangular frame, make a drawing to scale and measure the angle you’ll need with a protractor.
Step 13: Cut and Install the Planks
Place the first plank with its bottom side against the foundations and side rails and tight in between them at both ends. Use a combination square to ensure all of your planks are even before screwing down. Cut the planks using a table saw and secure them using deck screws, drilling pilot holes to keep your planks nice and clean.
Step 14: Design the Top of Your Gate
The top of your gate should have a nice curve to it. Cut the two 2x6s to the desired length and then use a jigsaw to cut out the arch. Drill pilot holes and then screw the boards together using deck screws.
Start by drawing an arc across the top of the fence gate using a string and a pencil, filling it with decorative curves of your taste. If you’re a woodworker, feel free to get fancy with your decoration. Use the jig to cut along your pattern.
Step 15: Install Hinges and Mount Your Gate
Once the top is finished, it’s time to install the hinges. Place them on the upper left and right corners of the gate. Pre-drill holes and then screw the hinges in place using 3-inch screws. The final step is to hang your gate. Have someone help you hold it in place while you screw it into the hinges.
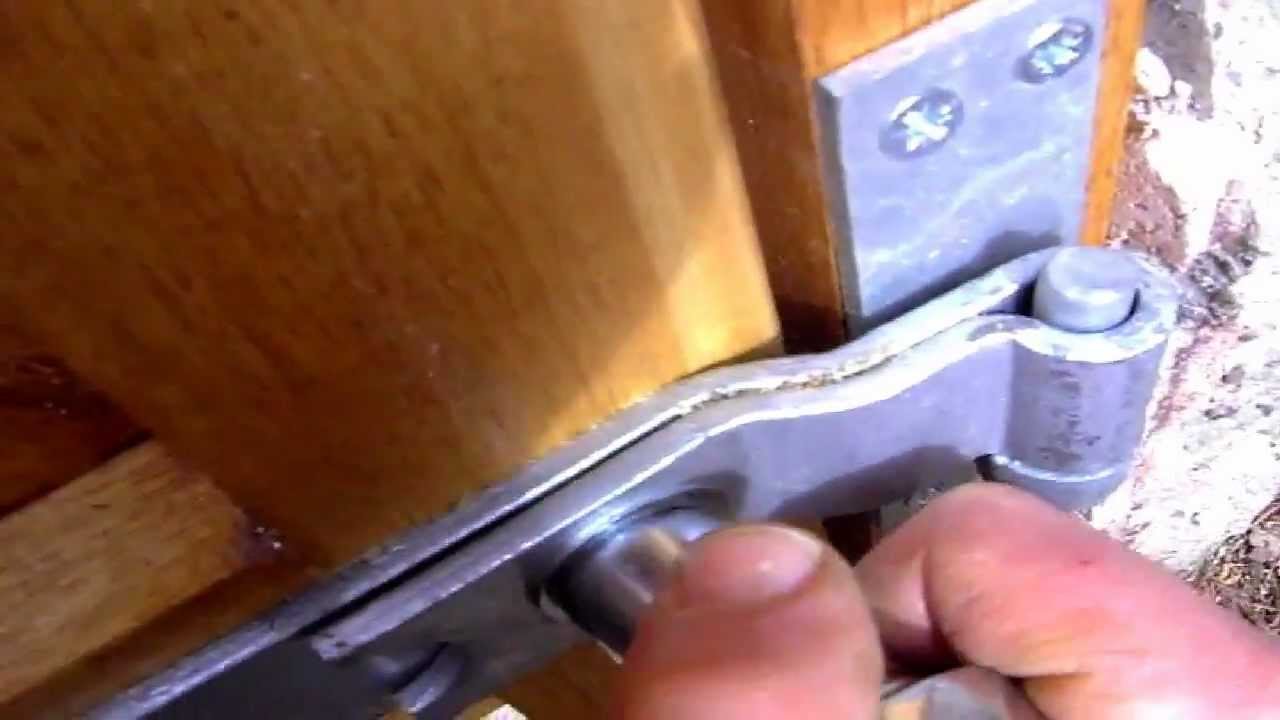
Leave about a 1/4 inch of distance on the hinge side of the gate. Using the cordless drill and screws included with the hinges, screw the hinges at the top, middle, and gate frame. Check to ensure the gate swings properly. Adjust the hinges to level, tighten or loosen the gate if necessary. Add diagonal cross brace to keep the gate square and prevent sagging. Remember that installing a brace with a little pressure in the opposite direction will make your gate warp. So, take diagonal measurements to check for squareness.
Step 16: Mount the Gravity Latches
Mount the gravity latches on the gate frame, one near the top and one near the bottom. The latch should be positioned so that it will snap into place when the gate is closed and hold the gate shut. Drill pilot holes and then screw in place using 2-inch screws.
Use a cordless drill and the screws included in the latches to screw the slide latches in place on the top and bottom of the gate. Screw the receiving section of the latches to the gate frame and mount the flip latch in a similar fashion at the center of the gate.
Step 17: Seal the Wood
Seal the wood with a sealant or weather proofing product. This will help protect the wood from the elements and keep it looking nice for years to come. You can use a paintbrush or garden sprayer to apply your sealant.
Try to cover the whole surface evenly, making sure you hit the bottom of the planks, which absorb more water than the end grain. This area is likely to rot or become discolored so let it dry for a couple of hours in dry climates or a day in more humid climates.
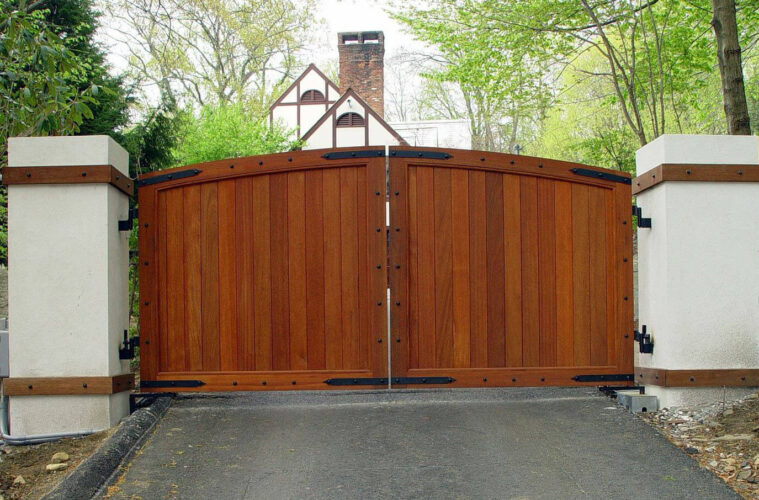
Step 18: Use Your Wooden Gate
Now that your wooden gate is complete, it’s time to enjoy it! Not only will it add beauty and privacy to your home, but it will also provide a secure barrier for your family and pets.
FAQs on How to Build a Wooden Gate for Your Yard
What are the benefits of having a wooden gate at home?
The benefits of using a wooden gate over another material are many. If you’ve already learned how to build your own house, adding a gate with the traditional look can be the best decision. It can blend in with all home styles, from modern to Victorian to an earthy farmhouse. Unlike other materials, it requires very little maintenance and looks as good as the day you installed it years later.
How can you attach pickets to the frame?
Use one angled piece from the bottom of the hung side to the corner of the latch side. Lay out pickets on the frame to check spacing and mark when you’re not satisfied.
Final Thought on Building a Wooden for Your Yard
Wooden gates provide a sense of privacy and security for your home and yard. They also add beauty and value to your property. Installing a wooden gate is a relatively easy project that can be completed on the weekend.
If you have any questions or need assistance with this project, don’t hesitate to contact a professional contractor. They will be able to help you with the planning and installation of your wooden gate, ensuring that it is a beautiful and safe addition to your home.
The post How to Build a Wooden Gate for Your Yard appeared first on Kitchen Infinity.
Did you miss our previous article…
https://www.conduithardware.com/?p=761
VA-Based Supplier Dave’s Cabinet is Acquired
CHESAPEAKE, VA — Dave’s Cabinet, a leading cabinet manufacturer in the Mid-Atlantic region, has announced that the ownership interest of company founder David Alderman CMKBD, has been purchased by John K. Morgan, CEO of Green Forest Cabinetry.
Terms of the transaction were not disclosed.
Dave’s Cabinet, founded in 1980, occupies three manufacturing buildings on approximately 40 acres of land in Chesapeake, VA. The business consists of a fully equipped end-to-end cabinet manufacturing/finishing facility, a retail division, plus a modern granite/quartz fabrication unit.
“I am incredibly proud of the 40+ years of Dave’s Cabinet’s success, especially the commitment and work to better our local community,” said Morgan, who, along with Alderman, is a past president of the National Kitchen and Bath Association (NKBA).
“I could not be more pleased to have the opportunity to lead his legacy to the next level of tomorrow’s micro-manufacturing world,” Morgan added.
Under the terms of the agreement, Julie Boone will retain her existing ownership interest in Dave’s Cabinet, said the company, which also announced a continuation of an annual $5,000 grant/scholarship to both the Great Bridge Baptist Church, a local parish, and the student program at the NKBA nationally.
The post VA-Based Supplier Dave’s Cabinet is Acquired appeared first on Kitchen & Bath Design News.
William Ohs Acquires PA Luxury Cabinet Supplier
DENVER — William Ohs, the Denver-based manufacturer of luxury cabinetry and furniture, has acquired Draper DBS, a Bucks County, PA custom cabinet supplier, “merging two companies that are well-established and respected in the luxury cabinet industry,” the companies announced.
Terms of the transaction were not disclosed.
“The combination of Draper DBS and William Ohs brings together the ideas and manufacturing concepts of two legendary visionaries in the luxury kitchen market,” said Rick Casey, v.p./manufacturing for William Ohs, founded in 1972 by industry pioneer Bill Ohs. “The combined synergies create both exciting and unparalleled opportunities moving forward,” Casey added.
William Ohs and Draper DBS “will be able to provide the same detail-oriented approach to a larger market while capitalizing on increased manufacturing efficiencies,” corporate officials said.
“I am excited and humbled to be drawn into the most creative act of wood joinery in the industry, the dovetailing of the crafts, hearts, and creative legacies of Draper DBS and William Ohs,” said William Draper, founder of Draper DBS. “This will be an intertwining of our combined strengths, histories, and visions to cultivate the future inspirations of all those who love great and evolving furnishing design.”
The post William Ohs Acquires PA Luxury Cabinet Supplier appeared first on Kitchen & Bath Design News.
Did you miss our previous article…
https://www.conduithardware.com/?p=755