Remove Tile Grout in a Few Simple Steps
Removing tile grout can be a long, messy project. You have to use buckets for water and vinegar, wear clothes that can get dirty, and deal with the mess of paste-like grout remover floating around the room.
However, it doesn’t have to be all bad. If you want to avoid all this work, you can get your tile grout looking new again with little effort by following tips used directly by the pros.
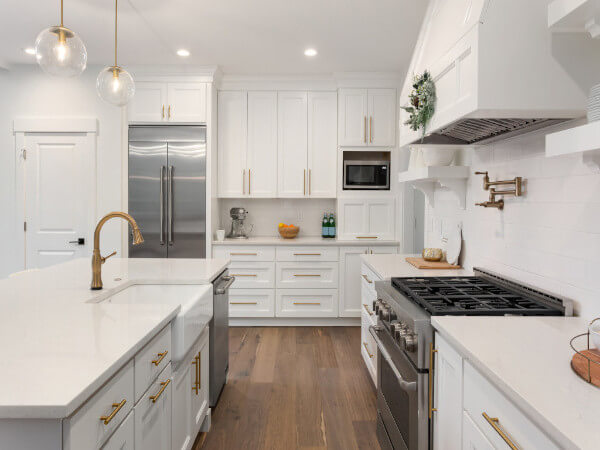
Image Credit: http://thepincer.com
In this article, we will give you the best ways to remove tile grout- with a tool, a blade, a chemical solution, or even through prevention. We will also provide some simple tips on how to clean up afterward. Let’s get started.
The Tile Grout Removal Tool
One of the best and easiest ways to remove tile grout is by using a grout removal tool. This is a handheld tool that has a small blade on the end. You can buy these tools at most home improvement stores.
To use the tool, you simply put it in between the tiles and pull out the grout that has collected there over time. The grout will come out of the tiles in small sections and may take some time to remove completely.
However, if you feel that this step is too much work, there are other methods to consider.
How To Remove Tile Grout With A Blade
Another easy way to remove tile grout is by using either a utility knife or a box cutter blade. Simply prop up one end of your tile on some spare boards or bricks so that the bottom side is facing up at an angle.
Then slide your blade into the crevice where the tiles meet, then forcefully push it forward. The grout will pop right out. Once you have removed all the grout in this way, you can then go over the tiles with a wire brush to remove any leftover bits.
If you have a lot of tiles to clean, this may be the quickest and easiest way to do it. However, it is not without its dangers- be careful not to cut yourself while doing this.
How To Remove Tile Grout With A Chemical Solution
If you don’t want to use a blade or a removal tool, you can also try removing tile grout with a chemical solution. There are many different products on the market that promise to do this job quickly and easily, but our personal favorite is muriatic acid.
Muriatic acid is a very strong chemical that can be bought at most hardware stores. It is used to clean concrete and masonry, so it is perfect for removing tile grout.
To use the acid, you will need some safety equipment- rubber gloves, goggles, and a respirator. You should also avoid any contact with your skin or clothing.
Pour the acid into a bucket and dip your brush in it. Then start scrubbing at the grout between the tiles. The acid will eat away at the grout and start to dissolve it. Keep scrubbing until all the grout is removed.
Be very careful when using this method- muriatic acid is a dangerous chemical and can cause serious injuries if not handled properly.
How To Prevent Future Buildup of Grout in the Tiles
If you want to avoid having to remove tile grout in the future, there is one simple solution – seal the grout lines with a sealant. This will create a barrier between the grout and the tiles and will help keep it from collecting dirt and bacteria over time.
There are many different sealants on the market, so be sure to do your research and find one that is right for your needs. Some sealants need to be reapplied every few months, while others can last up to 10 years.
Once you have sealed the grout lines, you will never have to worry about removing tile grout again.
Which rooms can you remove grout from?
There are various areas in your home where grout can get dirty and need removal. Here are some of the most obvious ones.
- Bathrooms: Grout lines in bathrooms are exposed to moisture regularly, which can lead to mold build-up over time. If you see signs of this phenomenon beginning to happen, it is best to remove the grout as soon as possible.
- Kitchens: Kitchen floors usually have tile grout lines with food particles stuck inside them. This attracts dirt and bacteria, which can cause dangerous cross-contamination issues if not cleaned regularly.
- Laundry Rooms: The same goes for laundry rooms- tile grout lines collect soap scum and lint from clothes, so they should be kept clean at all times.
- Shower: Grouting a shower is a tricky business- it is constantly exposed to water and can easily become dirty. If you notice that your grout is starting to look stained or mildewed, it is time for a good scrubbing.
- Basements: Basements are often damp areas, and this can cause grout lines to become discolored and dirty. Make sure to check your basement for this problem regularly, and remove the grout if necessary.
- Anywhere there are tiles: If you have any tiles in any other room of your house, it is a good idea to keep the grout clean and free of buildup. This will help keep the room looking its best and will prevent any future problems.
Removing tile grout can be a daunting task, but it doesn’t have to be. With the right tools and techniques, it can be a quick and easy job. Follow these tips and you’ll be on your way to a sparkling clean tile floor in no time.
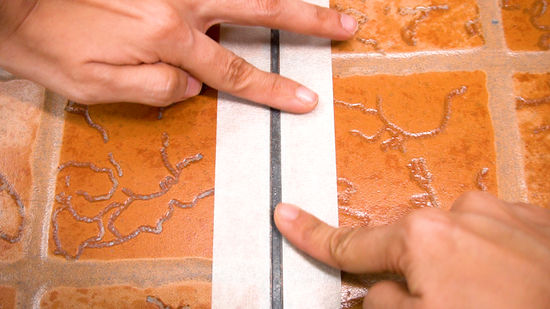
Image Credit: http://wikihow.com
Cleaning up after yourself
Once you have removed the bad grout, you should seal it with a new layer or reapply the old one to prevent future wear and tear. It is also a good idea to clean the work area so you’re not left with a mess.
Pour some diluted bleach onto the floor and use a mop to clean it up. This will remove any remaining residue from the acid and will help disinfect the area. Be sure to rinse the mop thoroughly after each pass, and don’t let the bleach come in contact with your skin or eyes.
When you’re finished, your floor should be clean and grout-free. Congratulations on a job well done.
Final thoughts on removing tile grout in a few simple steps
In conclusion, removing tile grout is a process that can be done relatively easily with the right tools and techniques. There are many different areas of your home where grout can become dirty and need to be removed, so be sure to stay vigilant and keep on top of it. A clean tile floor will brighten up any room in your house and will make it look newer and more inviting.
The post Remove Tile Grout in a Few Simple Steps appeared first on Kitchen Infinity.
Did you miss our previous article…
https://www.conduithardware.com/?p=790
Window Air Conditioning Tricks
Window AC units are a great way to stay cool during the hot summer months. But at the same time, they can be tricky to install and maintain. The wrong installation can lead to the AC unit falling out of the window, or not cooling your room as well as it should.
In this article, I will give you some tips for installing and maintaining your window air conditioner so that it works well all summer long. Let’s get right into it.
Installing and maintaining your ACs correctly
Understanding how different types of air conditioners work is the first step in learning how to maintain them.
For example, most window ACs are cooled with simple, CFC-free R410A refrigerant gas. For these types of air conditioners, water is the cooling agent that absorbs heat from inside the room and passes it through the AC’s compressor.
 Image Credit: http://popularmechanics.com
The compressor increases the pressure of the water vapour until it becomes a hot gas (steam). The gases are then released through a set coil outside your home which cools it down before pumping it back into your room. The AC fan blows cool air into your house or office space to lower its overall internal temperature window air conditioning tips
With that said, installing a window AC unit is very similar to installing a normal window. The first and most important step is measuring your window. Make sure you have the right size AC unit for your window otherwise it will not cool your room properly or may even fall out of the opening.
Once you have the correct sized air conditioner, carefully read over the installation instructions before taking any steps. A lot of units can be flipped horizontally or vertically depending on what suits your window best, so make sure you’re doing that correctly as well.
After you’ve got everything set up, it’s time to plug in your AC and enjoy some cold air. Because most units are installed inside a window, keeping them dust-free is important for keeping them running smoothly and reducing wear and tear.
Make sure to keep an eye on your filters and have them replaced when needed. Also, because you are dealing with water vapour, do not place anything that can melt or catch fire near your unit.
The last step is making sure the AC itself stays secure in the window so it does not fall out. Some ACs come equipped with locks but if yours does not have one, installing a few screws at the top of the unit will usually suffice to make sure it doesn’t accidentally slip out of its casing window air conditioning tricks
The importance of having air conditioners installed securely
As we mentioned before, one of the dangers of installing a window AC unit is that it can fall out of the window.
This happens most often when the window opening is too narrow for the AC unit, or if there is no installation support on the inside of the window frame.
To help prevent your air conditioner from falling out, make sure you are using the correct size unit for your window and that it is properly installed. You can also use a locking mechanism to keep the AC in place.
If you are still worried about your AC unit falling out, it’s best to contact a professional to install it for you. They will know how to properly secure your air conditioner so that it doesn’t move an inch over the long term.
Other factors to consider
In addition to proper installation and maintenance, there are a few other things you can do to keep your window AC unit running smoothly all summer long.
One of the most important things to do is to keep the area around your AC unit clear. This means not placing any furniture or other objects near the unit that could obstruct the airflow.
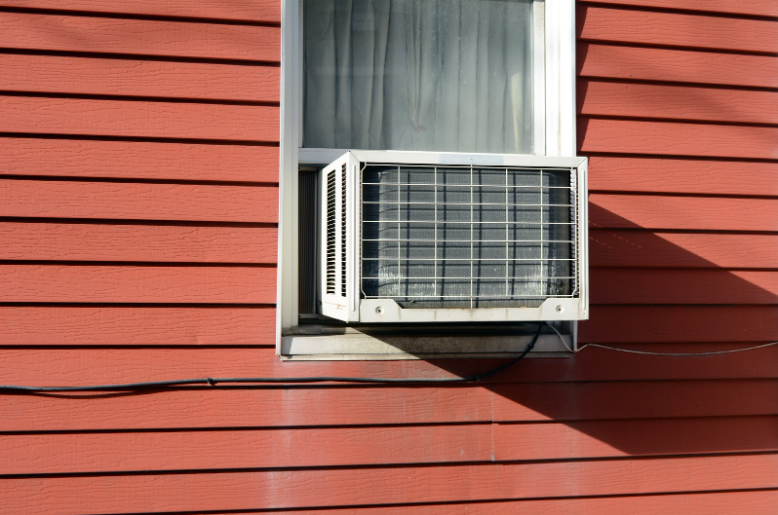
Image Credit: http://clerawindows.com
Finally, set a schedule for using your AC so that you’re not turning it on and off constantly. This will help reduce wear and tear on the unit and save you some money on your energy bill.
Window air conditioning freeze-ups
Window air conditioner freeze-ups do happen, but there are steps you can take to lessen the frequency at which they occur.
The first is keeping water out of the unit. A window AC unit pulls in air from outside and then pumps it back into your room. If that air has any moisture in it, it will lead to ice forming on the coils which prevent it from cooling down your space again.
Just like for all other units, avoiding places where frost can form is important for keeping your unit running smoothly throughout the year.
Finally, be sure not to cover your AC with blankets or furniture when it’s turned on as this can trigger ice build-up very quickly.
Window Air Conditioning Tricks – FAQ
What is the best way to clean the filters on my window air conditioner?
The most effective way to clean filters on a window air conditioner is by vacuuming them with the brush attachment. You can also use a damp cloth to wipe them down, but be sure to let them dry completely before putting them back in the unit.
How can I improve the airflow through my window air conditioner?
If you are having trouble getting enough airflow through your window air conditioner, try cleaning or replacing the filter. You can also make sure the unit is in an open area with plenty of room for air to circulate.
What should I do if water starts leaking from my window air conditioner?
If water starts leaking from your window air conditioner, the first thing you should do is turn it off and unplug it. Next, try to determine where the leak is coming from and take appropriate action to fix it. If you are unable to fix the leak yourself, contact a professional for assistance.
Can I use a space heater with my window air conditioner?
Yes, you can use a space heater with your window air conditioner as long as it is placed at least three feet away from the unit. Be sure to keep a close eye on the space heater while it is in use to avoid any potential fires or other hazards.
Final thoughts on window air conditioning tricks
In this article, we’ve gone through a few window air conditioning tricks that you can use to keep your home cool and comfortable. By following these tips, you can save money on your energy bills and make the most of your air conditioning unit.
Always take care of your window air conditioning unit by keeping it free from dirt, debris, and other materials. This will help to keep the unit running efficiently for as long as possible. If you have any trouble with your unit or you notice something is wrong with it, be sure to contact an expert who can give you specific advice for your situation.
Finally, check out this article on the best air conditioners to buy if you’d like to get your hands on the best ACs in the market right now.
The post Window Air Conditioning Tricks appeared first on Kitchen Infinity.
Did you miss our previous article…
https://www.conduithardware.com/?p=786
How to Repair Orange Peel Texture
Orange peel texture is a common issue in the home improvement industry. This problem can happen for many reasons, but most commonly it happens because of improper installation or removal of roofing materials. The good news is that there are some things you can do to fix it.
This article will outline how to repair orange peel texture and prevent future occurrences. Let’s get started.
What is orange peel texture?
Orange peel texture is a term used to describe the appearance of a surface that has been covered in a thin layer of paint or another coating. The surface appears bumpy and textured, similar to the skin of an orange. This can be caused by many factors, including improper installation or removal of roofing materials, using the wrong type of paint or sealant, or excessive weathering.

Image Credit: http://eegrestore.com
Alternatively, it may be caused by using paint or sealant that is too thick. In this case, the paint or sealant may have been applied with a sprayer instead of a roller and not properly brushed out to smooth the surface. When this happens, it can be difficult to tell which part of the roof has been painted and which parts haven’t; therefore it appears as though the entire roof is orange peel textured.
Main causes of orange peel texture
If shingles are not installed correctly, they can pull away from the roof over time, causing the underlying roofing material to appear bumpy and textured. Also, if the shingles are removed too quickly, they can tear away from the roofing underlayment, causing them to appear bumpy and textured as well.
Alternatively, orange peel texture may be caused by using paint or sealant that is too thick. In this case, the paint or sealant may have been applied with a sprayer instead of a roller and not properly brushed out to smooth the surface. When this happens, it can be difficult to tell which part of the roof has been painted and which parts haven’t; therefore it appears as though the entire roof is orange peel textured.
Finally, if your home is in a sunny or hot location, the sun may cause the paint to blister and peel, also resulting in an orange peel texture.
How to fix orange peel texture
There are several ways that you can fix orange peel texture.
In this first place choosing the best ceiling materials to buy should be done before getting started.
If the problem is caused by using paint or sealant that is too thick, then the solution is to use a roller instead of a sprayer to apply the paint or sealant. Use a medium nap and go over it about three times with the roller, brushing out any visible lines left behind by the roller.
If your home is in a hot location and has been exposed to too much sun, you can install reflective roof shingles to reduce heat absorption and lower your cooling bills. If you applied a primer that was too thick, apply a professional grade primer at half strength so that it doesn’t dry orange peel texture.
Finally, if the problem is caused by improper installation or removal of roofing materials, then the best solution is to hire a professional to come and fix it. They will be able to properly install or remove the roofing materials so that it doesn’t pull away from the roof over time.
Tips for avoiding orange peel texture in the future
There are several things you can do to prevent orange peel texture from cropping up on your roof again.
First, if you are going to be roofing your home yourself, make sure that you do a good job. Read the instructions thoroughly before getting started and use quality materials. You’ll also want to make sure that if you’re getting someone to do the job for you, they aren’t making any mistakes as they work. This could be anything such as not adding enough shingle adhesive or tearing off shingles too quickly.
Once the roof is finished, don’t walk on it for at least 48 hours so that it can be properly dry up. This will help prevent orange peel texture from forming by giving the coating time to dry completely before it has any chance of peeling away.
If you are having any other problems with your roof, be sure to contact a professional right away. They will be able to assess the situation and recommend the best course of action. Remember, it’s always better to be safe than sorry, especially when it comes to your home.
Roof texture is not always an easy thing to fix yourself. If you are not sure how to go about repairing the texture on your roof, or if you think the problem may be more serious, it is always best to call in a professional. They will be able to take a look at the situation and let you know what steps need to be taken to fix it. By taking care of the problem as soon as possible, you can avoid further damage and keep your home looking its best.

Image Credit: http://seejanedrill.com
How To Repair Orange Peel Texture – FAQ
What is orange peel texture?
Orange peel texture is a type of finish that is often seen on walls and ceilings. It is characterised by its bumpy, uneven surface.
What causes orange peel texture?
In addition to the types of roof material chosen, there are several factors that can contribute to the development of orange peel texture:
- Porous materials: If the surface material is porous, such as drywall or plaster, it will absorb the paint or primer unevenly. This will create a bumpy surface when the material dries.
- Poor surface preparation: If the surface isn’t properly prepared before painting, it will also be more likely to develop orange peel texture. The surface should be clean and free of dust, dirt, and grime.
- Incorrect application: If the wrong type of paint or primer is used, it can affect how well it adheres to the surface and may create an uneven texture when dried. It may also be hard for the finish coat to adhere to a rough surface produced by a poor-quality primer or paint.
- Drying time: Generally speaking, finishes with long drying times are more likely to develop orange peel texture than those with short drying times. This is because in some cases, the paint will begin to dry in certain areas before you have finished applying it. While this isn’t always avoidable, proper ventilation and working in small sections at a time can help minimize this risk.
- Environmental factors: Sometimes exterior painting jobs produce orange peel texture because of environmental factors such as humidity, temperature, and wind. Exterior painting jobs are especially affected by these factors as they can affect the drying time and how well the paint cures.
How do I fix the texture of the orange peel texture?
The process will depend on what’s causing it, but in general, you should start by eliminating any environmental influences that may be a factor. For example, if there is too much moisture in the air or if it’s very cold or hot outside, this may affect how your finish coat dries and contributes to the orange peel texture. You may have better results painting when conditions are more favorable for finishing work.
Final thoughts on how to repair orange peel texture
In conclusion, orange peel texture is very ugly and bad for resale. You should try your best to properly maintain and repair your roof to avoid this.
If you have any other questions or concerns about orange peel texture or any other roofing issues, be sure to contact a professional right away. They will be able to help you get the problem taken care of quickly and efficiently.
The post How to Repair Orange Peel Texture appeared first on Kitchen Infinity.
Did you miss our previous article…
https://www.conduithardware.com/?p=783