How to Prepare a Vinyl Floor for Ceramic Tile
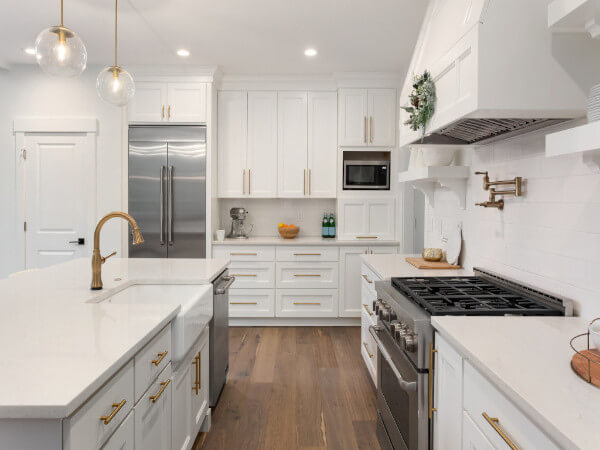
If you’re looking to make upgrades in your home, the kitchen or bathroom floor is a great change to consider. Many older homes and rental units come with kitchen and bathroom flooring made from linoleum. Installing ceramic tiles in your kitchen or bathroom flooring is a great way to improve the look of your home.
If you’re looking for an easy and cost-effective way to redo the floors in your kitchen or bathroom without breaking the bank, then installing ceramic tiles is a great place to start.
The best part about installing ceramic tile flooring on linoleum floors is that no special tools are required for installation. You just need some basic household items like tape measures and tiling knives. You will also want access to plenty of water during installation because ceramic tiles can get hot when they dry out.
Before You Begin
When planning to install a ceramic tile in your kitchen or bathroom, you should always make sure that you test the flooring first by pressing the tiles firmly against it. Ensure there are no bumps or ridges under your tile; if there are, try sanding them down before installing the tiles. Make sure the subfloor and joists making up the floor structure are in good condition and have minimal flexing and deflection.
Soft, thin, and damaged subflooring or undersized joists can flex too much, leading to cracked tile and grout joints. If your cement subfloor is thin and lacks stiffness, install a layer of new plywood over the resilient flooring, followed by a layer of thin cement board.
If removing the vinyl or linoleum before tiling appears to be an easy task, it’s better to do this instead of tiling it. There are several reasons why it might be a bad idea to tile directly over resilient flooring. These reasons include:
The Floor Maybe Too High
An additional layer of flooring applied directly over the old vinyl flooring will make it thicker and raise the overall height of the flooring. Since vinyl flooring is thin, it’s less of an issue than laminate, engineered wood, or solid hardwood flooring. But, even with vinyl flooring, the extra floor thickness can still cause problems along with the baseboard trim or at door frames.
The Resilient Flooring May Not Be Suitable
While standard sheet vinyl flooring that’s well bonded usually makes an acceptable base for the ceramic tile, that’s not true of all forms of resilient flooring. Loose lay sheet vinyl can shift beneath the new flooring, making it unsuitable for a base for a ceramic tile. Vinyl tiles can also show the possibility of shifting.
Also, no resilient flooring with cushioned construction will work beneath the ceramic tile. Most luxury vinyl planks are also not suitable for tiling over because this flooring is laid as a floating floor with no adhesives. This means that the flooring can easily shift beneath the tile, causing damage to grout joints.
Here’s How to Prepare Vinyl Floor for Ceramic Tile
Tools and Materials
You’ll need the following tools and materials to make this project work:
- Bucket and mop
- Hearing protection
- Sandpaper
- TSP cleaner
- Eye protection
- Thin-set adhesive
- Notched trowel
- Utility knife
- Oscillating sander
- Cement board seam tape
- Drywall knife or smooth-edged trowel
- 1/4 inch thick cement board panels
- 11/4 inch cement board screws
- Breathing protection
Prepare Your Floor
Follow the manufacturer’s recommendations for cleaning your vinyl floor. Ensure the subfloor and cement underlayment have a combined thickness of at least 11/4 inches. A Cement board, tile, and grout will add significant dead weight to your flooring system, meaning you’ll need a hefty substrate with minimum deflection.
Thoroughly clean your vinyl with plain water and a scrub brush and let it dry. It must be free of dust, dirt, and any oily residue. After that, lightly sand the vinyl flooring with an oscillating sander while wearing a breathing project and eye protection. This will create some texture for the thinset adhesive to bond. Finish by wiping down the vinyl with plain water again to remove all sanding dust.
If your room is small enough and you don’t mind going down on your knees, then you don’t need to rent a floor sander. Instead, use any power hand sander such as random orbit sander to get the job done.
Clean and Repair the Floor
Clean your vinyl flooring with a TSP to remove dirt, soap, and oil residue. Check for protrusions such as nails and pound them back to place. If any of the parts of vinyl or linoleum flooring bulges out, use a utility knife to slice out the bulge. Your floor needs to be smooth as possible to accept the thinset adhesive and cement underlayment.
Skim Coat the Fabric with Mortar
Mix enough mortar to cover the floor with a skim coat. Apply it evenly over the surface of the vinyl with a notched trowel, then use a float to smooth it out. Let the mortar dry overnight. The mortar should be about the consistency of ketchup.
The skim coat needs to be very thin and only thick enough to bond with the fabric. After drying for about 30 minutes, you’ll have created a smooth masonry surface ready to install your tile.
Test-Fit Cement Board Panels
Lay down a 1/4 inch thick cement board panel over the entire floor. Wear breathing, hearing, and eye protection if you’re cutting the panels using a circular saw. You can also score the panels with a utility knife and snap them along the score lines.
Make sure you leave a 1/4 inch gap along the walls and between all cement board panels. Once you have test-fit the entire floor, remove the panels and set them aside. In most flooring installations, 1/2 inch cement board panels are always recommended as the underlayment for ceramic and stone tile. But when laying tile floor over an existing flooring material, it’s best to use 1/4 inch panels, given the thickness of the floor.
Set the Tile
Now it’s time to set the tile. Start in one corner and work your way out, using a level to ensure each row is straight. Lay ceramic tile so that the grout joints are staggered and use spacers if needed. Be sure to create even ridges over the entire surface to prevent air gaps. Air gaps can lead to cracked tiles down the line.
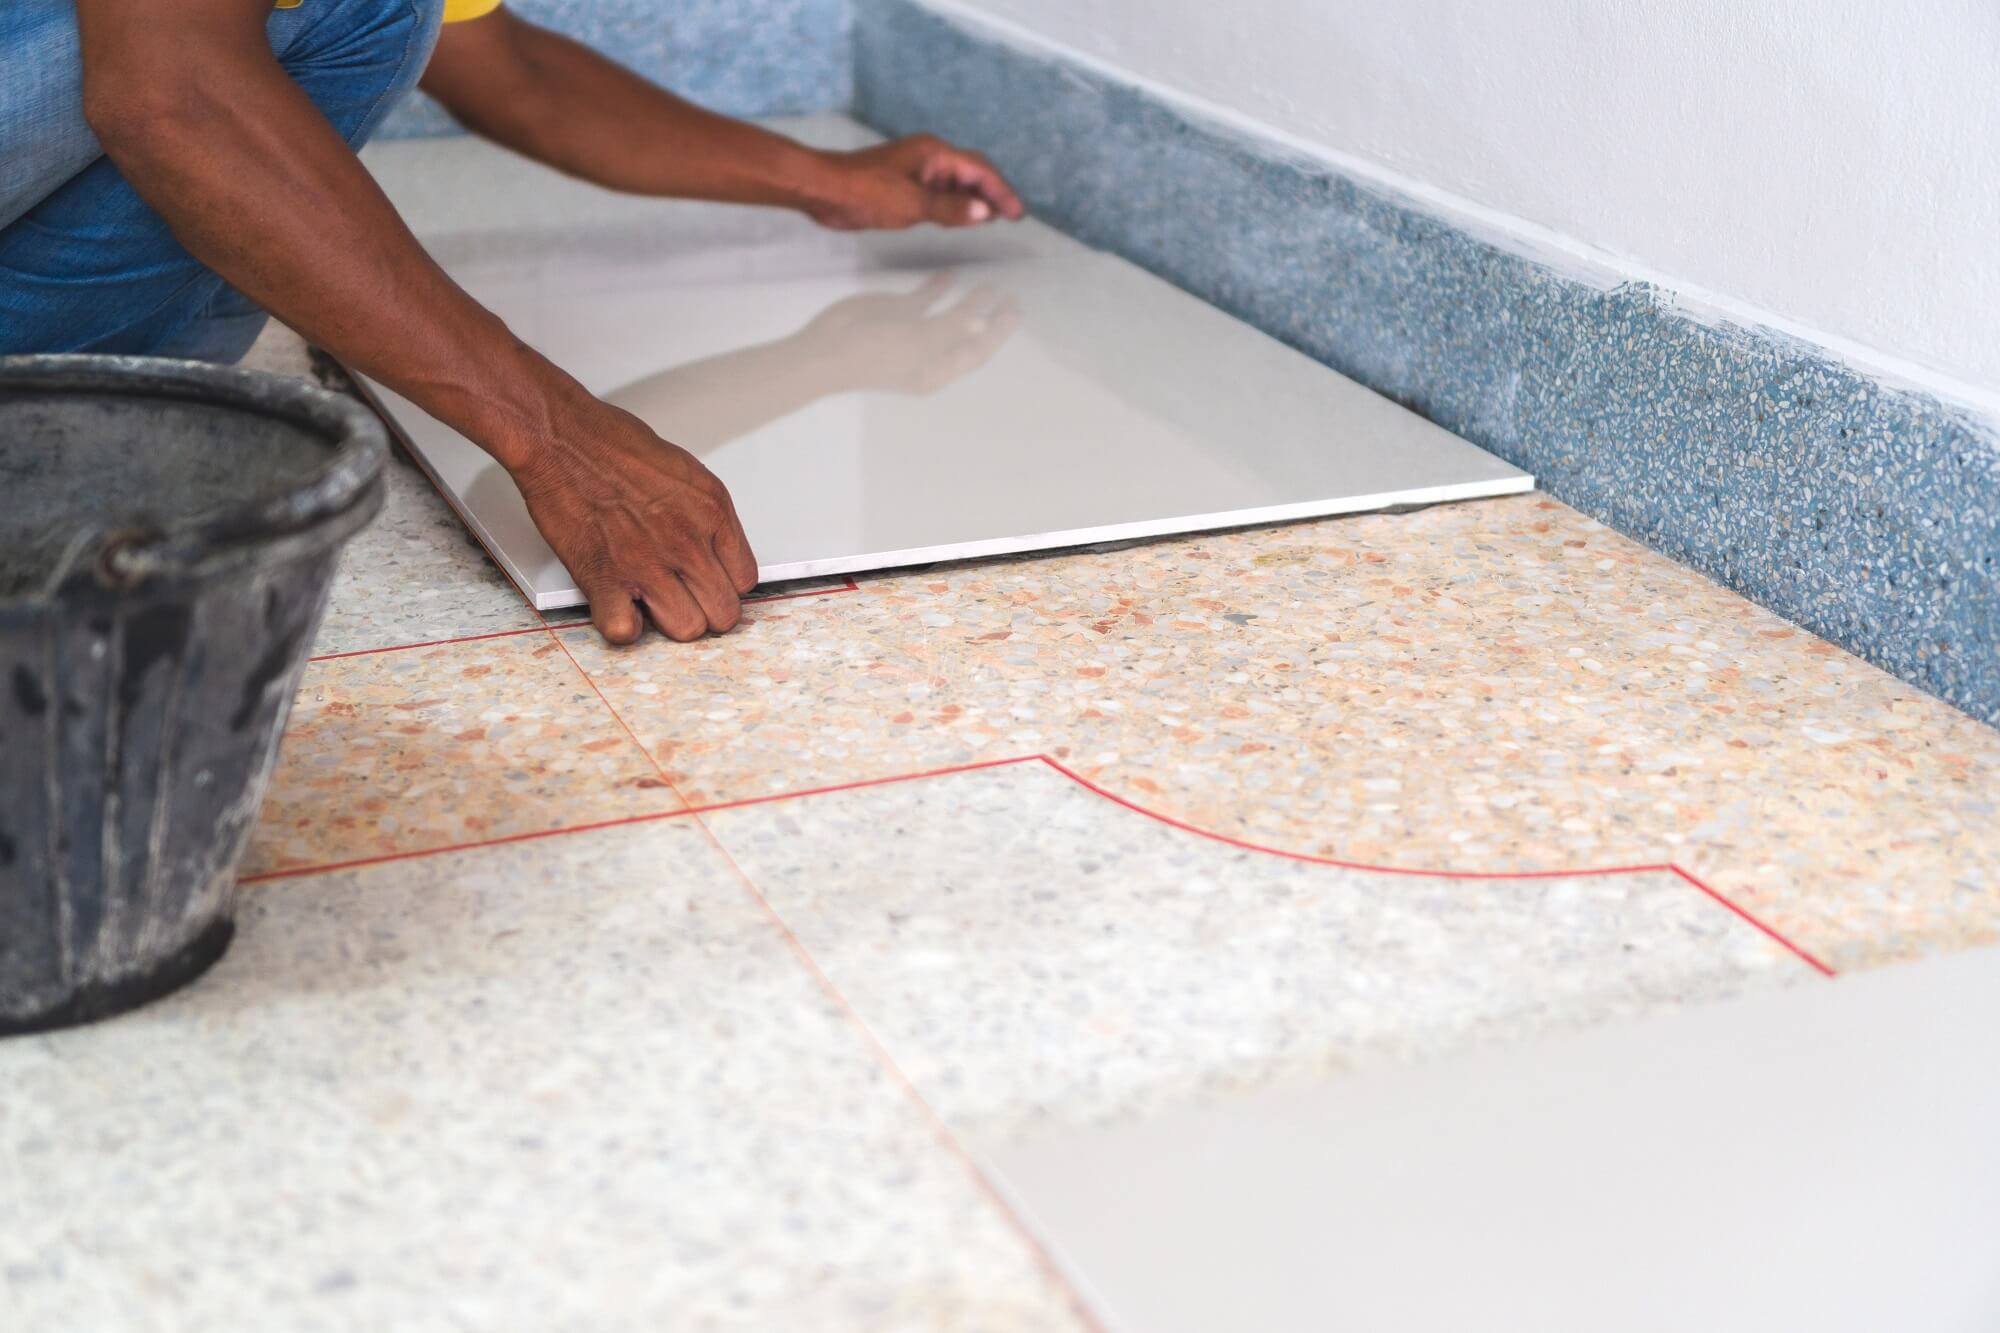
Set the tiles into the mortar, ensuring to wiggle each tile into position to ensure uniform coverage of the mortar onto the back of each tile. The edges will be cleaner if you place the edge of the tiles to edge and slide them apart to create the correct spacing.
You’ll also want to make sure you leave a 1/8-inch gap between the tile and the wall. After laying all the flooring material, remove any excess mortar from between the tiles using a grout float. Once your tile is in place, cut it to size using a wet saw.
Install Cement Board Panels
Lay cement board panels into position, starting at the wall and working your way to the center of the room. This will prevent creating a gap between two panels next to each other if you ever decide it’s necessary to remove one.
Tape the Joints
Use self-adhesive cement board joint tape to cover the joints, working from one side of the room to the other. The seams are where all your tiles will connect, so make sure they’re tight. Use a drywall knife or a smooth trowel to apply a layer of thin-set adhesive over the taped joints, filling in the gaps between panels. Allow the thin-set adhesive to dry completely before laying the ceramic tile.
Install the Grout
After setting all the tiles, carefully spread the grout across their surfaces using a rubber trowel. Use enough grout to fill in all the little nooks and crannies, but be careful not to use too much, or it will start to ooze out from between the tiles.
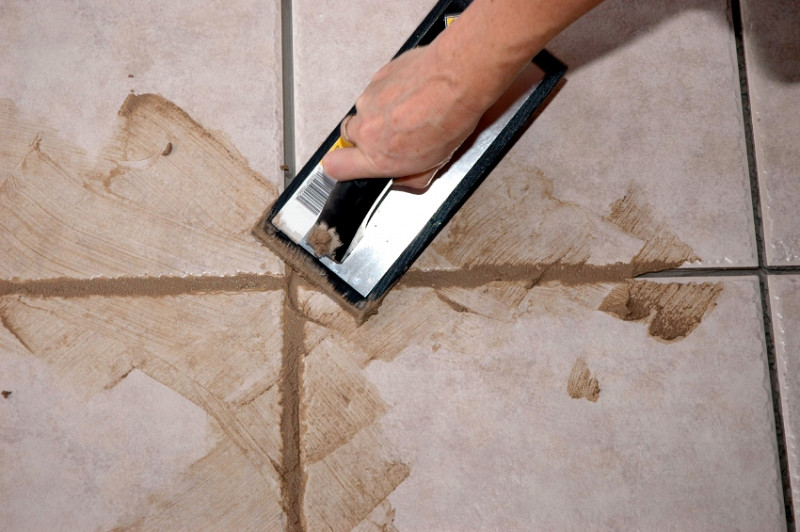
Wipe away any excess grout with a damp cloth, then allow the grout to dry completely. Polish the tiles once the grout has dried, use a soft cloth to polish the tiles until they shine.
FAQs on Preparing a Vinyl Floor for Ceramic Tile
What should you use when installing ceramic tile over an existing vinyl floor?
In most flooring installations, 1/2 inch thick cement board panels are used to ensure a stable base for the tile.
Final Thought on How to Prepare a Vinyl Floor for Ceramic Tile
Installing ceramic tile over linoleum flooring requires a significant change to the existing floor. However, you can still create a beautiful finished product by choosing the right tile and completing the installation process correctly over the existing floor.
The post How to Prepare a Vinyl Floor for Ceramic Tile appeared first on Kitchen Infinity.
Did you miss our previous article…
https://www.conduithardware.com/?p=778
Creative Bathroom Organizing Ideas
Bathrooms can be a total mess. It seems like you never have enough storage space, and every time you need something in there, it’s always at the bottom of a pile somewhere. Most bathrooms are small spaces that make organizing hard, if not impossible.
On top of that, we all have our personal preferences for keeping things clean and tidy. Luckily we have lots of easy ways to organize your bathroom with little to no cost involved. We’ve rounded up some bathroom storage ideas below so you can get started on making yours look neater immediately.
Add a Shelving Unit Above the Toilet
There are lots of ways to store toiletries above the toilet. You can put up a cabinet, use a wall-mounted shelf, or get creative with what you have around your bathroom. Many companies also sell shelving units made to fit around standard-size toilets.
Another great option is to build open shelving above the toilet for additional storage. Doing it on your own provides more opportunities to match the shelving with your home decor style. Also, consider open shelving.
These open vanities are classic and can make any sink look like a modern floating style and they don’t take up too much visual space in small bathrooms. You can easily add floating shelves underneath for attractive storage baskets that can even disguise the plumbing.
Lean a Ladder for Towel Storage
The space between the bottom of your shower and the ceiling is a great place for storing towels if you have an old ladder lying around. This is one of the straightforward ways to hang towels in your bathroom, especially when you add hooks or a towel bar to the wall.
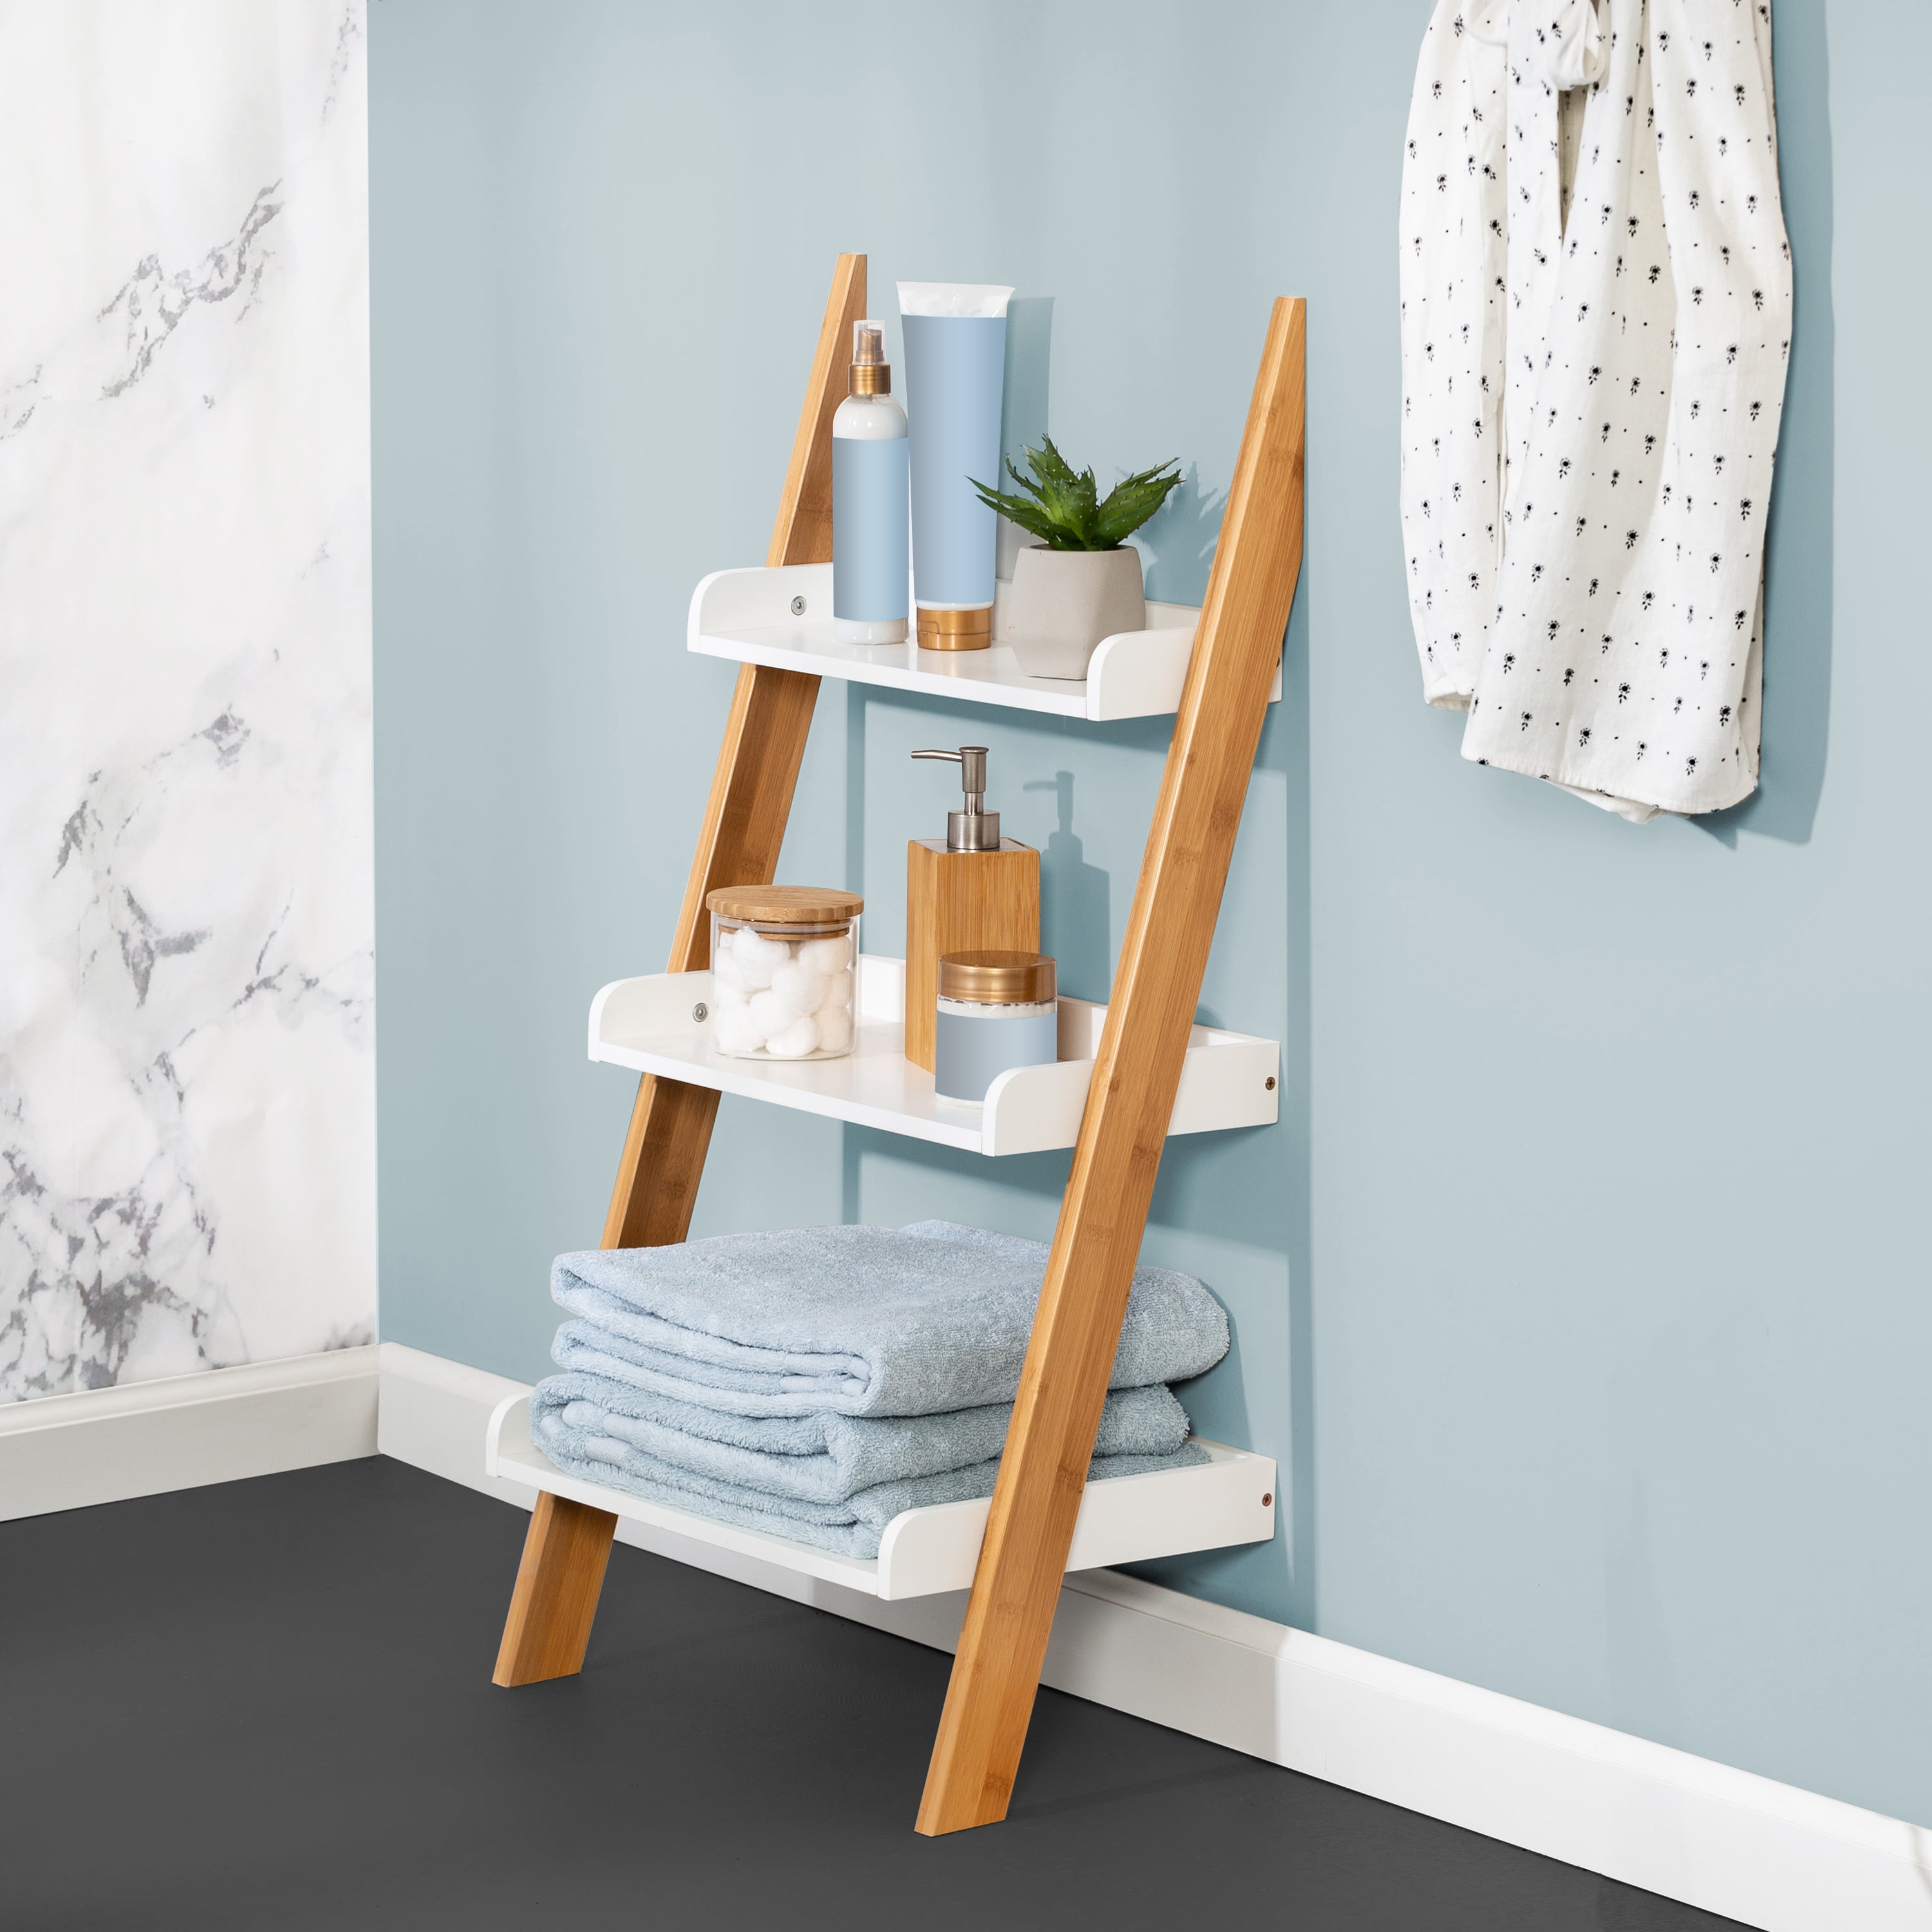
Incorporating ladders into your modern bathroom for hanging towels lets you maximize that vertical storage. Plus, you can hang hooks and baskets from a ladder to store washcloths and other toiletries.
Mount Shower Caddy Using Suction Cups
Hanging a shower caddy from the ceiling is an easy way to free up space in your bathroom. All you have to do is screw a hook into your ceiling, then fix strong suction cups or adhesive hooks to the shower surround. This frees up both counter and floor space while also giving you easy access to your bath products, linens, candles, and other toiletries when you’re in the shower.
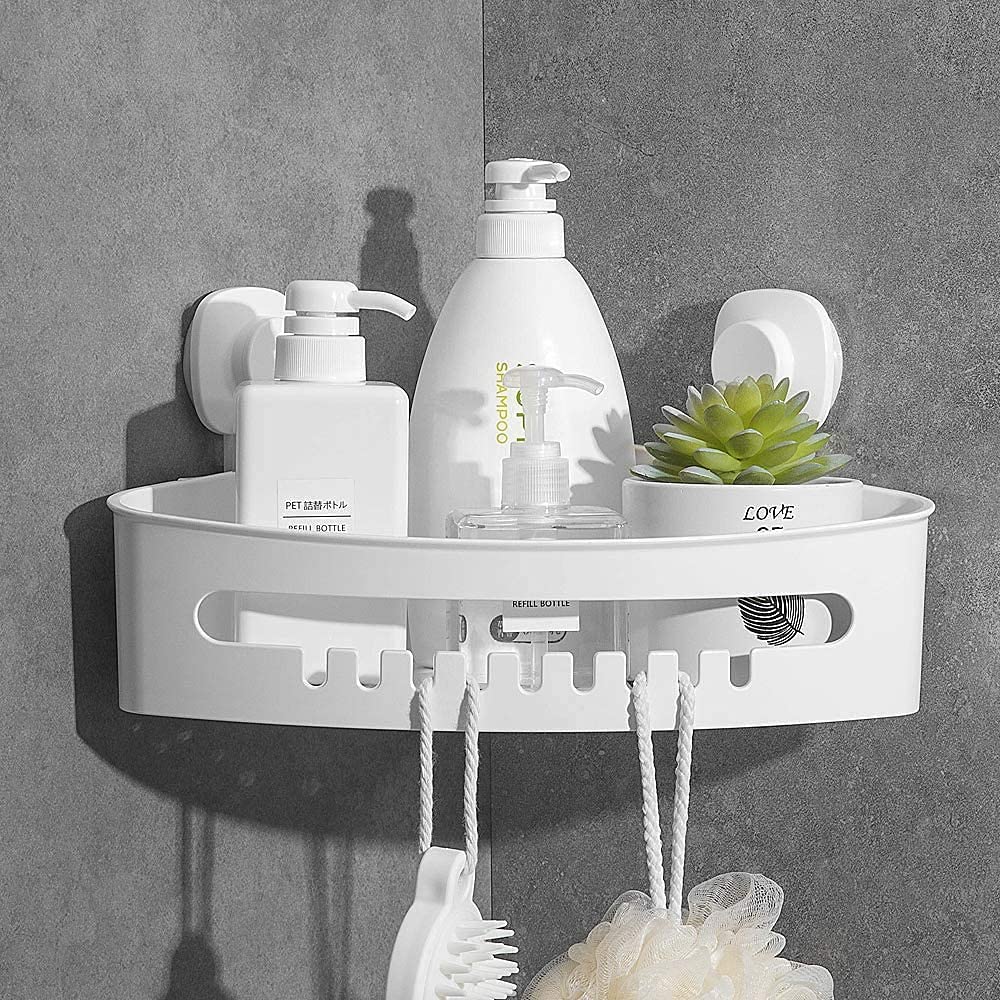
A wall-mounted bath caddy allows you to store more items without taking up any extra storage. A bath caddy is one of the easiest and inexpensive small storage bathroom ideas to implement.
Store Your Reading Material
One of the best ways to free up counter space is to store your reading material elsewhere when it comes to bathroom organization. A great place to put it is in a magazine rack or bookcase that’s mounted next to the toilet. This way, you can grab your reading material when you’re finished with your business, and you won’t have to clutter up the countertop.
Store Items on the Inside of a Cabinet Door
If your bathroom doesn’t have a great deal of counter space, every inch is valuable. However, there are several items you can store on the inside of cabinet doors to free up room. For example, place an over-the-door shoe rack on the back of your bathroom door or in another inconspicuous area so you can store extra towels or shampoo bottles.
You can also buy a tension rod and hang it on the back of your cabinet door to store washcloths. You can also take advantage of this space by attaching clear bins to the doors in which you can store everyday essentials. Label each bin and add dates to items that have an expiration. This way, you’ll know where everything is, and nothing will go to waste.
Create Some Space for a Hair Dryer
If you don’t have a lot of space in your bathroom, try to find an alternate spot for your hairdryer. You can hang it on the back of your bathroom door or a hook on the wall. This way, you’ll have more room to store other items.
To implement this bathroom organizing idea, you can use an over-the-door rack to fit wider items, including hair tools. The nest part is that you won’t need to drill holes to hang it.
Keep Stylish Items on a Tray
If you want to keep your bathroom looking stylish, try placing all of your luxury items on a tray. Everyday household items, such as hand lotion, perfume, jewelry, cotton swabs, makeup brushes, and tissues can be placed in canisters or jars so they don’t take up room on the counter. Decorate your bathroom countertop with a stylish tray to hold some of your most-loved and visually appealing items.
Use Lazy Susan in Your Bathroom Cabinet
A Lazy Susan is a round turntable that can be installed into your bathroom cabinet. You can use this to store all kinds of items, including makeup, hair appliances, and personal hygiene products. Simply spin the lazy Susan to find what you need.
Use Cups or Jars for Storage
Add three mason jars to your medicine cabinet to make quick work of organizing toothbrushes, cotton balls, and swabs. You can even use cups or votive candle holders for storage on the countertop to hold your makeup brushes or favorite perfumes.
By storing items vertically inside a jar or cup, you can make better use of the vertical space inside the cabinet. This bathroom organizing idea requires you to keep items together. These include one jar for cotton balls, one jar for cotton swabs, and another for other necessities.
Create a Skinny Alcove
Use a skinny alcove in your bathroom to store smaller items like lip balm, sunscreen, or hand sanitizer. You can also fit larger items into the space by turning them to their sides. By using the vertical space within the alcove, you can stack extra towels and hold baskets with all your skincare products without sacrificing surface area in your bathroom.
Designate a Place for Dirty and Clean Towels
You can keep your bathroom neat and organized by designating a place for dirty towels. After you’re done in the shower, hang the towel on a hook right next to the shower or tub. If possible, create a small spot for a hamper so clothes and wet towels don’t end up in a pile on the floor. You can roll some clean towels and store them on top of the hamper to save space.
Roll Up a Bar Cart
If you have an unused bar cart sitting around, grab it and roll it into your bathroom. You can fit the cart perfectly in the corner, so you will free up some counter space if there’s no room next to your sink. You can also use this area as a makeshift vanity area since there are many drawers for all of your beauty. This is also a good place for flowers to freshen up a guest bathroom or powder room.
Blend It in with Colors and Patterns
If you’re aiming for a more sophisticated and chic style, match your bathroom organizer with the colors and patterns on your shower curtain. For example, if your shower curtain is white with colorful flowers, an all-white or cream laundry hamper will fit right in.
Paint it the same color as your wall for a clean, cohesive look if you’re looking to keep your bathroom storage shelving from standing out as a focal point. This also allows the entire space to feel sleek, clean, and fresh. Check how to paint the bathroom to get some amazing ideas.
Create Storage Unit Under the Sink
If you’re short on storage space, consider creating a hidden storage unit under the sink area. This is a great place to store bins for toiletries, cleaning supplies, and towels. You can even buy a special cabinet or organizer specifically for this purpose. While a decorative shelf is mounted on the wall for decorative items, the under-sink area offers you room to stow items out of sight, even if you have a tiny bathroom.
Fake a Linen Closet
Don’t panic if you’ve got a space that doesn’t have room for an actual linen closet or the previous owner took the closet when they purchased your home. Instead of having no place to hang damp towels and hand towels, give this idea a try. Take advantage of the free corner wall and add a shelving unit there. You can also attach baskets to the wall for a spot to fold extra towels and washcloths. A slim wall unit will also work.
Organize Bath Toys in Waterproof Bins
Do your kids have bath toys that they never seem to put back when it’s bath time? Turn a cheap plastic organizer into something functional. Niches in the wall are a great spot for storing such toys in a small plastic bin. If you don’t have a niche, turn to a strong suction cup near the bath. You can also hang an extra shower curtain tension rod along the back wall of the tub and add hooks so that you can hang toy bins.
Divide Vanity Drawers into Sections
Don’t let your bathroom vanity drawers look like junk drawers. Instead, purchase drawer dividers and group items together to make your drawers functional and appealing storage spaces. Curate your new vanity drawers with commonly used products that make sense in your household.
FAQs on Creative Bathroom Organizing Ideas
What are the three types of bathrooms?
Bathrooms are categorized as the master bathrooms, containing a shower and a bathtub adjoining the largest bedroom. There is also a full bathroom or full bath, containing four plumbing fixtures, including a toilet and a sink, and a half bathroom or powder room, containing just a toilet and sink.
Final Thought on Creative Bathroom Organizing Ideas
As you can see, bathroom organization isn’t as simple as throwing everything into a cabinet and closing the door. You have to plan out where things will go and what you want to bring together in one place.
Try these bathroom organizing ideas to spice up your space. Don’t let the lack of storage or time be an excuse for not washing your hands after using the restroom! Take some time out of your day to organize, and you will thank yourself later.
The post Creative Bathroom Organizing Ideas appeared first on Kitchen Infinity.