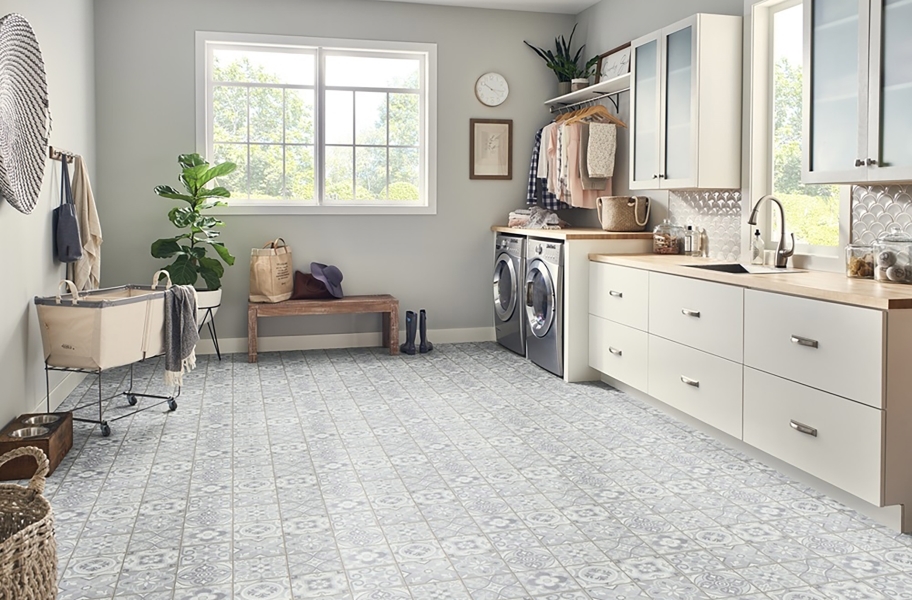
13 Top Manufacturers of Luxury Vinyl [LV] Flooring
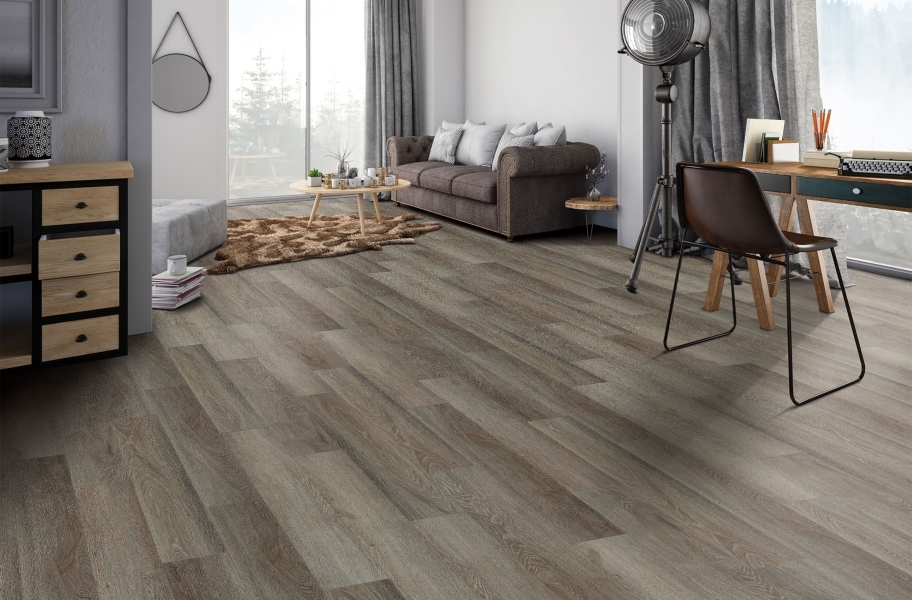
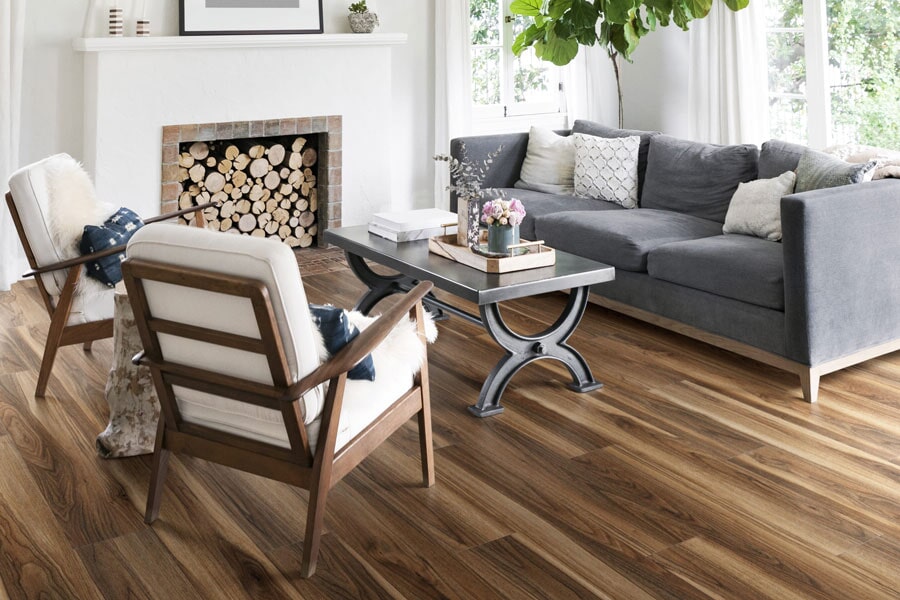
When it comes time to replace your current floor, you have many flooring options out there to choose from. One option that is quickly gaining popularity is vinyl plank flooring. Luxury vinyl plank flooring gives you a look and feel of hardwood but without all the hassle that goes along with it.
This makes luxury vinyl plank flooring one very popular choice when you’re making the final decision on your next flooring project. Today, we are going to take a closer look at some top manufacturers who produce this type of product so that when the time comes for you to make that final decision, you will know who to go with.
What is Vinyl Flooring?
Vinyl flooring is a synthetic material that looks and feels like real flooring without the cost. Vinyl flooring comes in many forms, including luxury vinyl plank, sheet vinyl, and luxury vinyl tile. They are created by layering a specialized PVC plastic on top of a fiberboard backing to give the product strength.

Pros of Vinyl Floors
Stain Resistant
Almost every brand, style, and texture of luxury vinyl plank is stain proof, and those that aren’t are heavily resistant to staining.
DIY Installation
In most cases, vinyl plank flooring is easy to install. Large rectangular planks can usually be laid down in a matter of hours with a very small learning curve.
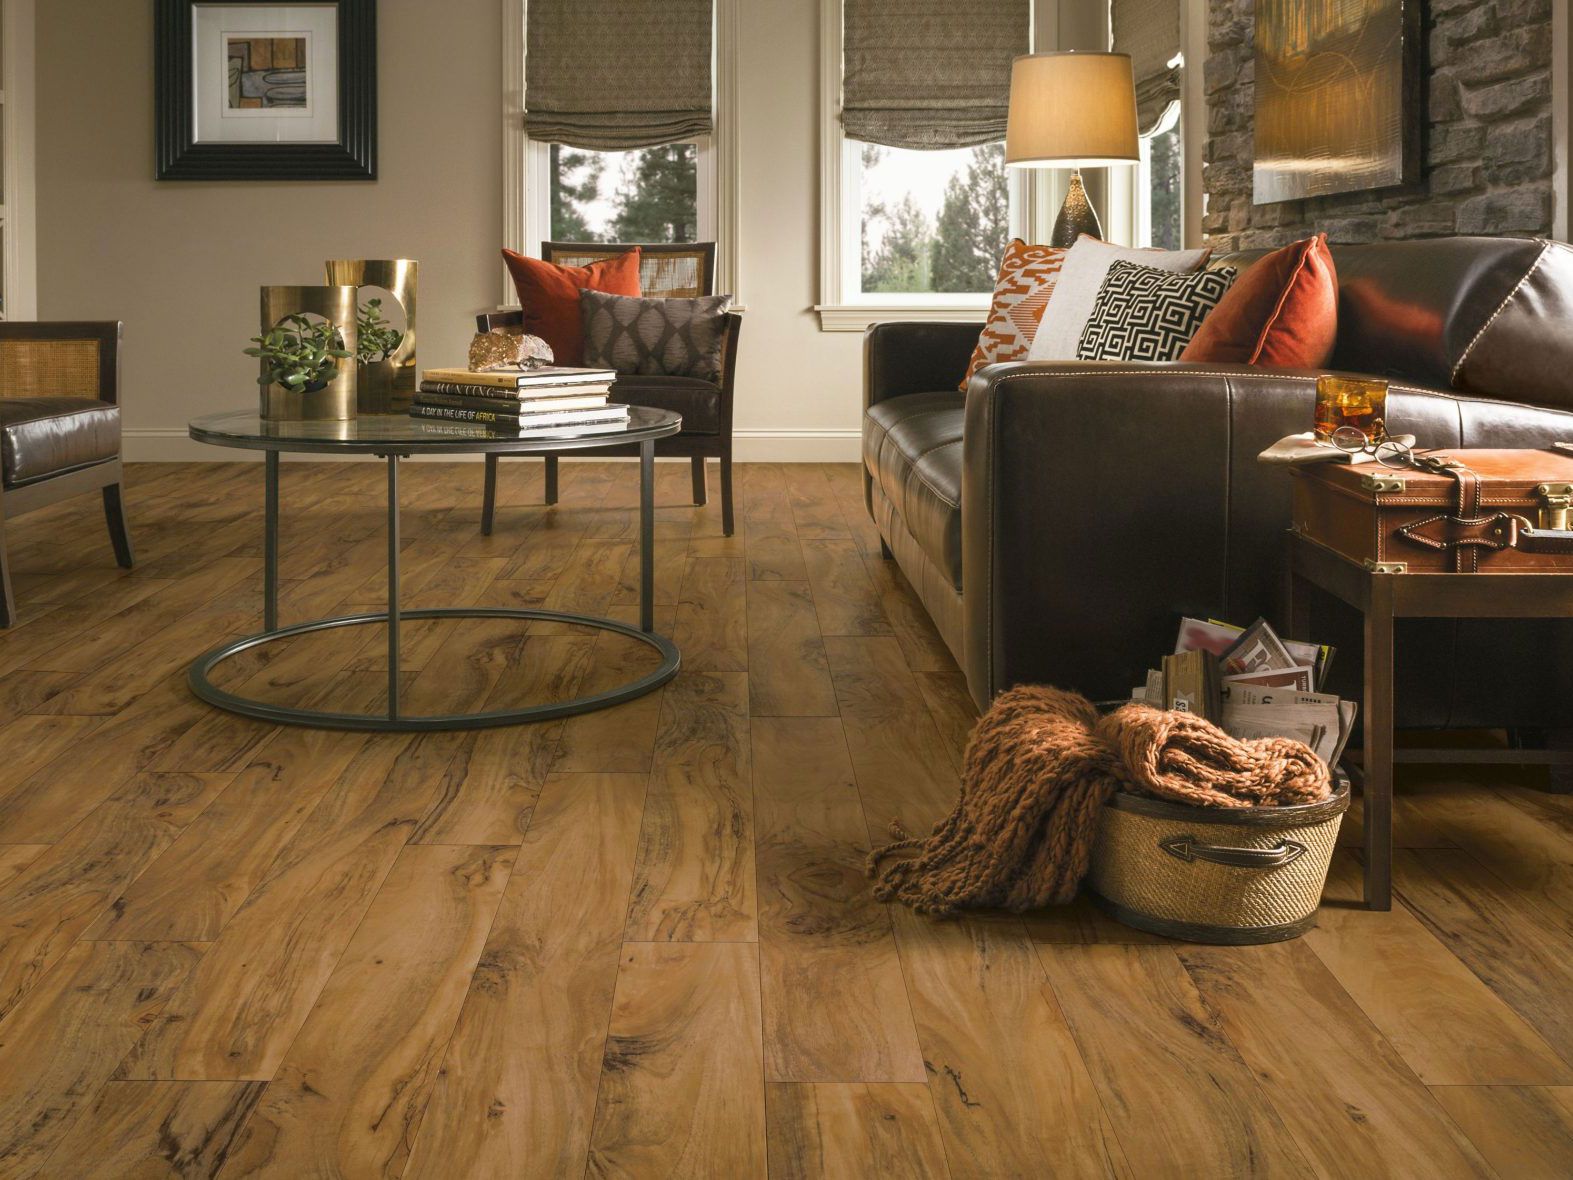
Affordable Luxury Vinyl Plank Flooring
One of the biggest pros of luxury vinyl plank floors is that they offer an affordable alternative to real hardwood and laminate. The overall price of LVP flooring has come down in recent years for many reasons. There is style and type for every budget. It’s priced between $2 and $7 per square foot, making it cheap compared to hardwood, carpet, and decent tile.
Residential and Commercial Use
Luxury vinyl plank can be used for both residential and commercial applications. They are durable enough to withstand heavy foot traffic in office buildings, educational facilities, retail stores, hotels, airports, or anywhere requiring a high cleanliness level.
Cleaning Vinyl Plank Flooring
Vinyl flooring is easy to maintain. You don’t need anyone to teach you how to clean vinyl floors. A quick mop or vacuum removes most surface dirt. For tougher stains, use a mixture of hot water and vinegar to soak the area for up to 15 minutes before wiping it off with a clean cloth. The flooring can be refinished if too much scuffing occurs over time.
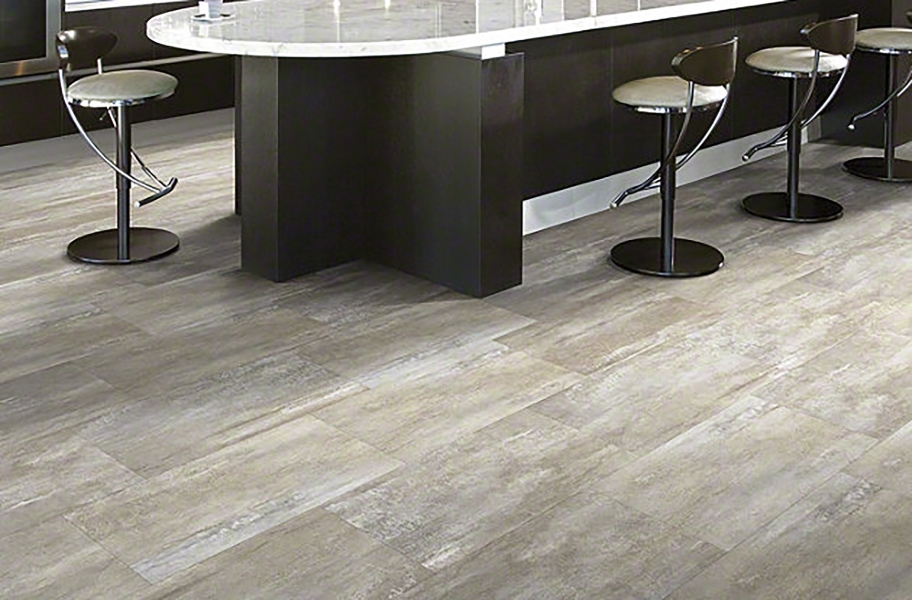
Styles and Finishes
Due to the wide variety of installation methods, vinyl plank flooring comes in a variety of styles and finishes. While less expensive options in other flooring materials mean lower quality, vinyl flooring isn’t the case.
Cons of Vinyl Plank Floor
Volatile Organic Compounds and Off-Gassing
Since the plank flooring is synthetic, it emits a scent that some people can detect as volatile organic compounds or VOCs. These can be hazardous to health, although they typically begin to dissipate within the first 24 hours of installation. It’s good to keep windows open during and after installation, but not directly in front of air conditioners or fans that might trap the odors.
No Added Home Value
Unlike hardwood flooring or wall to wall carpeting, vinyl flooring doesn’t typically add to resale value. However, it offers excellent durability and resilience that increases useful life by decades. This makes it an important consideration if you’re planning to live in your home for many years after installation.
Not Easily Repaired
If you drop a perishable item such as an egg, wine bottle or bread crumbs on your vinyl flooring and try to wipe them up quickly, they may leave a noticeable stain. You can’t simply refinish the flooring with wood floor wax as you would for hardwood floors.
Professional installers can successfully repair vinyl floors, but the damage may already be permanent because, unlike hardwood floors, vinyl floors are not made with real wood.
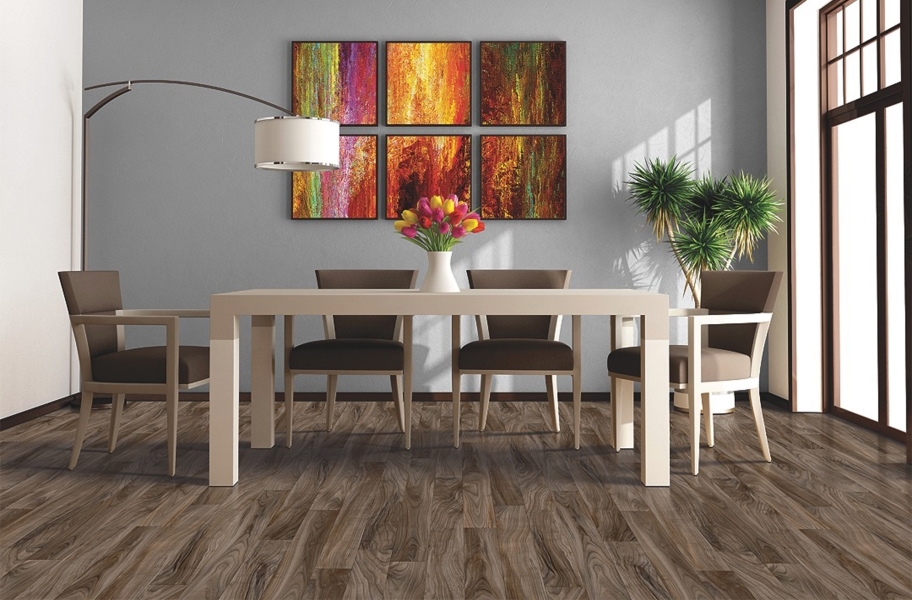
What to Look for in a Quality Vinyl Plank Floor
Not all luxury vinyl flooring is created equal. Vinyl planks and tiles vary between $1 and $8 per sq ft. Here are some of the factors that explain the variation. You should look for these features when choosing the best vinyl plank flooring.
Rigid Core
Lesser grades of vinyl floors may come with a fragile core made from polystyrene foam, which breaks apart as you walk on it and can damage your subfloor. Luxury vinyl planks should have a rigid core made from PVC. The most common core is wood plastic composite, while the newest type is stone plastic composite.
Thickness
Rigid core vinyl planks average 5mm thick, while vinyl tiles range from 11 to 13 mm. Thicker is better because thicker planks and tiles can withstand more wear and tear before showing signs of damage.
Price and Warranty
Prices can range from $1 to $7 per square foot, depending on the type of material and manufacturer. Luxury vinyl tiles typically cost more than luxury vinyl planks. A good quality product should come with at least 20 years for residential use and 10 years for commercial use.
Vinyl Plank Flooring Brands
1. Mannington
This is one of the oldest major vinyl flooring manufacturers founded in 1915. Mannington offers luxury vinyl in two product lines. These include Mannington luxury sheet vinyl and Adura luxury tile and plank flooring.
Mannington is unique in offering a sheet vinyl product described as luxury vinyl. The luxury vinyl products are either tile or plank products for all other manufacturers. The Adura brand comprises both tile and plank offerings. Most of the tiles mimic natural stone, and the tiles are typically 18×18 inches square or 12×24 inches in size.
Some products are meant for glue-down applications, while others use a click-lock connection. If you’re looking for near authenticity in vinyl wood flooring, go for the plank collection, which features variable widths, realistic colors, and surface textures.
2. Shaw
Shaw is the only other company that offers a product that resembles luxury vinyl flooring. The Shaw Contract Flooring brand offers an array of sheet products and luxurious vinyl planks you can find. While they’re a little more expensive, you’ll get a high quality, the durable plank that exceeds your expectations.
Shaw also tends to back its products with generous warranties, demonstrating the company’s faith in what it sells. There are LVP types to choose from Shaw floors. These include the DuraTru collection, the least expensive, and ranging from 5 mil to 7 mil in thickness.
For thicker flooring, choose the Floorte style, which is a mid-range of their collection, offering you a dozen of styles to choose from. Most residential applications come from this collection. For commercial use or higher-end products, choose Floorte pro.
The prices will rise in Floorte pro but with up to 30 mil thickness and a solid plank using SPC. The thicker mil also comes with longer warranties, including commercial use. One advantage of choosing vinyl plank flooring from Shaw is that most of the company’s products are fully waterproof instead of just being water-resistant. Shaw is one of the largest and most famous vinyl plank flooring brands.
3. Armstrong Vinyl Plank Flooring
Armstrong Vinyl Plank Flooring is another manufacturing brand that has been around for decades. Armstrong’s vinyl plank flooring comes in both floating and glue-down installation methods and a variety of styles, including contemporary, traditional, rustic, and classic designs.
Most of Armstrong’s luxury types of vinyl are plank products that mimic wood grains. With the company’s lifetime warranty covering residential use, you can’t go wrong with this brand. The average prices are between $5 and $7 per square foot.
4. Forbo Flooring Systems
Forbo is a Swiss-based company that makes a point of being as environmentally friendly as possible by using green energy, minimizing transport, and cutting down on waste. Their Allura residential line offers a vast array of around 100 different styles to choose from and not fewer than eight installation methods.

The company also offers specialist flooring such as acoustic flooring that helps reduce noise, durable, low-maintenance homogeneous flooring, and versatile and varied heterogeneous options, opening up plenty of creative possibilities.
This is a great option to consider, especially if you’re interested in installing ecological, high-quality flooring in residential or commercial settings.
5. Mohawk Flooring
Mohawk Flooring is a renowned name in the flooring industry. They offer a huge variety of stylish and versatile options that are easy to install and affordable, with customers hailing from nearly every walk of life.
Mohawk offers luxury vinyl flooring and laminate, resilient sheet, and hardwood. Mohawk has been around for over 100 years, and they are the largest flooring manufacturer in the entire nation, processing 100 million square feet of products per month.
Mohawk floors are easy to clean and care for, making them a popular option for people with young children and pets in their homes. Some Mohawk products also include a special pet-friendly warranty, so if it gets damaged by your furry companions, you’ll be covered, contrary to Mohawk’s competitors.
On the downside, Mowhak comes with a shorter warranty than other brands, so if you’re looking for a long warranty brand, then this isn’t the right option. With their plenty of experience, Mohawk is a reputable company that comes at the most reasonable price possible.
6. NuCore Flooring
The luxury vinyl flooring from this brand is highly durable and resilient to every foot traffic and resists scuffs. The planks are not only durable, but they’re also waterproof, making it the only brand offering 100% waterproof across the entire line.
All their models are wood grain finishes to emulate a real hardwood floor. The brand also features an innovative design with a cork underlayment that is hypoallergenic. This underlay also provides a softer floor when walking, absorbs more sound, and is warm for colder climates.
The interlocking floating design with this cork underlay allows you to lay more flooring without the need for transition molding. You’ll also get a lifetime warranty on residential installs with this brand. Maintenance is also simple, with regular sweeping and mopping.
Made to withstand pets, children, and high traffic areas, NuCore is the perfect choice if you’re looking for the look and performance of your floors.
7. Karndean
This is a relative newcomer in the world of luxury vinyl flooring, originating as a small business in 1973. Although it’s a small manufacturer, Karndean specializes in nothing but luxury vinyl flooring and is highly regarded in the industry. It offers wood-inspired plank styles and stone inspired styles, making it one of the most diverse companies despite its small size.
Its unique flooring products mimic other materials such as metals, fabrics, cork, and bamboo. It comes with a pro-rated lifetime warranty. However, some models require professional installation for the full warranty to take effect. So, make sure you read all of the fine print before purchasing.
8. COREtec Plus
COREtec Plus is another manufacturer that only manufactures luxury vinyl flooring. It prides itself on using eco-friendly materials without sacrificing performance and design. Featuring an innovative core construction, COREtec Plus’ products are water resistant and offer more than 10 times the hardness of other brands for easier maintenance. Like Karndean, it’s recommended to have your COREtec installed professionally.
It offers White Glove services, including installers, for an additional charge. Using this service will also give you a full warranty on installations, and you can use the floors as soon as the job is complete. The major lines of COREtec include original, pro, stone, wood, and one plus. Each of these lines has its models of LVP.
9. Proximity Mills
Proximity mills have manufactured high-end luxury vinyl flooring in the U.S. for over 30 years. The company’s London Towne Collection is finished in an old English style and is one of the most elegant products on the market today (and it doesn’t look like vinyl). It comes in 12 patterns, six colors, and four textures, which are part of the FSC certification. The company also manufactures two luxury vinyl planks under the brand name Aireloom and has a new line of luxury vinyl tile called Proximity Tile Collection.
Proximity Mills floors boast advanced toughness and durability, and all flooring from the company comes with a lifetime warranty for residential use. However, its commercial warranty are not as good as those offered by other companies.
Proximity mills also pride themselves on exceptional customer satisfaction. And on the downside, they don’t allow anybody to sell their products, making it a little difficult to get hold of proximity mills flooring.
10. Cali
Cali flooring is a good choice if you’re concerned about investing in green products. It’s manufactured using 100% renewable energy, and the material used to make this vinyl tile comes from post-consumer and post-industrial waste, reclaimed wood and scrap tires.
The company was born of an idea that came to the founders after a surfing trip in Hawaii, and their original products were engineered bamboo flooring. Among the lines produced by Cali is Mute step flooring, which incorporates a cork underlay to help reduce noise while increasing comfort.
The next is Vinyl Pro Classic, designed for ease of installation, vinyl plus, including cork underlay and Longboards which are vinyl planks sold in a larger format.
11. Flooret
If you want to keep things simple but have a luxury vinyl tile, as a result, look no further than Flooret. This company offers luxury vinyl tiles by the square foot with either a wood or stone pattern on top. The product is meant to be kept in place without adhesives and floated over existing flooring, including wood, concrete and ceramic tile.
It has a single line of vinyl flooring, divided into the base and the signature versions. The difference is the wear layer, with base offering 20 mils and signature providing a whopping 40 mil, making it indestructible.
These types are UV protected and feature ceramic bead technology to enhance toughness and durability. All Flooret products include a lifetime warranty. It also offers affordable pricing, thanks to its simplicity and the direct to customer business.
12. Lifeproof Vinyl Flooring
Nail-down and glue-down installations are available. It comes in various widths and designs, including wood plank effect vinyl flooring, authentic-looking tile styles and luxury vinyl planks that look like stone. The classic square printed pattern is also for those who want something plain and simple.
Lifeproof flooring also boasts a 20 mil wear layer and a waterproof rigid core, contributing to its durability. If you’re looking for flooring that won’t break the bank, then this is the right choice.
13. Raskin
This is a company specializing in attractive modern flooring solutions that are also quick and easy to install. Both loose lay and glue down options are available. The company offers several flooring options, including premium waterproof, commercial and loose lay.
All these are characterized by high levels of quality and attractive artistic designs. If you’re looking for a well-known flooring option that can make a real impact, then this is the real choice.
FAQs on Top Manufacturers of Luxury Vinyl Flooring
What thickness of vinyl plank flooring is best?
The thicker the plank, the sturdier it is. So the rule of thumb is to use 4mm to 6mm thickness in heavily used areas of the house and 4mm and below for areas like the bedroom.
Final Thought on Top Manufacturers of Luxury Vinyl Flooring
As you can see, vinyl flooring is easy and simple to install. And the best vinyl plank flooring will give you years of trouble-free use, easy to maintain, and suits the style and decor of your home.
The post 13 Top Manufacturers of Luxury Vinyl [LV] Flooring appeared first on Kitchen Infinity.
Bird Bath Fountains and Why You Need One
Birds are a great addition to any yard, but how do you get them to come? You can’t just put out a birdbath and expect birds to flock. They need more than that; they need food, water, and shelter. To attract the most birds into your garden, it’s important to make sure all of their needs are met.
All it takes is one little bird bath fountain in your backyard or front yard. The sound of running water will attract many songbirds, including blue jays, woodpeckers, and sparrows. If you’re looking for something more traditional, like a stone basin with plants around it, we have those too! There are dozens of designs available so you can find the perfect one for your home.
Types of Bird Bath Fountains
Hanging Bird Bath Fountains
A hanging bird bath fountain is a great way to add motion and sound to your outdoor space. The sound of falling water refreshes and captivates. It can even contribute to the overall ambience of your yard or garden.

These bathroom fountains for birds are made from durable steel and other metals, making them long-lasting, low-maintenance additions to your garden. You can also use it as a bird feeder if you prefer.
Pedestal Bathroom Fountain for Birds
Built with you in mind, pedestal bird bath fountains add a touch of class to your yard while giving birds the perfect place to get clean and take a drink. Like other bathroom fountains for birds, this type is made from durable materials such as resin and metal.
This classic pedestal-style bath is popular with bird lovers. It can withstand all types of weather to attract birds year-round. The shallow bowl is also ideal for smaller birds.
Water Wiggler Bathroom Fountain for Birds
As the name suggests, this bathroom fountain also wiggles to attract birds. It moves water through an internal tube system that gets birds’ attention with movement and sound. The cup is ideal for tiny songbirds such as finches, flycatchers, wrens, thrushes, and more.
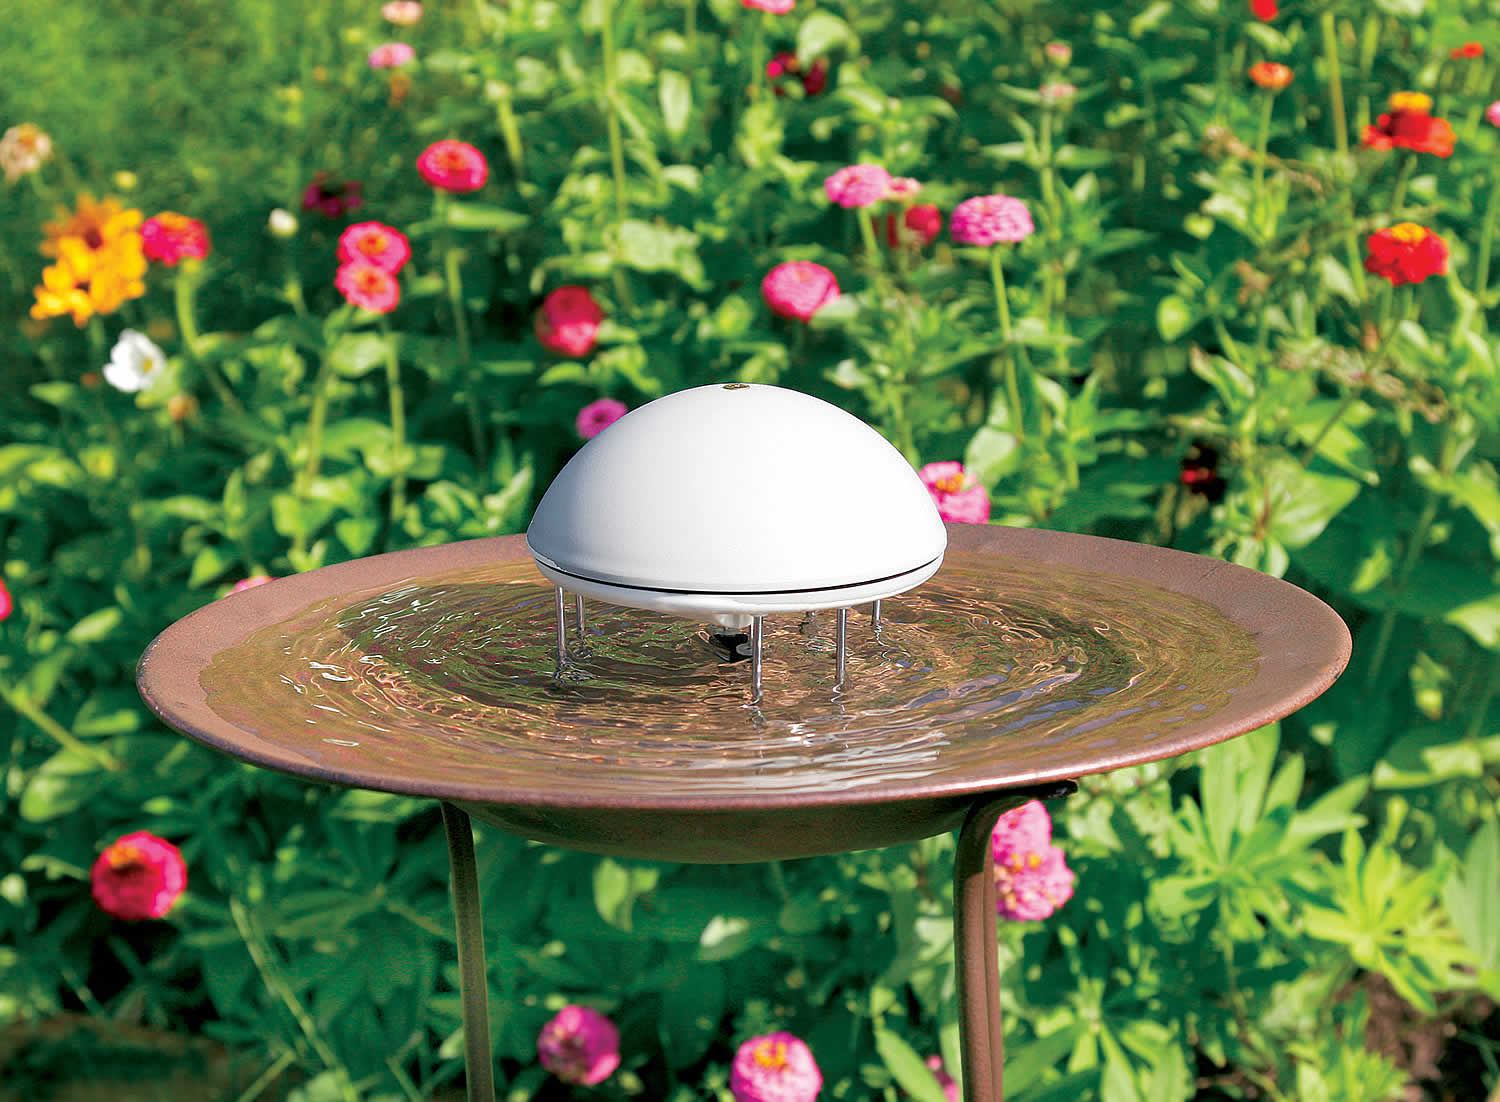
Birding experts also recommend the water wiggler to catch the attention of more bird species with moving water. You might also attract migrating birds like warblers that don’t visit bird feeders.
Ground Bird Bath Fountain
This fountain is a ground-mounted bathtub fountain with a very shallow dish. Its design allows water to change directions many times before it eventually falls into the shallow dish. The single tube emits a gentle bubbling noise that makes it readily available for birds in search of water.
It lessens the need for frequent cleaning because dirt and debris do not settle as quickly as they would on a static model. Ground dwelling birds like sparrows and juncos will appreciate the easy access to water. It holds four cups of water in the shallow basin.
Tree Stump Bird Bath Foundation
This fountain provides water for various types of birds in an instant. It is built around a tree stump foundation which offers the user several options in addition to holding water. You can place plants in the water or on top, you can feed the bird’s fruit that will attract them to your yard, and they can even rest inside it when weary.
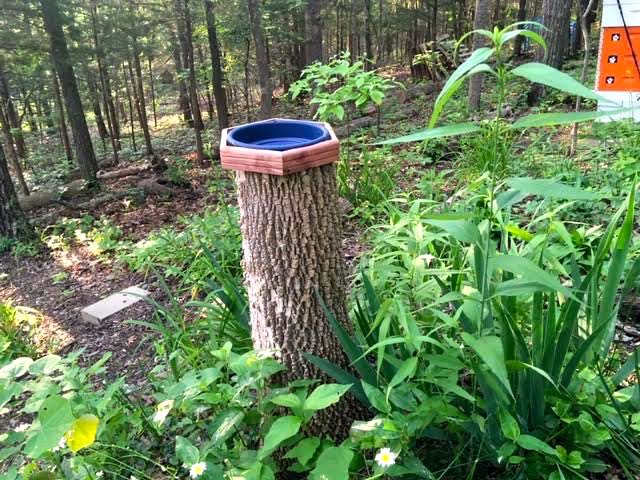
The three-leg design prevents it from being knocked over by other birds or neighborhood kids. If you adore cardinals, then this is the right choice. The natural look will blend well in your backyard.
It’s made of durable resin to last for years. You can also use it as an indoor decorative piece. The realistic-looking tree stump is topped off by a bird’s nest, with faux green succulents growing on the wood.
Glass Koi Bath Fountain
Koi fish baths are remarkable pieces that add an aquatic feel to your home. The inclusion of glass makes it look like you’re gazing into the waters of a river or pond. It has a calming vibe and can add to the serenity in any room. This glass bowl is bright and light, with a sturdy metal base included. The frame folds up easily to store it in your garden shade.
Sunflower Bird Bath Fountain
If you want a smaller fountain, this one is a great choice. It’s a hollowed-out sunflower complete with a birdbath and foliage around the base. The colors are bright and cheerful, and it gives an old-world feel to your garden or porch setting.
The pedestal birdbath can be used as a beautiful home accent, but it’s also functional. The water falls out of the bowl and into the pool below, which can be used to your pet’s or children’s delight. This is a great way to keep them cool in the summer months.
Mosaic Bird Bath Fountain
How beautiful and unique! This one is made from a mosaic of brightly colored tiles and has a little bird on top that sends water into the bowl below. You can set this in your front yard or backyard, and it will give off a strong sense of style and class. It’s perfect for pet owners who want to keep their animals cool during the warm months.
This handcrafted mosaic piece will also sparkle in direct sunlight and beautify the shade. It doesn’t come with a stand, so the seller recommends the dish on an inverted terra-cotta pot.
Stone Bird Bath Fountain
Here we have a very natural and rustic birdbath fountain. It’s made from mainly stone and is perfect for people who want to keep nature close by but still give their outdoor space a touch of class. It has an upper portion with a little opening that the water pours out of. You can either sit this on dry land or fill it up with water and let the birds drink from it.
This is another natural birdbath fountain that is gorgeous. It uses a large enough bowl to place plants inside of it if you wish to do so. This also has an inverted top portion, so it creates a nice gentle sound when the water starts to flow.
Ceramic Bird Bath Fountain
This is the perfect fountain for anyone who wants a little piece of art in their outdoor space. This has a small base and inverted top but with intricate designs that give it such an uplifting feeling when you look at it. Setup is quick and easy, you screw the bowl onto the pedestal stand.
Concrete Bird Bath Fountain
This is what I ended up getting for my backyard. It has a unique design, with the bowl perched atop the pedestal stand. However, there are no bells and whistles when it comes to this fountain. You can also create your unique design by painting it whatever color you like.
Cast Iron Bird Bath Fountain
This birdbath fountain has a classic look to it. But what makes this stand out from the rest is the little pump that pumps water up and runs down throughout the tiers of this fountain. It adds to its charm and loveliness. If you like an artistic touch to your backyard, then this is just for you.
Solar Bird Bath with Lights
If you want to go green and add some style, then this is the fountain for you. All you have to do is leave it out in the sun and watch your fountain light up your backyard. The solar power powers the pump, so there are no messy wires running all over the place. Just make sure that this birdbath faces south to receive direct sunlight to turn on at night.
Solar Water Fountain with LED Lights
This is the most colorful of the three fountains. You have a simple fountain with some solar panels in front by day. But by night, watch lights light up within the solar panels and reflect off the water for an enchanting glow. Since the lights are solar-powered, you don’t have to worry about hauling extension cords around or even changing batteries.
The three different shine modes allow these lights to turn on at dusk and off at dawn. Just make sure that this fountain is facing south to get enough sunlight to charge during the day.
Plastic Bird Bath and Feeder Fountain
This is the cheapest and simplest of bird bath fountains. It has a little basin for birds to drink from, along with a feeding ring above it, so you can also feed them as they drink. The entire fountain is made out of plastic, so no need to worry about rust or metal pieces that might fall apart.
They included a plastic water tray that holds water, so remove it, and you have a bird feeder. The base is crafted of durable Eastern red cedar wood.
FAQs on Bird Bath Fountains and Why You Need Them
What is the importance of bird bath fountain?
Birds need bird baths in the winter, just as they need the rest of the year. In the very cold months, water can be very hard to find, and they do appreciate a bird bath with accessible water in it. If your backyard has a heated bird bath, then you can expect some activity all year, even in the winter. They give you an opportunity to interact with different bird species and identify baby birds as well.
How often should you change the water in the bird bath?
You should change the water every two to four days then clean up the bird bath. Remember, taking care of birds coming to your yard involves providing them with clean water in the fountains.
Final Thought on Bird Bath Fountains
Birds need a full and clean bird bath. So if you build it, they will come. Make sure you clean your bird bath with a garden hose every couple of days. If you see dead bugs floating in it or algae starting to form, that’s a clear indication that it’s time to clean. You can also learn different ways to attract birds to your compound such as putting our hummingbird feeders.
The post Bird Bath Fountains and Why You Need One appeared first on Kitchen Infinity.
Reasons for Yellow Leaves on Houseplants
It’s very frustrating when your favorite houseplant starts to show signs of stress, isn’t it?
Those yellowing leaves could mean that the plant is getting too much or not enough water. It might also be a sign that the light in the room isn’t right for this type of plant. Maybe you’re using tap water with chemicals in it or it could also mean that you’ve been fertilizing your plants every other week, which might be too little.
No matter what the cause is, understanding why your particular houseplant is showing these symptoms will help you find solutions more quickly and easily.
In this article, I’ll discuss the possibilities of why yellow leaves are happening to your houseplants, what the symptoms mean, and what you can do about it, so if you’re ready to learn about all these things – read on.

Image Credit: http://gardeningknowhow.com
Plants need the right amount of light, water, and nutrients to grow well
All plants need the right balance of light, water, and nutrients to grow well. They use sunlight to create food through photosynthesis, and if they’re not getting enough light, they might start to turn yellow. This isn’t just true for houseplants – outdoor plants need the right amount of light too.
If your plant is getting too much water, the leaves might start to turn yellow because the roots can’t get enough air and the leaves will wilt. This happens because when you water your plants, the water doesn’t have time to evaporate between watering, which is what helps keep the roots healthy.
Low humidity in the air can also cause houseplants to lose their moisture more quickly, leading to yellow leaves. You can increase the humidity in the room by using a humidifier or placing your plants near a water source.
If you’re using tap water to water your plants, it’s important to check if any chemicals in it might be harmful to your plants. If so, you can use filtered or distilled water instead.
Houseplants need the right nutrients to stay healthy, and you can provide these nutrients by fertilizing your plants at least once every two weeks with a general-purpose fertilizer. Fertilizing your plants regularly will help them grow big and strong.
Different solutions to consider
Now that you know all about the reasons for yellow leaves on houseplants, let’s move on to the solutions.
If your plant is getting too little sun it’s best to find a brighter spot in your home. A south-facing window is great because it will get plenty of sunlight throughout the day.
If you’re using tap water that has chemicals in it like chlorine, you can use filtered or distilled water instead. If you have well water, the chemicals are most likely coming from your pipes. You can talk to someone at your local hardware store for more information about removing these chemicals from your house’s plumbing system if this is an issue you face.
You may find that even after fertilizing regularly with products made especially for houseplants, that they still start to show signs of yellowing leaves because of lack of nutrients – this is likely because you’ve been fertilizing every other week, but plants need supplemental food every week. If you find that this is the case, switch to fertilizing more often.
If your plant is losing moisture quickly, try using a humidifier or placing your plant on top of an inch-thick water-filled tray so the bottom sides of the leaves are touching – this will help increase humidity levels in your room.
You can also try moving your plant to a brighter place since bright light helps increase humidity levels.
If you have tried all of the above solutions and are still having issues with yellow leaves on your houseplants, then it might be time to talk to someone who knows about plants at a garden center nearby. If you’re not very familiar with gardening or plants in general, don’t worry about trying to diagnose what is wrong – it’s better not to guess and risk doing something that harms the plant.
Consider cleaning your household leaves and flowers to remove dust and other particles that can settle on the leaves and block sunlight. Regularly wiping your houseplants’ leaves with filtered or distilled water will also help remove any dirt or residue that might be clogging the pores in the leaves and causing yellowing – this is especially important if you’re using tap water because of its chemicals.
Other factors to consider
It’s also important to remember that sometimes leaves start to turn yellow simply because the plant is growing older – this is normal, and if it happens just once or twice then there probably isn’t anything to worry about.
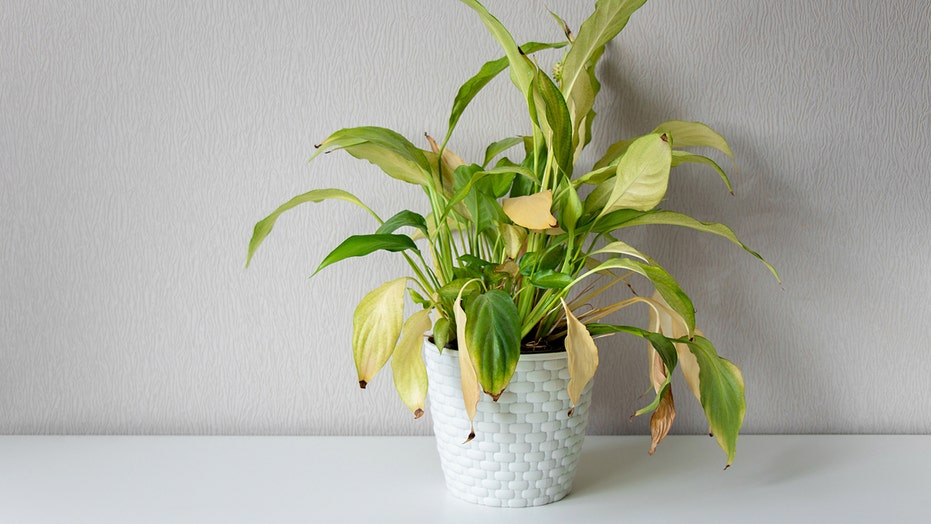
Image Credit: http://foxnews.com
But if your plant seems like it’s getting worse over time (the reason for yellow leaves might be different every time), you should take note of the changes. If multiple plants in your home are turning yellow at the same time, or you find areas on the leaves where they look brown instead of green, these could be signs that something more serious might be wrong with your plant(s).
If you’re concerned about any changes to your plants, now is a great time to do some research before reaching out to someone who knows about plants for help. The internet is a great resource for learning about the specific problems your plants might be having, and garden centers usually have experts on staff who can help you out as well. With a little detective work, you’ll be able to get to the bottom of the problem and solve it in no time.
Reasons For Yellow Leaves On Houseplants – FAQ
Why are my houseplants’ leaves turning yellow?
The most common reasons for yellow leaves on houseplants are overwatering and under-watering. Other causes can include pests, diseases, or nutritional deficiencies.
How can I prevent my houseplants’ leaves from turning yellow?
The best way to prevent your plants’ leaves from turning yellow is to water them properly. Make sure to water deeply but infrequently, and never allow the soil to become soggy. You can also fertilize your plants regularly with a balanced fertilizer, and keep them free of pests and diseases by using regular pest control measures.
Final thoughts on reasons for yellow leaves on houseplants
In conclusion, there are many reasons why your houseplants might be turning yellow. It could be a sign that they need more water, or that they’re getting too much sun. It might also mean that they’re being overfed, or that they have a nutrient deficiency. By pinpointing the cause of the problem, you can take steps to correct it and help your plants get back to their healthy green selves.
The post Reasons for Yellow Leaves on Houseplants appeared first on Kitchen Infinity.
Did you miss our previous article…
https://www.conduithardware.com/?p=931
Electrical Service Panel Basics Homeowners Should Know
Electrical service panels are an essential part of your home’s electrical wiring system. If you’ve ever wondered what is inside a service panel, how it works, and why it’s so important, then this article is for you. It explains the basics of your home’s electrical service panel so that you can better understand how to use it and stay safe. Read on!
What Is an Electrical Service Panel?
The electric service panel is the connection between internal wires coming from the street and the internal electrical wires of the home’s electrical system. The service panel is the central distribution point that connects the service wire to the exit wires.

These exit wires are called branch circuits or branch wire circuits. In single-family residences, the owner of the building owns the electric service panel and not the electric company.
In that case, the owner is responsible for all the electric service panel issues. As a homeowner, you might not realize how much damage can be done if this service isn’t installed or maintained properly.
Where to Find Electrical Service Panel
The home electrical panel is generally kept away from the main household activities. These locations include the garage, hallway leading to the garage, basement, and closet. You can also find your electrical panel by locating the service drop and service head on your roof.
Usually, the service panel should be directly below, in one of the home’s stories. If the power lines are buried, the line will start on the street and connect to the home from the front or side of the house.
Older houses using fuse boxes are placed in the outer part of the house, especially to a section of the wall or in a particular structure constructed to house the distribution box. In most modern households, the electrical service panel can be found near the electrical meter, which measures the electricity consumed every month.
Types of Electrical Service Panel Basics
Main Electrical Service Panel
The main electrical service panel is the connection point for all the electric lines entering the house. This is also where copper cables connect to fuses or circuit breakers that protect wiring in your home’s walls and circuits. This allows current to flow safely through fixtures, appliances, outlets, and light switches.

With the main electrical service panel, you can shut off the incoming utility power and receive incoming power from the utility company and distribute it to each branch circuit that supply various fixtures, outlets, appliances, and other devices throughout the house.
Electrical Service Panels are generally referred to as either main or sub-panels, depending on the circuit breaker size. The service panel that supplies electricity to your entire home is the main electrical service panel or main breaker box. Your home’s main electrical service panel should be installed by a trained professional because it must meet specific building codes and requirements. Professionals also know how to calculate electric load capacity for homes, hence ensuring safety.
Sub Panel
A sub-panel is a power distribution center with circuit breakers and incoming electrical service. This type of panel feeds electricity into a smaller area, such as an outbuilding or detached garage. A sub-panel can only be fed by a single incoming circuit from the closest main electrical service panel.
In other words, it cannot be fed by the main electrical service panel you have in your home. A new sub-panel must be installed and wired to the closest main electrical service panel if additional circuits are needed.
Circuit Breaker Panels and Fuse Boxes
When a circuit draws more current than it’s designed to handle, the wiring gets hot and poses a fire hazard. Excessive current in a circuit is prevented by overcurrent safety devices, which disconnects incoming power to individual circuits when necessary.
In most contemporary systems, these are called circuit breakers. A circuit breaker is a switch that may shut off manually or trip automatically by an electric system overload. Fuse boxes are designed to prevent circuit overload. Circuit breakers and fuses are the weakest links in each electrical circuit, designed to fail safely.
It’s important to know what to be aware of when ensuring the proper function of these electrical safety devices in your home.
Service Distribution Panel and Branch Circuits
A service panel is a major component in an electricity supply system. It distributes power from the utility service drop to the individual branch circuits that serve your electrical appliances and light fixtures. All branch circuits originate at the main electrical service panel or the service distribution panel.
The panels are equipped with some mechanical device for disconnecting the home’s electrical circuits from the incoming power if the electric system fails. An overload can cause failure due to excessive heat or even catching fire. Although the main breaker is used to turn all branch circuits on and off at the same time, there are times only one branch circuit to a certain area of the home needs attention.
The most important function of the service panel is safety, keeping you and your family members safe from electrical shock. Any electrical repair in your home involves turning off the power to the circuit to be worked on, and this is only done at the service distribution panel. Depending on when your home was built, your service distribution panel may be either a circuit breaker panel or a fuse box.
What Can Go Wrong with Panels and Breakers
Corrosion
If a branch circuit breaker fails to trip when current flow exceeds safe levels, it could be the result of electrical corrosion. Corrosion occurs when electricity flows through a metal conductor such as copper or aluminum and slowly erodes that metal away.
Corrosion can lead to loss of material and weaken the connection between wires, damaging the breakers and creating a fire hazard. Electrical service panels should be inspected regularly for signs of corrosion.
Overloaded Circuits or Panels
If a circuit is overloaded with too many appliances, the wiring will get hot and may even melt the insulation on the wire. This can damage or destroy a breaker. Most household circuits are rated either 15-amps or 20-amps. A 15-amp circuit breaker can only handle around 12-amps, while a 20-amps circuit breaker can handle about 16 amps.
When you connect too many appliances to the same circuit, the overcurrent safety will frequently trip or blow.
Outdated Fuse Boxes
Older homes may have outdated fuse boxes instead of circuit breakers. They do the job, but they are less reliable and more difficult to inspect for hazardous conditions. You should upgrade any old fuse boxes to a modern service panel with circuit breakers as soon as possible. These older systems have the potential to become unsafe if not well maintained.
FAQs on Electrical Panel Basics Homeowners should Know
What is an electrical panel called?
A distribution board, also known as panelboard, breaker panel, or electric panel, is a component of an electricity supply system containing many electric circuits.
Final Thought on Electrical Basics You Should Know
All wiring in your home should be in accordance with local building and electrical codes. Most homeowners only have the experience of opening the outer door of the electrical service panel to flip on a disabled circuit breaker.
Even if you’re a DIY master, always hire a qualified electrician to do any work, especially when it comes to any work that involves removing the protective front cover. While the cost of electrical projects can be high, especially if you hire an electrician, it’s always worth it in the long run. It’s better to be safe than sorry.
The post Electrical Service Panel Basics Homeowners Should Know appeared first on Kitchen Infinity.
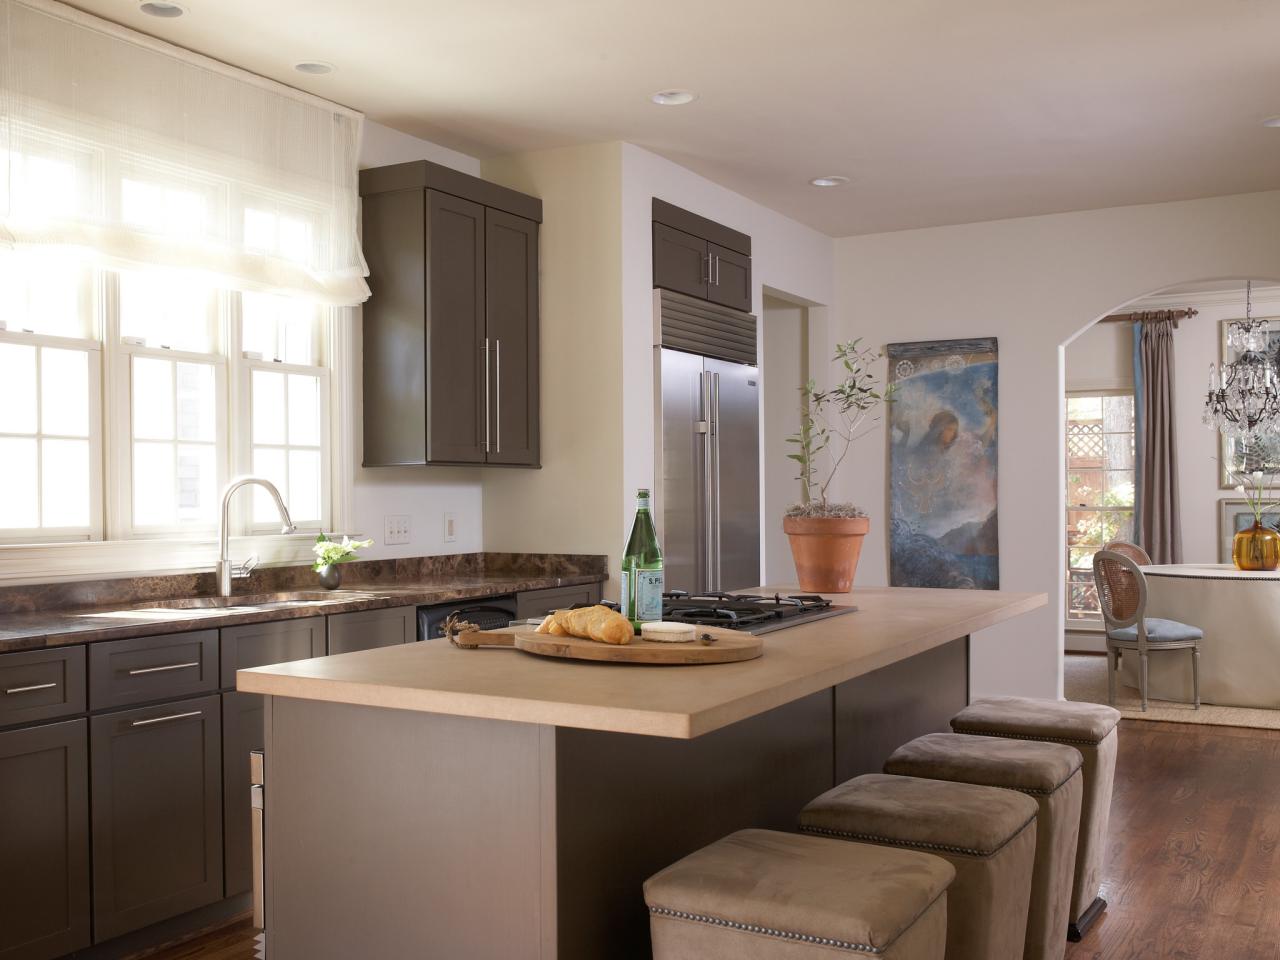
The Dos and Don’ts of Kitchen Color Schemes
Choosing colors for your kitchen is a big decision that can have lasting effects on the way you feel when spending time in this space. When choosing hues, it’s important to consider whether or not they’ll become boring after some time. If so, this could lead to an unpleasant experience and make it harder to enjoy cooking and eating in your kitchen.
To avoid making decisions that will cause regret, later on, follow these dos and don’ts when choosing paint colors for your kitchen. These tips will help ensure you love what you see every day. Read on!
The Dos of Kitchen Color Scheme
Take Expert Advice
When it comes to choosing a kitchen color scheme, it can be confusing. So, take advantage of the knowledge and experience that color professionals and designers possess. They’ll know about how colors work together and will be able to make recommendations based on your lifestyle, preferences and tastes.
Some color advisors will also help you with color selections, while others will work as interior designers or architects that provide color consultation as part of their services.
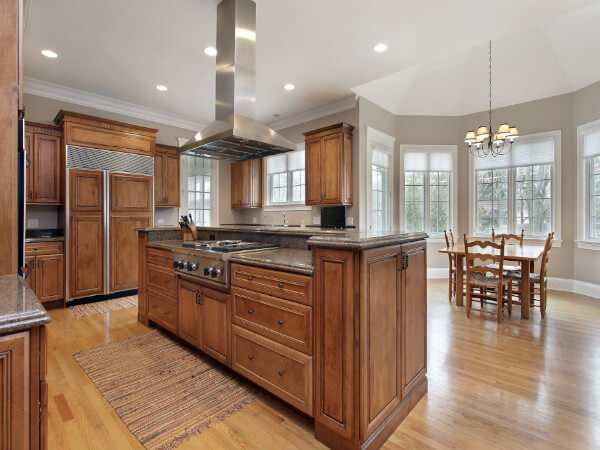
Consider the Lighting
Lighting is key when it comes to choosing kitchen color schemes. The more natural light you have in your kitchen, the more real the colors appear. If your kitchen is small and dark, consider a kitchen color scheme to make the area look bigger and more inviting.
You can paint your walls a dark tone, but only if your countertops and cabinets are not dark. Along with natural light, think about the artificial light in your kitchen. Colors tend to appear different depending on the light fixtures you use. Adding soft gold light fixtures can be enough color to add depth to your kitchen color scheme. So, whenever you think about coloring your kitchen, also consider choosing the right lighting for your kitchen.
Use Chalkboard Paint on the Kitchen Door or a Wall
A chalkboard makes a wonderful addition to any kitchen, whether it’s for keeping track of your grocery list or jotting down recipes as they come to mind. If your walls are dark, paint them with matte black Chalkboard Paint, and you won’t be able to miss them.
You can find a wide variety of chalkboard paint colors from most paint suppliers. It’s perfect for kids to scribble without damaging the walls and for adults to write lists and quotes or draw images while adding color. And if you’re not ready to commit to a wall of chalkboard paint color, a framed DIY chalkboard in your favorite color can also work.
Consider Cool vs. Warm Color Palettes
Most children learn about warm colors and cool colors during art class. Making up two halves of the color wheel, warm colors include reds, oranges and yellows, while cool colors include greens, blues and purples. These color groups tend to evoke different emotions.
So deciding on the emotions you want in your kitchen can help you decide on these color palettes to use. Warm colors evoke cozy, warm feelings in a room, especially with yellows and oranges. These colors can also be bold, dramatic or dynamic if you focus on reds.
On the other hand, cool colors are often associated with tranquility and refreshing emotions, especially with blues and greens. Another option other than sticking to one color palette is to contrast them. For example, you can make any yellow kitchen feel more grounded by adding a touch of a cooler color.
Watch Your Undertones
Understanding how to paint undertones will help you get the colors that work best for your kitchen. All colors, even neutrals, have a color undertone that adds gray, green and even pink to an otherwise neutral space. Learning about different undertones can help you decide what colors go together in your kitchen color scheme.
Look Carefully What’s in the Kitchen
You should take a close look at what’s already in your kitchen. This can help you decide which colors go together and which ones clash. Compared to other rooms in the house, kitchens have more things that you need to consider when choosing a color scheme.
Your countertops, cabinets and appliances all bring their colors and hues to the kitchen. These items may clash with whatever paint colors you pick. Decide whether part of your kitchen remodeling plans include repainting cabinets or putting in a new countertop.
If that’s not part of your plan, you’ll have to work around the existing colors. The kitchen floor also adds color to the space, which you’ll have to work with if new flooring isn’t in your plan. Think about how different wall colors will look contrasted against different colors of hardwood, tile or linoleum floors. If your floor pattern contains multiple colors, consider tying in one of those colors when choosing a kitchen color scheme.
Don’ts of Kitchen Color Scheme
Don’t Hesitate to Use Gray Wall Colors in Your Kitchen
Gray is a pretty neutral color, so that it will go with almost any other color in your kitchen. It’s also a great backdrop for artwork, light fixtures and shelves that you might hang above the cabinets or counters. These qualities make gray one of the best colors for the kitchen.
Don’t Overdo it With the Color
It’s easy to get carried away and paint every wall in your kitchen a different color, but this can be overwhelming. Mixing colors well is harder than you might think. Instead of going hog wild with several bright colors, stick to one or two that you like and try pairing them up with neutral shades.
Adding too many colors might also make the space appear cluttered and disorganized. A basic rule of thumb is to use three colors. These include primary color, neutral color and secondary color.
Don’t Forget About Connecting Areas
Don’t forget about adjoining rooms in your kitchen color scheme. An accent wall can provide more color to an open dining hall or a living area. By dividing a few of the room’s colors across the surrounding spaces, you may connect the color scheme. Also, consider the rest of your home.
If you want to go with a modern kitchen design but your property is older, add a few key features for the sake of consistency. And to avoid inconsistencies in the house, keep the color schemes of the room similar. In this case, adding a feature wall in the kitchen is a terrific approach to experiment with color.
Don’t Ignore the Undertones
Paint colors are usually made by combining two separate tones of paint, so when looking at a paint color, you’re looking at two different colors together. One is the primary color or mass tone, and the other is the color that achieves that specific tone.
Since your kitchen has a lot of cool elements, choosing a warm undertone, even if the overall tone is cool, will look odd. Comparing the shade of paint with the pure tone of the same color is the greatest approach to choosing the perfect color for your kitchen. Comparing your shade to the pure shade will help you see the undertone more clearly and decide whether it will look right in your space.
FAQs on the Dos and Don’ts of Kitchen Color Schemes
What colors make the kitchen look bigger?
White or light colors reflect light, making spaces look bigger and brighter. In contrast, darker colors absorb light, making a room feel smaller and cozier.
Final Thought on the Dos and Don’ts of Kitchen Color Schemes
Creating a flowing kitchen color scheme might seem like a daunting task at first. But with time, patience, and a little warmth, you’ll find yourself with the perfect kitchen color scheme within no time.
The post The Dos and Don’ts of Kitchen Color Schemes appeared first on Kitchen Infinity.
Did you miss our previous article…
https://www.conduithardware.com/?p=924
9 Best Quiet Bathroom Exhaust Fans
Bathroom moisture and odors can lead to a variety of problems, including slippery floors, damp towels, and unhealthy fungi. Fortunately, installing an exhaust fan in your bathroom is an easy way to keep these problems at bay. Exhaust fans remove moist air from the room so that it doesn’t get trapped inside where it can damage over time.
However, you’ll want to choose the right type of fan for your space before making a purchase. The right type of exhaust fan will also reduce unpleasant odors and allergens like pollen and pet dander without causing any damage to nearby surfaces or leaving behind harmful residue after use.
Here are the quietest bathroom exhaust fans that stand up to the challenge.
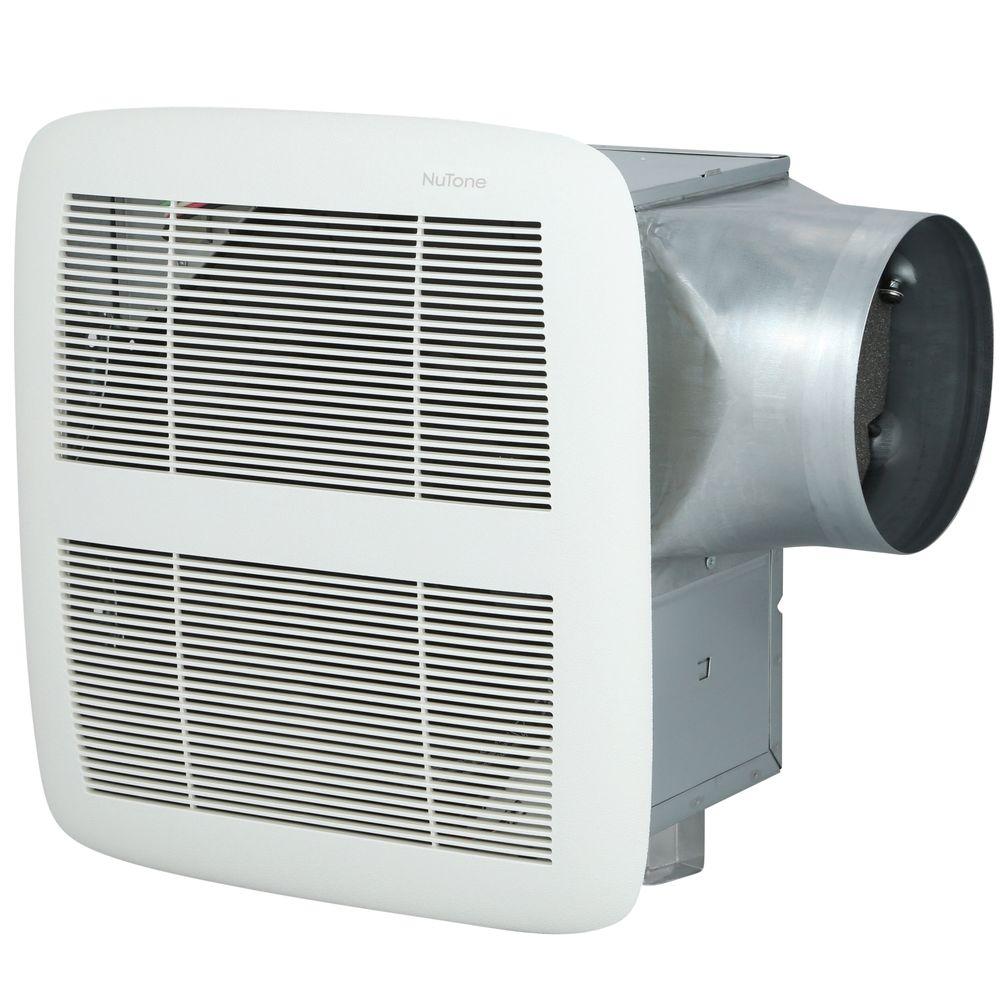
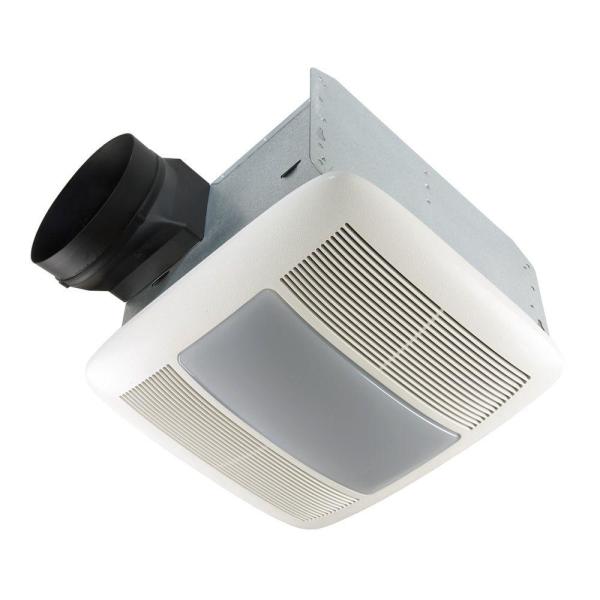
1. Panasonic Whisper Fit EZ Retrofit Fan
This is the quietest bathroom fan for those who want a simple and affordable solution to keep the air in their bathroom cleaner, fresher, and free from odors. The Panasonic Whisper Fit EZ Retrofit Fan is perfect for those who want a home improvement project that won’t draw too much attention because it doesn’t look like it came straight out of a science fiction movie.

This is an incredibly powerful bath fan with a noise rating of fewer than 0.3 sones. This makes it an ultra-quiet bathroom fan with the LED light in the market that you can’t pass by if you’re shopping for the quietest bathroom exhaust fan. This fan is also low profile and comfortably fits a ceiling space or wall.
It’s an affordable choice for delivering quiet, energy-efficient, and effective exhaust ventilation. If you’re doing residential remodeling, hotel construction, or renovations, then this is a perfect choice. Unlike other quiet exhaust fans with plastic blades, this Panasonic product uses galvanized steel blades.
If you’re also looking for a fan that can keep medium to large bathrooms dry without being a noisy nuisance, this is the right choice.
Pros
- Ultra silent at less than 0.3 sone
- Energy-efficient and durable design
- Powerful enough to quickly move air and keep the bathroom dry
- It’s among the quietest choices in the market
- Easy to install in 4 or 6-inch ducts
Cons
- It’s one of the expensive options in the market
- Some LED bulbs won’t fit
- Used for 4-inch or 6-inch, so if you have a 3-inch, you’ll need an adapter
2. Broan Very Quiet Bath Fan
The Broan Very Quiet Bath Fan is for bathrooms up to 75 square feet, which is large enough for the average bathroom. This model is more than half the cost of the most expensive Panasonic fan, allowing you to save a considerable sum of money.
It comes with True seal damper technology to reduce air leakage by 50 percent compared to similar models. In addition to being quiet and effective, installing this bathroom fan is easy, thanks to its hanger bars for wall placements. It’s also energy-efficient and durable, ensuring you can use the fan for long periods without worrying about power bills or the system wearing out.
Plus, the plastic body of this fan can blend in and even complement the aesthetics of most bathrooms. It’s also a top choice if you’re looking for a quiet fan that delivers clean air and is super easy to install. The unit is HVI certified and energy star qualified. The manufacturer also recommends that it’s used for bathrooms in 75 to 80 square feet.
Pros
- It doesn’t require lots of space or special tools for installation
- It’s one of the quietest bathroom fans
- Energy-efficient design
- Effectively dries and ventilates bathrooms
- Hanger bar system included
- Certified for use over the bathtub
Cons
- Difficult to install in existing rooms
- Requires professional wiring
3. Broan NuTone Quiet Ceiling Fan
We all know that bathrooms can get steamy and wet, making them ideal for mold, mildew, and bacteria. The Broan NuTone makes it easy to remove moist air from your bathroom while reducing odors with its powerful circulation system.
There is no need for an additional ductwork connection. You install this ultra-quiet fan between the joists in your ceiling. The quiet operation of this bathroom exhaust fan makes it ideal for sleeping areas, while its Energy Star efficiency saves money on your energy bills.
This model keeps the bathroom at a comfortable temperature and helps to minimize moisture and fogging. It also comes with a light for added convenience. This fan is suitable for 105 square feet bathrooms. Thanks to the 6-inch hose connector and the anti-vibration mounting, it also comes with easy installation.
Pros
- It comes with integrated light
- Perfect for medium size bathrooms
- The integrated heater helps combat moisture and fogging
Cons
- Very expensive
- Not as energy-efficient
4. BV Ultra Quiet Bathroom Exhaust Fan
BV Ultra Quiet Bathroom Exhaust Fan is known for its quiet operation. And since it’s also Energy Star efficient, you’ll have the best of both worlds when it comes to this bathroom fan. This model can be used in rooms up to 90 square feet. The humidity sensor helps limit condensation and fogging when the bathroom gets steamy.
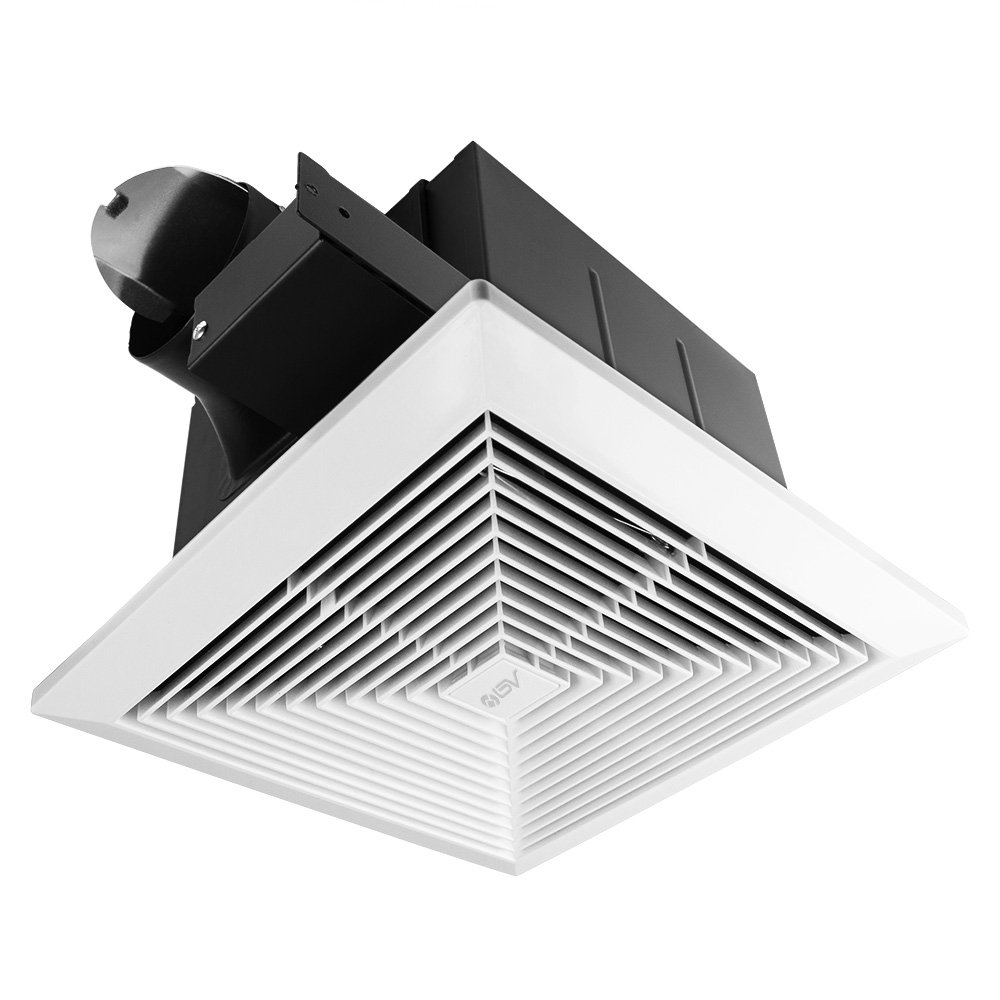
It’s made of a stainless steel body, making it durable. It also has a silent clever technology which makes it a whisper quiet bathroom exhaust fan such that it can be challenging to know if it’s on. Its heavy-duty motor fan is suitable for continuous use, especially if you have a busy bathroom that requires it to be on often.
The fan also comes with an adjustable bracket, making it easy to install. The unit comes with a one-year limited product warranty with technical support service.
Pros
- Quiet operation
- Stainless steel body
- One year limited warranty
- Adjustable bracket for installation
Cons
- It may be difficult to install
- Complains of unexpected loudness
5. Delta Breez Near Silent Vent Fan
Delta Breez Near Silent Vent fan is an excellent choice for a bathroom exhaust fan that can be used without worrying about it being too loud. The fan comes with a multi-functional control switch, allowing the user to have full control of its operation. The unit is completely portable and requires no ductwork at all.
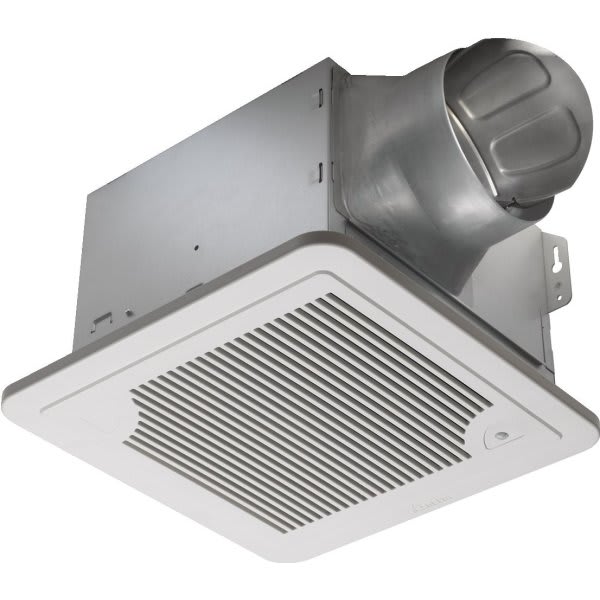
This bathroom fan has an indicator light to know if it’s on because at 0.6 sones, it may be difficult to know. The motor is a DC brushless type which will probably outlast many other appliances.
Other features boosting this fan’s effectiveness and convenience are its 6-inch duct and motion sensor. The 6-inch duct enables the fan to extract bad air and bring in fresh air faster while the motion sensor automatically turns on the fan when a person walks in.
It also has a humidity sensor that triggers the fan once the humidity level in your bathroom passes a certain level. On the downside, this is the most expensive bathroom exhaust fan. It’s also the least efficient, making it pricey to use. On the other hand, if you need a fan that’s powerful enough to serve a large or commercial bathroom, then this is a great choice.
Pros
- Capable of moving a large amount of air
- Super quiet performance
- Durable build
- It comes with humidity and motion sensor
Cons
- Highly expensive
- Less efficient than other bathroom fan options
6. Akicon Ultra Quiet Ceiling Exhaust Bathroom Fan
This is a more standard bathroom ventilation fan from Akicon. It comes with noiseless technology that helps it be ultra quiet. The exhaust fan has a powerful motor that works to remove moisture and odors from your bathroom. It’s rated the most efficient of all the bathroom fans on this list, making it a great choice for busy bathrooms.
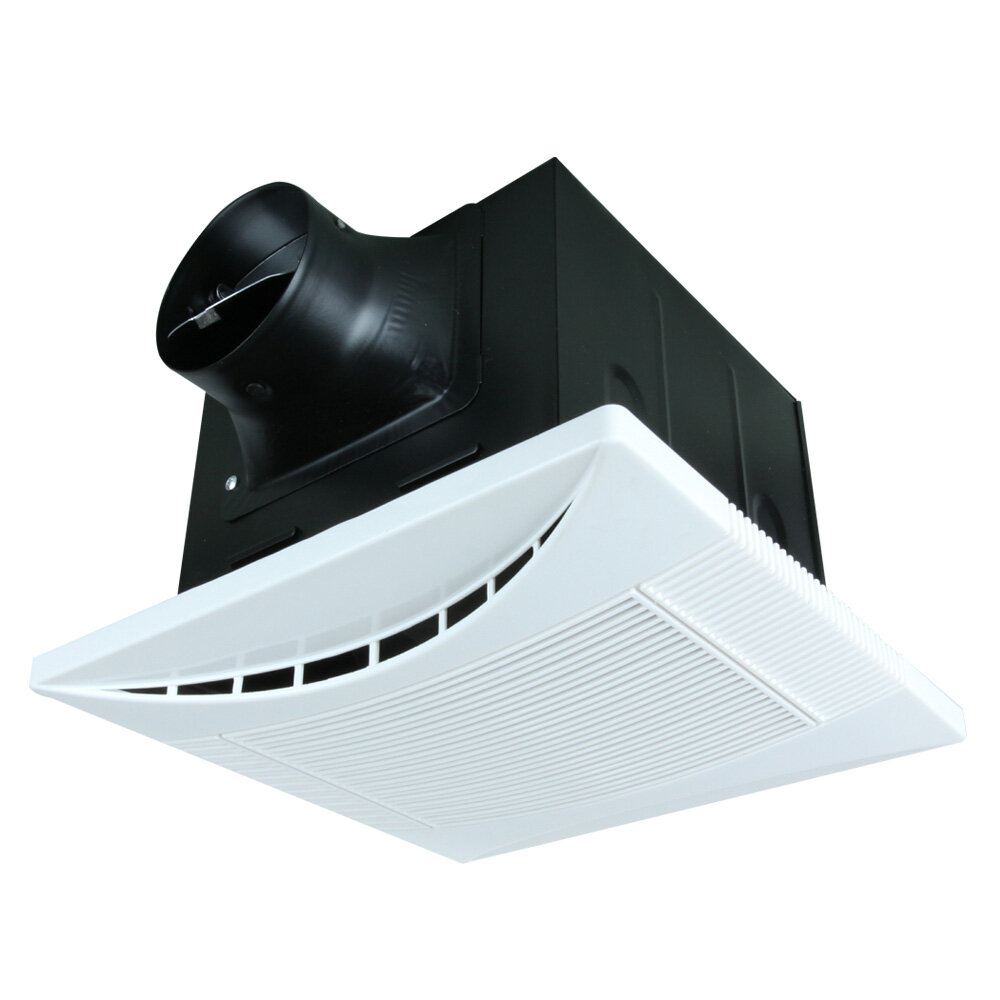
This fan is suitable for bathrooms with a 4-inch duct connection, and you may need the help of a professional to install it. This is a budget-friendly fan that excels at being quiet, but it’s most effective at keeping smaller spaces dry well and ventilated.
Pros
- Long-life ball bearing motor
- Affordable price
- Quiet performance
- Energy star certified for energy efficiency
Cons
- Not suitable for larger bathrooms
- Requires professional installation
7. Kaze Appliance Ultra Quiet Bathroom Exhaust Ventilation Fan Ventilator
The Kaze is a top-rated bathroom fan for less noise and low energy use. The motor is ultra-quiet, making it an excellent option for bathrooms that need to be especially quiet. This unit has a bright LED light with a night light that is easy on the eyes and perfect if you want to avoid turning on overhead lighting. It is also Energy Star certified for energy efficiency and uses only 1.0 watts on the lowest setting.
Apart from being quiet and effective, this fan features high-quality components, including a galvanized steel body and blades. It also features a permanently lubricated motor that keeps the fan running smoothly over long periods. Because of its double hanger mounting bars, installing this fan is easy.
The duct connection also has a backdraft damper that keeps foul air out without stopping the inflow of fresh air. This fan is energy star certified for its energy efficiency, meaning you’ll have fewer worries about your electricity bills.
Pros
- Reasonably priced
- Durable design
- Quiet performance
- It comes with a 3-year parts warranty
Cons
- The size of the fan’s housing may require resizing your existing ceiling opening
8. Hauslane Ultra Quiet Electric Bathroom Exhaust Fan
Hauslane Ultra Quiet Electric Bathroom Exhaust Fan manufacturers offer a free product warranty for this fan, so you know the manufacturer is confident about its durability. The extra uses suction to remove stale air and smells from your bathroom and is crafted from the highest quality materials.
It’s recommended for spaces up to 120 square feet. This exhaust fan is durable stainless steel housing and comes certified by both UL and ETL. This fan also comes with a double hanger bar system for ideal positioning and standard housing to fit most ceiling joists.
DIY installation also becomes easier, thanks to its 4-inch vent connector. A one-year warranty also backs it.
Pros
- Durable stainless steel housing
- Bright LED light panel
- One year warranty
- Impressive quiet operation
Cons
- Unclear instructions in the user guide
9. Win Air Ultra Quiet Bathroom Vent Fan
Win Air Ultra Quiet Bathroom Vent Fan is a powerful and quiet exhaust fan perfect for small to medium-sized bathrooms. Thanks to its simple design, it has a 1/2 HP motor and can be installed in less than an hour.
The white grill matches virtually any bathroom decor, and the unit is pretty simple to install. It’s also designed to be installed with a 4-inch duct.
Pros
- 0.3 sone rating
- Rated for small to standard bathrooms
- Decent price
Cons
- It May get louder with usage
- Not a name brand
How to Pick the Best Quiet Bathroom Exhaust Fan
Sones
One sone of noise is the equivalent to the sound of a quiet refrigerator. The lower the sone rating, the more silent it will be. Sone is a unit of measurement that indicates how much noise a fan produces. Some fans have ratings as high as four sones, but anything higher than one sone isn’t a quiet bathroom exhaust fan.
Cubic Feet Per Minute
This CFM rating tells you how much air your fan can move when it’s on. For example, if the description says this bathroom exhaust fan has an intake of 100 CFM and blows out 106, then theoretically, it will take in 100 cubic feet of fresh air per minute and blow out 106 cubic feet of exhaust air.
Energy Efficiency
Energy-efficient fans will cost more than regular fans, but you could save money by buying one because they don’t use as much electricity. Electronic energy-efficient fans are also quieter because they have a built-in inverter that regulates the speed of the fan, allowing it to run at different speeds depending on how much power is needed for optimal performance.
Price
Exhaust fans are available at a wide range of prices, just like any other product, so what you pay is what you get. Cheaper fans have a lower CFM and less durable components, while pricier ones have more features and last longer.
Instead of settling for the cheapest or most expensive product on the market, opt for ones whose features meet your needs without exceeding your budget.
Ease of Installation
How easy is it to install an exhaust fan? Just like most other products in the market, they come with an installation manual so you can follow the instructions and do the job on your own or contact a professional regarding any questions or concerns you might have.
FAQs on Best Quiet Bathroom Exhaust Fans
How do you choose a quiet bathroom exhaust fan?
This depends on your budget, desired features, and location to mount the unit. Some are easier to install than others, which also affects your choice.
How much noise do bathroom exhaust fans make?
Bathroom exhaust fans are designed to be quiet, but they could still produce some noise depending on their capacity, power source, and location.
Final Thought on the Best Quiet Bathroom Exhaust Fans
Picking out appliances like a bathroom exhaust fan can be a daunting task. However, if you follow the guide above, it would be easier to choose a bathroom exhaust fan that is best for your needs.
The post 9 Best Quiet Bathroom Exhaust Fans appeared first on Kitchen Infinity.
Did you miss our previous article…
https://www.conduithardware.com/?p=916
How to Grow an Amazing Flower Garden
To have an amazing, vibrant garden full of flowers that are in bloom all year round, there are many things to take into consideration. It is important not only to know what type of plants and flowers you want but also where they should be planted, the conditions needed for their survival, and protection from pests or other problems.
This article will help walk you through each step so that your flower garden can be the envy of everyone else’s. Keep reading to learn more.
Image Credit: http://gardendesign.com
How to grow an amazing flower garden
1. Make sure your soil is healthy
One of the most important things to consider when planting flowers is the quality of the soil. All plants need some type of nutrients to grow and thrive, and the soil provides these essentials.
If your soil is poor or has a lot of clay in it, you will need to add organic matter such as compost, peat moss, or manure to make it more hospitable for plant growth. You can also purchase fertilizer specifically designed for flower gardens, which will provide everything your plants need.
2. Choose the right type of flowers for your garden
Not all plants are suited for every climate or growing condition. Some flowers thrive in full sun while doing better in partial shade. Some like to grow in rocky, sandy, or clay soil while others prefer rich, moist dirt. Before you start planting your garden, choose some plants that are appropriate for your area of the country so they can get all of the nutrients they need to survive.
The best evergreen plants to grow in a flower garden are:
- Morning glory (Ipomoea purpurea) – A vigorous vine that is easy to grow and produces lovely trumpet-shaped flowers in shades of blue, purple, pink, or white. It blooms all summer long and can be grown as a climbing plant or trained to grow on a trellis.
- Confederate Jasmine (Trachelospermum jasminoides) – This vine produces clusters of fragrant white flowers that bloom all summer long. It grows best in full sun or partial shade and can be used to cover an ugly fence or wall.
- Trumpet Creeper (Campsis radicans) – This fast-growing vine is covered with large, trumpet-shaped flowers in shades of red, orange, or yellow in the summer. It thrives in full sun but can grow in partial shade as well. It needs a structure to climb on and will need regular pruning to look its best.
The best shade-loving plants to grow in a flower garden are:
- Coral Bells (Heuchera spp.) – This easy-to-grow perennial produces pretty blooms and is an excellent choice if you want to color in your shade garden. It blooms in spring and fall with shades of red, pink, white, or coral and will tolerate just about any soil type.
- Jacob’s Ladder (Polemonium caeruleum) – A delicate, foliage plant with beautiful bell-shaped flowers that come in shades of blue, purple, or sometimes even pink. It tolerates partial sun but prefers shade and moist soil where the roots can spread out.
3. Planting flowers in a pattern can create an amazing design
There are many ways to plant flowers in patterns and designs so that you get beautiful results without having to try too hard. You can line plants up along paths or sidewalks with different colors of blooms at each end for a simple but impressive decoration. If your garden is on slopes, you might want diagonal rows following the hill instead of side-by-side lines. These kinds of flower gardens will add interest to any outdoor setting.
4. Mulch around plants to keep them healthy and prevent weeds from growing
Mulching is the process of adding a layer of organic or inorganic material around plants to protect their roots, retain moisture and suppress weed growth. It is especially important to mulch around newly planted flowers until they are well established. You can use shredded bark, straw, leaves, grass clippings, or any number of other materials for mulching.
5. Add some water into the ground to help with plant growth, but don’t over-water.
Container gardens need more frequent watering than those planted in the ground since the soil in containers dries out more quickly. But be careful not to overwater, as this can cause root rot and kill your plants.
TIP: One of the best ways to water flowers in a container is to water from below by setting the flower pot in a larger container filled with water. This way, the roots won’t sit in soggy soil which can also cause them harm.
6. Design your garden around something special
If there’s a favourite place you’d like to highlight or a particular view that you want to enjoy while tending your garden, think about how you can bridge it into your design so that it becomes an integral part of the overall look. Flower gardens work well when they are set near benches or loungers where people can relax among nature and admire their hard work.

Image Credit: http://gardendesign.com
Other factors to consider
When designing a flower garden, there are a few other factors to take into account, such as:
- The amount of sunlight the area gets – Flowers need at least 6 hours of sunlight per day to grow and bloom properly.
- The soil type – Not all flowers do well in all types of soil. Make sure to check the requirements of the plants you choose.
- Drainage – Poor drainage can kill plants quickly, so make sure your flower garden has good drainage before planting.
All of this information can help you create a beautiful and unique flower garden that will be enjoyed for years to come. With a little bit of planning and some thoughtful design, you can have the garden of your dreams.
How To Grow An Amazing Flower Garden – FAQ
What type of soil should I use to garden with flowers?
Good-quality topsoil is always a great option when planting any kind of flower. If you don’t have access to topsoil, you can also create your mix by combining equal parts of compost, sand, and clay.
What are some good flowers to start a garden with?
There are a lot of different flowers that can be planted in a garden, but some of the most popular varieties include roses, lilies, sunflowers, and daisies. Be sure to choose flowers that are suited for your climate and growing conditions.
How often should I water my flower garden?
It’s important to keep your flower garden well-watered, but you don’t need to water it every day. A good rule of thumb is to water your plants when the top inch of soil feels dry to the touch.
What should I do if I see pests or diseases in my flower garden?
If you notice any pests or diseases affecting your flowers, take action immediately to get rid of them. You can usually treat pests and diseases with organic or chemical pesticides, or by using natural methods such as soap spray or garlic oil.
Final thoughts on how to grow an amazing flower garden
In conclusion, there is so much more that goes into a flower garden than just planting seeds and watching the flowers grow. Even if you have green fingers, there’s still some planning and preparation involved to get those beautiful blooms that we yearn for. Remember that each plant has specific needs, whether it be water or sunlight, and provide them with what they need.
The post How to Grow an Amazing Flower Garden appeared first on Kitchen Infinity.
Did you miss our previous article…
https://www.conduithardware.com/?p=912
10 Best Oven Cleaners of 2022
If you’re a baker, you already know how annoying baked messes can be. Not only do they make your kitchen look cluttered, but they can also be difficult to clean. This is especially true if you have a built-in oven.
Luckily, there are a few oven cleaners on the market today that can help make this process a lot easier. In this article, we’ll be discussing the best oven cleaners of 2022. But before that, let’s have a look at some of the things you need to look for when buying an even cleaner.
What to Consider When Buying an Oven Cleaner
Intended Use
Most oven cleaners are designed to be used on a variety of oven surfaces. However, some might require you to perform a spot check first before applying it. This is especially true for products that aren’t particularly friendly with the environment.
Brand Reputation
When choosing an oven cleaner, try to pick one from a reputable brand. Sure, getting a cheaper product might seem like a good idea, but in the long run, you’ll only be disappointed with the results.
Ease of Use
Some oven cleaners can be a bit difficult to use. If you’re not particularly handy, it’s best to choose easy to apply. Also, consider a cleaning solution that can work on spot cleaning.
Formulation
The formulation of an oven cleaner can affect its effectiveness. If you want to get the best results, it’s important to use a non-toxic and eco-friendly product.
With all of this in mind, let’s take a look at some of the best oven cleaners on the market today:
1. Fume-Free Oven Cleaner
If you’re looking for an environmentally friendly oven cleaner, the Fume-Free Oven Cleaner is a great option. This product is made with biodegradable ingredients so that it won’t harm your skin or the environment. It also comes with a non-toxic formulation, making it safe to use around your home.
The Fume-Free Oven Cleaner is also easy to use. All you have to do is spray it on the desired oven surface and let it sit for a few minutes. After that, you can easily wipe it away with a cloth or sponge.
Pros
- -Environmentally friendly
- -Non-toxic
- -Easy to use
Cons
- -May not be as effective on tough stains
- -Can leave a residue behind if not rinsed off properly
Overall, the Fume-Free Oven Cleaner is a great choice for those who want an environmentally friendly and non-toxic oven cleaner.
2. Astonish Oven Cleaner 128 Ounce
If you’re looking for a powerful oven cleaner, the Astonish Oven Cleaner is a great option. This product comes with a 128-ounce bottle, so it’s perfect for those who have a large oven to clean.
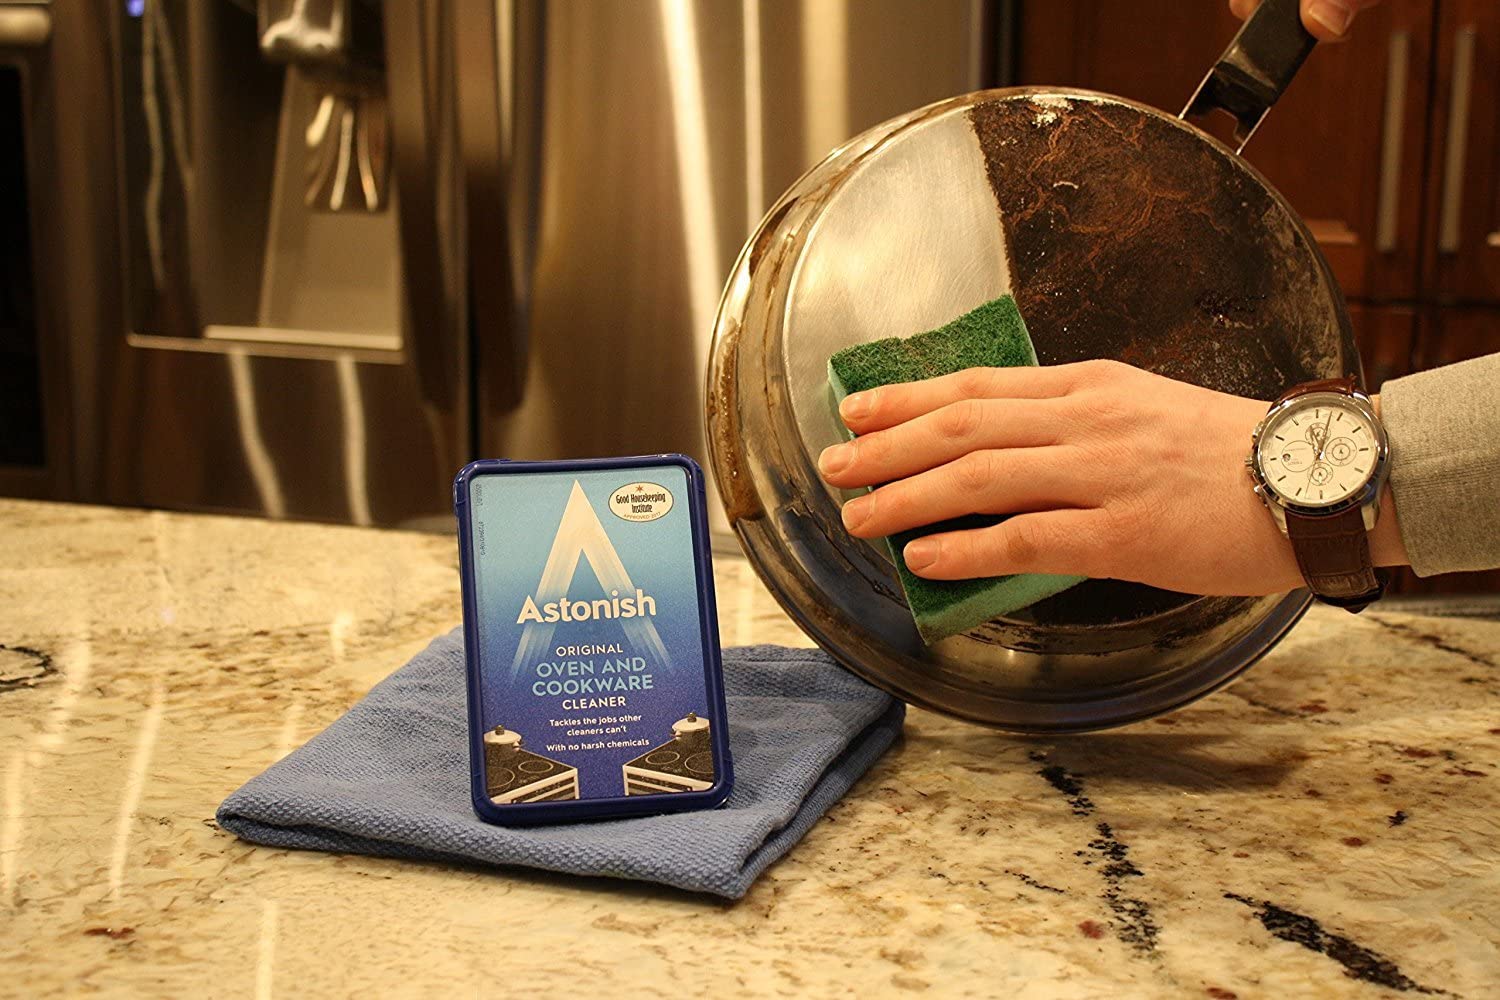
The Astonish Oven Cleaner is also easy to use. All you have to do is spray it on the desired surface and then let it sit for a few minutes. After that, wipe it off with a damp cloth or sponge and your oven will be sparkling clean.
Pros
- Large 128-ounce bottle
- Easy to use
Cons
- Can leave some residue behind if not rinsed off properly
The Astonish Oven Cleaner is a great option for those who want a powerful oven cleaner with an easy-to-use formulation.
3. Trisodium Phosphate Cleaner, 56 Ounce
If you’re looking for something eco-friendly, then the Trisodium Phosphate Cleaner is perfect for you. This product does not contain harsh chemicals or additives that can harm the environment or your skin.
This Trisodium Phosphate Cleaner also works great on ovens and grills so that you can use it on a wide variety of surfaces. All you have to do is spray the desired oven’s interior surface with the product, wait for it to sit for a few minutes, then rub away with a damp cloth or sponge.
Pros
- Eco-friendly
- Works great on ovens and grills
- Safe to use around your home
Cons
- It may not be as effective on tough stains
- Can leave a residue behind if not rinsed off properly
The Trisodium Phosphate Cleaner is a great choice for those who want an eco-friendly oven cleaner.
4. Oven & Grill Cleaner, Non-Toxic, Biodegradable
If you’re looking for a non-toxic and biodegradable oven cleaner, then the Oven & Grill Cleaner is a great option. This product is made with all-natural ingredients, so it’s safe to use around your home.
The Oven & Grill Cleaner is also easy to use. All you have to do is spray it on the desired surface and then let it sit for a few minutes. After that, wipe it off with a damp cloth or sponge.
Pros
- Non-toxic
- Biodegradable
- Easily applied
Cons
- You must protect your skin
The Oven & Grill Cleaner is a great choice for those who want an environmentally friendly oven cleaner.
5. Magic Eraser Extra Durable Scraber
This is another great oven cleaner from Mr. Cleaner. This product comes with an extra-durable scrubber, so it’s perfect for those tough, baked on food.
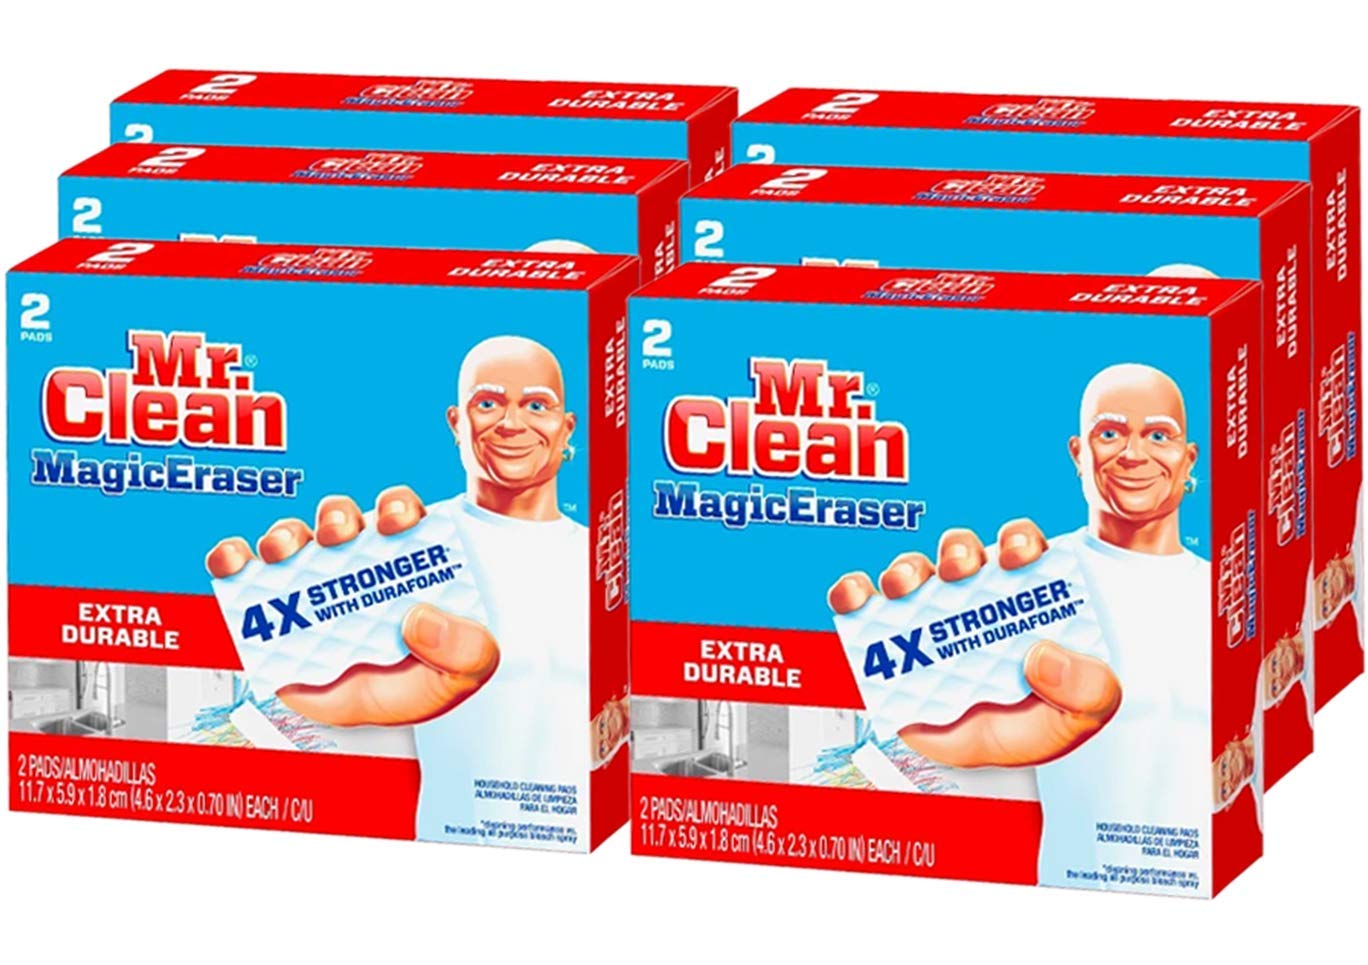
The Magic Eraser Extra Durable Scrubber is also easy to use. All you have to do is wet the scrubber and then rub it against the desired oven’s interior surface. After that, just rinse it off or wipe it away.
Pros
- Extra durable scrubber
- Easily applied
Cons
- Ensure extra scrubbing
The Magic Eraser Extra Durable Scrubber is a great choice for those who want an easy-to-use oven cleaner with a durable scrubber. It works great on all oven surfaces including the oven door.
6. Goo Gone Oven and Grill Cleaner
The Goo Gone Oven and Grill Cleaner is a great choice for stubborn baked-on grease. This product comes with a spray bottle, so it’s easy to apply. The Goo Gone Oven and Grill Cleaner are also non-toxic and biodegradable. Plus, it’s safe to use around your home.
All you have to do is spray the desired surface generously with the Goo Gone Oven and Grill Cleaner, let it sit for a few minutes, then wipe away.
Pros
- Effective on removing tough stains
- Non-toxic
- Biodegradable
- Non-abrasive and surface clean
Cons
- It comes in a small bottle
7. ARM & HAMMER Pure Baking Soda
Baking soda is a great natural cleaner that you can use on various surfaces. If you’re looking for an all-purpose oven cleaner, then the ARM & HAMMER PURE BAKING SODA is a great option. This product comes in a 4-pound bag, so it’s perfect for those who want to save money and buy in bulk.
The ARM & HAMMER PURE BAKING SODA is also very easy to apply. All you have to do is sprinkle the desired amount on the surface, let it sit for a few minutes, then wipe away.
Pros
- It comes in a large bag
- Natural cleaner
- Easy to apply
- Preserves the polish and finish of ovens
Cons
- The packaging is too bulky
The ARM & HAMMER PURE BAKING SODA is a great choice for those who want an all-purpose oven cleaner.
8. Magic Stainless Steel Cleaner Aerosol
If you have a stainless steel oven, then the MAGIC STAINLESS STEEL CLEANER AEROSOL is a great choice. This product comes in a spray can, so it’s easy to apply. Plus, it’s made with all-natural ingredients and essential oils, so it’s safe to use around your home.
To use this product, all you have to do is spray it directly on the desired surface and then let it sit for a few minutes. After that, just wipe it away with a damp cloth or sponge.
Pros
- All-natural ingredients
- Easy to apply
- Best for aluminum and chrome surfaces
- Adds a protective coat after cleaning
Cons
- Non-abrasive; hence not good on tough stains
- Leaves strikes
9. Oven Pride Complete Oven Cleaning Kit
The Oven Pride Complete Oven Cleaning Kit is one of the best commercial oven cleaners on the market. Not only does it come with everything you need to clean your oven, but it’s also very effective at removing tough stains.
This product comes with a scrubbing pad, chemical cleaner, and degreaser. So all you have to do is follow the included directions to clean your oven. The product also comes with a money-back guarantee, so you can be sure that you’re making a smart purchase.
Pros
- It comes with everything you need
- Features a clean-up bag
- Chemical-free product
- Very effective at removing tough stains
- Money-back guarantee
Cons
- Follow the included directions carefully
- Don’t use in cast iron surfaces
The Oven Pride Complete Oven Cleaning Kit is a great choice for those who want an easy-to-use oven cleaner that’s effective at removing tough stains.
10. Elbow Grease All Purpose Degreaser
For those who want an oven cleaner that’s made with natural ingredients, the Elbow Grease All-Purpose Degreaser is a great choice. This product comes in a 16-ounce jar, so it’s perfect for resale or home use. Plus, it can be used on multiple surfaces–not just your oven!
To apply the Elbow Grease All-Purpose Degreaser, all you have to do is squirt it directly on the desired surface. Then, let it sit for a few minutes before wiping it away with a damp cloth or sponge.
Pros
- Natural ingredients
- It can be used on multiple surfaces
- Easy to apply
- Safe for cooking surfaces
- Works well on grease stains
Cons
- Must be diluted before use (according to the instructions)
The Elbow Grease All-Purpose Degreaser is a great choice for those who want an oven cleaner that can be used on multiple surfaces. Plus, it has natural ingredients, so it’s safe to use around your home and even near food.
FAQs on Best Oven Cleaners
What’s the best oven cleaner?
The right oven cleaner is the one that fits your specific needs. It all narrows down to what you’re looking for in your oven cleaner. Do you want something that can remove tough stains or a chemical-free cleaner? You must consider these when buying one.
How often should you clean your oven?
It all depends on how often you use your oven. If you aren’t using it that much, go for at least once a month cleaning. If you’re using it regularly, more than twice a month, consider biweekly cleaning of the oven.
How do I get rid of the odor in my oven?
You can use charcoal to get rid of odor in your oven. Just fill up an aluminum pan with the charcoal, place it inside your oven, close the oven door, and wait for a few hours. The accumulated heat from the activated charcoal will get rid of bad odors. Afterward, you can remove the pan and let everything cool down before using your oven again.
Our Verdict on Best Oven Cleaners
Buying the best oven cleaner in 2022 boils down to what you’re looking for in an oven cleaner. Do you want something easy to apply with natural ingredients or a heavy duty oven cleaner that can remove tough stains? Whichever one you choose, be sure to read the instructions carefully before use.
The post 10 Best Oven Cleaners of 2022 appeared first on Kitchen Infinity.
Did you miss our previous article…
https://www.conduithardware.com/?p=907
How To Grow Black Lace Elderberry
If you are looking for a beautiful and unique ornamental plant, black lace elderberry is an excellent choice. It has dark purple foliage and blackberries, making for a dramatic landscape focal point during the growing season. This beautiful shrub goes by many names, including black lace, elderberry, common elderberry, black elder, European elderberry, Judas tree, and blue or black elderberry.
This versatile plant provides year-round beauty without much effort on your part. Whether you’re looking for a new ornamental shrub or simply want fresh fruit at your fingertips, this variety of Sambucus canadensis is sure to please. In this article, we’ll talk about everything you need to know about growing black lace elderberry.
Uses of Black Elderberry
Elderberry plants have gained popularity thanks to their lovely appearance and important uses in traditional industries, culture, and medicine. They fall under early spring flowers since they bloom creamy pink flowers in the spring. These are followed by blackish-red fall berries, which can be harvested for making elderberry wine and jam. You can also leave the elderberry wine on the plant to attract birds and other wildlife.

Black lace berries are also edible and high in vitamin C. If you want to plant them for food and drink, then the American elderberry, also known as Sambucus canadensis, is the better choice than the European type known as Sambucus nigra.
The intense purple black foliage is finely cut, giving it an effect similar to Japanese Maple, also known as Acer palmatum. Some designers are even using it in the more tender maple varieties since black lace is extremely durable and adaptable.
It can also be used as a dramatic accent plant, planted en masse for a troublesome high hedge, or incorporated into the mix or perennial border. Black lace is also suitable for use in woodland gardens, rain gardens, and attracting birds and butterflies to the yard. You can also plant a black lace next to a shrub with brightly colored leaves to create contrast and interest.
This is a very cold hardy, and easy-to-grow plant adaptable to most sites. In addition, this plant is deer resistant, drought tolerant, fall heat tolerant, and a landscape plant. It can also be used as a potted shrub on the patio. It’s good in groupings or masses or perennial and shrub borders.
Common elderberry plants are deciduous plants or small trees that can reach up to 20 feet in height and width. Some specimens have grown as tall as 33 feet in their natural habitat.
Planting Black Lace Elderberry (Sambucus racemosa ssp. melanocarpa)
Black lace elderberry can grow in USDA plant hardiness zones 4-7 but is susceptible to winter damage. It is best planted in fertile, loamy soil with excellent drainage and receives full sun or partial shade. If planting specimens near homes or other structures, it is a good idea to place a barrier of mulch or fencing around the plants to protect them from being damaged by lawnmowers, mower debris, and deer.

They are relatively easy to grow. They can be propagated from seeds, softwood cuttings, or semi-hardwood cuttings. Seeds need cold stratification. Seeds should be sown in the autumn and kept moist for 60 days before planting. A thin layer of vermiculite on top of the soil helps retain moisture. It also does well in wet soils.
These plants also do well in acidic to alkaline soils, but it’s also important to look for slightly acidic soil. Before planting this shrub, amend the soil with compost to ensure healthy growth. You can easily make your compost to use for the purpose. After that, it will benefit from regular fertilizing with compost once every year in the spring.
Due to their sporadic growth, elderberry plants tend to form a lot of suckers. So prune it regularly if you want to maintain size and shape for your shrubs. Pruning involves removing unhealthy, damaged, old, or dead branches in early spring.
Black Lace Elderberry Care
Black lace elderberry is self-pollinating, but if you wish to have as many berries as possible, you can plant another cultivar near your black lace elderberry for increased pollination.

Light Requirement
In the North, while black lace elderberry will tolerate partial shade, it will produce more flowers and a more attractive foliage color if grown in full sun. At the southern end of its range, it will benefit from afternoon shade.
Soil Requirements
Black lace elderberry grows best in slightly acidic, loamy soil that is moist but well-drained. The black lace elderberry bush also tolerates clay soil types better than many shrubs, but it performs better over time if planted in soil that drains well. Black lace does best in moist soil, although it will tolerate dry soils. It thrives under acid or alkaline soils.
Watering Common Elderberry
Black lace elderberry is a drought-resistant shrub and does not require large amounts of water to thrive. However, it benefits from supplemental watering during dry periods and in hot summer climates. The plant prefers evenly moist soil. And since elderberry shrubs often grow near wetlands, it tolerates wet soil better than many other plant species.
Fertilizer and Transplanting
This deciduous shrub needs to be fertilized in early spring by applying a slow-release fertilizer specialized for trees and shrubs. If you wish to transplant an existing plant, do so in spring or early summer while the soil is moist and warm. Elderberry shrubs do not recover well from root disturbance, so take care when moving them. You may harm or kill the plant with poor planning or execution.
When growing elderberry bushes in the home garden, plant them near a water source such as a drip irrigation system or pond, especially if rainfall is infrequent. Ensure that the roots get at least 1 inch of water weekly and keep an eye on soil moisture levels so you can provide supplemental watering during dry spells.
Pruning Elderberry
Best if pruned immediately after blooming. The correct time for pruning this plant is late winter or early spring. Pruning will keep it attractive, vigorous and check its spread. As the woody stems become older, they become weaker and less attractive. So, remove the older stems to direct more energy into the newer, more attractive ones.
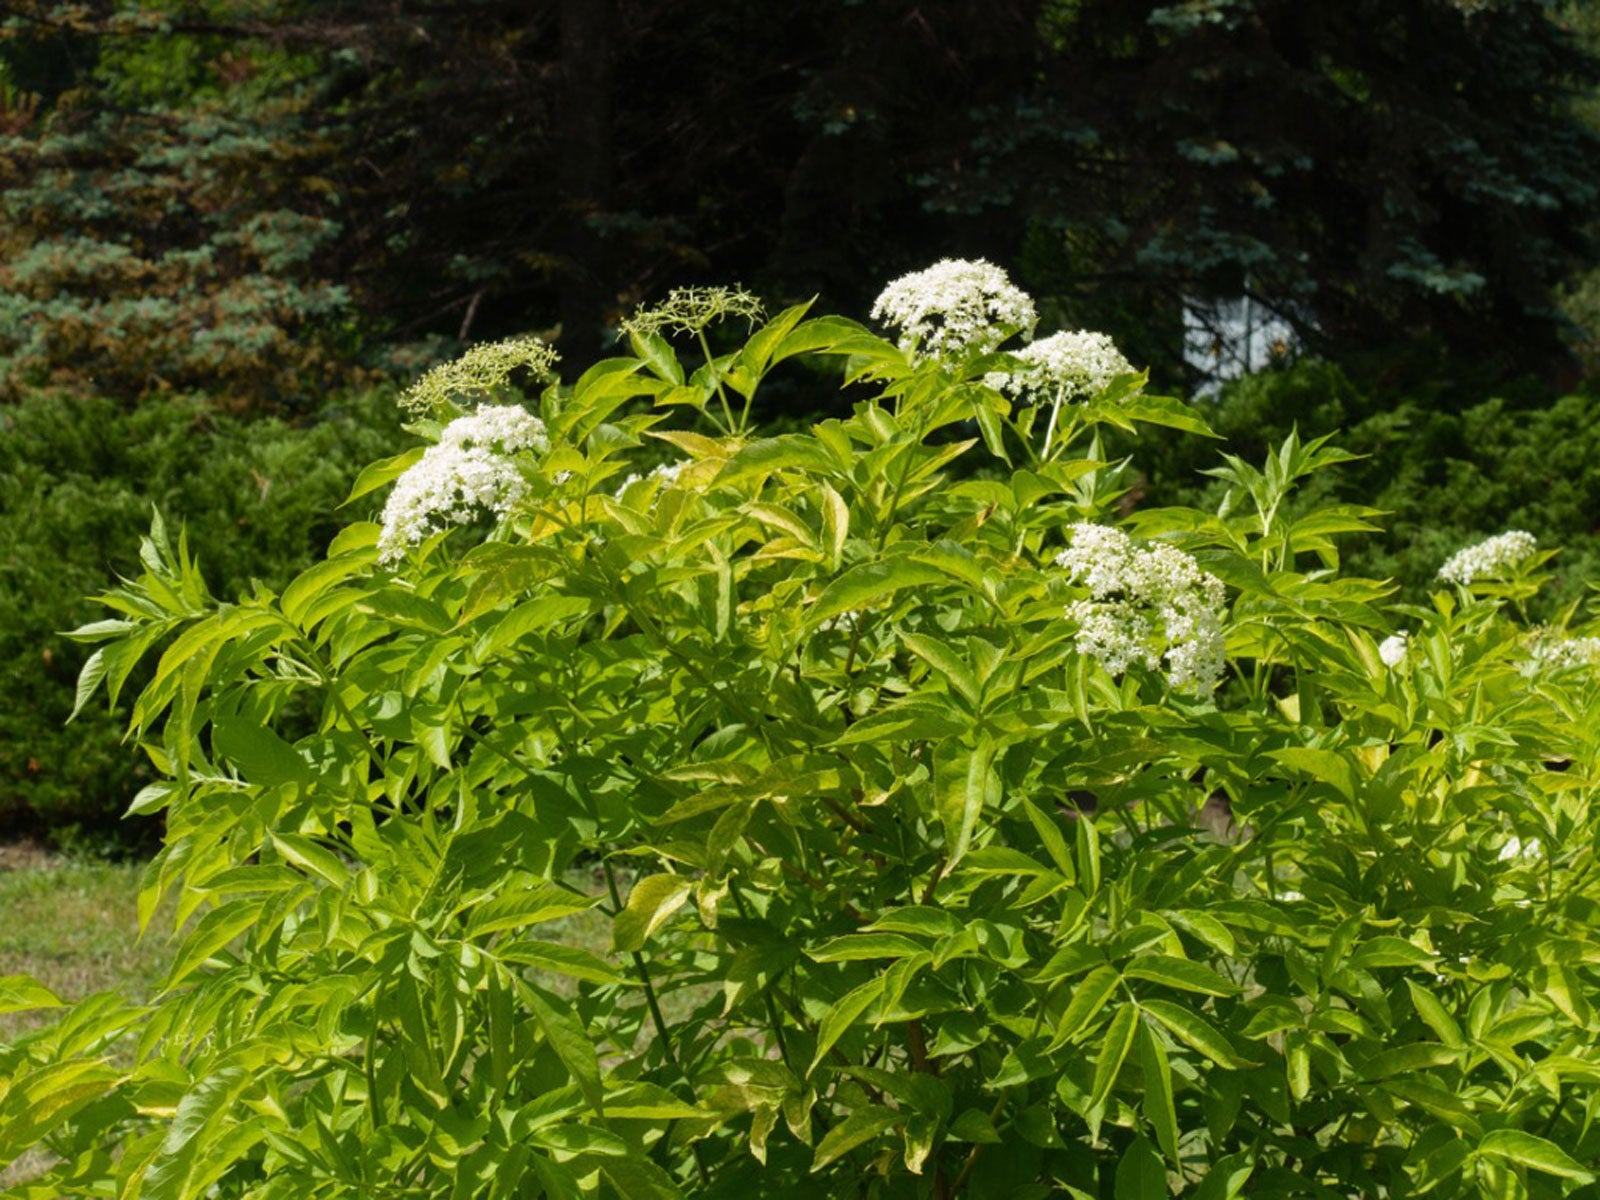
Propagating Common Elderberry
Cutting the branches of the elderberry bush back to four inches gives you a convenient place to collect cuttings.
To propagate common elderberry, remove the smaller tip shoots from grown branches’ end and dip them into rooting hormone. The best time for this operation is fall or early winter. Remove all leaves on the cutting except the top two pairs. This makes it easier to dip into rooting hormone and reduces the chances of disease spores falling into any open cuts.
Shorten all side branches by half their length to direct energy into the main stem. Root the cuttings in a pot filled with sand, peat moss, and perlite at a ratio of 1:1:1. Water sparingly until roots form.
After three weeks, the cuttings should be ready to plant in your garden or for overwintering. Select a location that gets at least six hours of sun per day and has well-drained soil.
Common Pests and Diseases
Prone to a number of diseases, including canker, leaf spot, and powdery mildew. Apply Neem oil once pollination begins for best results. Also, make sure there is proper spacing to promote good air circulation, irrigate at soil level, and keep mulch six inches away from the main stems of the bush.
FAQs on How to Grow Black Lace Elderberry
What plants are compatible with black lace elderberry?
White pine trees and quaking aspen are good elderberry companion plants, especially if you’re looking for something taller than the shrubs.
Final Thought on How to Grow Black Lace Elderberry
Elderberry plants are very popular plants that you can never miss. Not only do these shrubs look splendid and very familiar, but they’re also low maintenance in almost any environment and growing conditions.
The post How To Grow Black Lace Elderberry appeared first on Kitchen Infinity.
Did you miss our previous article…
https://www.conduithardware.com/?p=903
Peat Moss: What It Is and How To Use It
Peat moss is a natural growing medium with many applications, but it can be hard to know how to use it in your garden. But what exactly is peat moss? How does it differ from other types of soil or mulch?
This guide covers everything from the types of peat moss available to how much water each type holds. We’ll cover everything from planting trees and shrubs with peat moss as a potting medium or using it as alternative mulch material in vegetable gardens. You’ll also find out which kinds of plants grow best when grown directly in peat moss without any additional soil mixed into the mix. Let’s get started!
What Is Peat Moss?
Peat moss is a soil amendment that is harvested from peat bogs. Many of these peat bogs are found in wet areas of Canada. Peat bogs are formed over a long period as organic materials partially decompose.
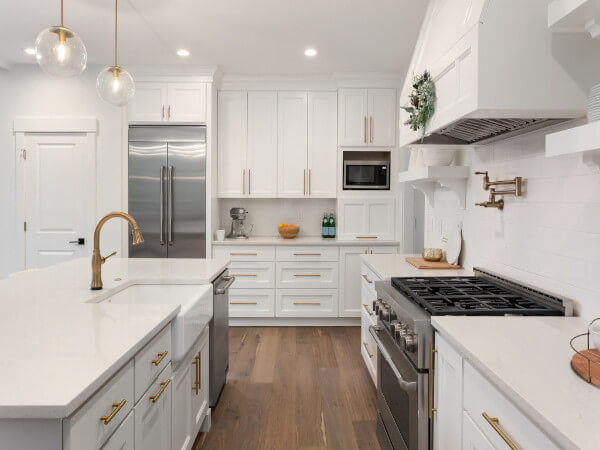
Although sometimes referred to as peat, peat moss and peat are not the same things. Peat moss is one of the products harvested from peat bogs. Other types of peat moss come from the partial decomposition of other organic materials. If you know how to make compost then you must know this type of peat moss. The moss in peat moss refers to sphagnum moss.
Where Does Peat Moss Come From?
Peat moss comes from your flower pot or garden from wetlands or bogs. It’s not decomposed material because the surface of the blogs doesn’t allow oxygen and air to filter underground. This makes the fibers of the sphagnum moss remain intact.
Types of Peat Moss
Sphagnum Peat Moss
The most commonly used type of peat moss is sphagnum peat moss. Sphagnum peat moss has a high ability to absorb moisture and holds ten times its dry weight in water. After it’s harvested and dried, sphagnum peat moss is light in color, making it retain 10-12 times its weight in water.
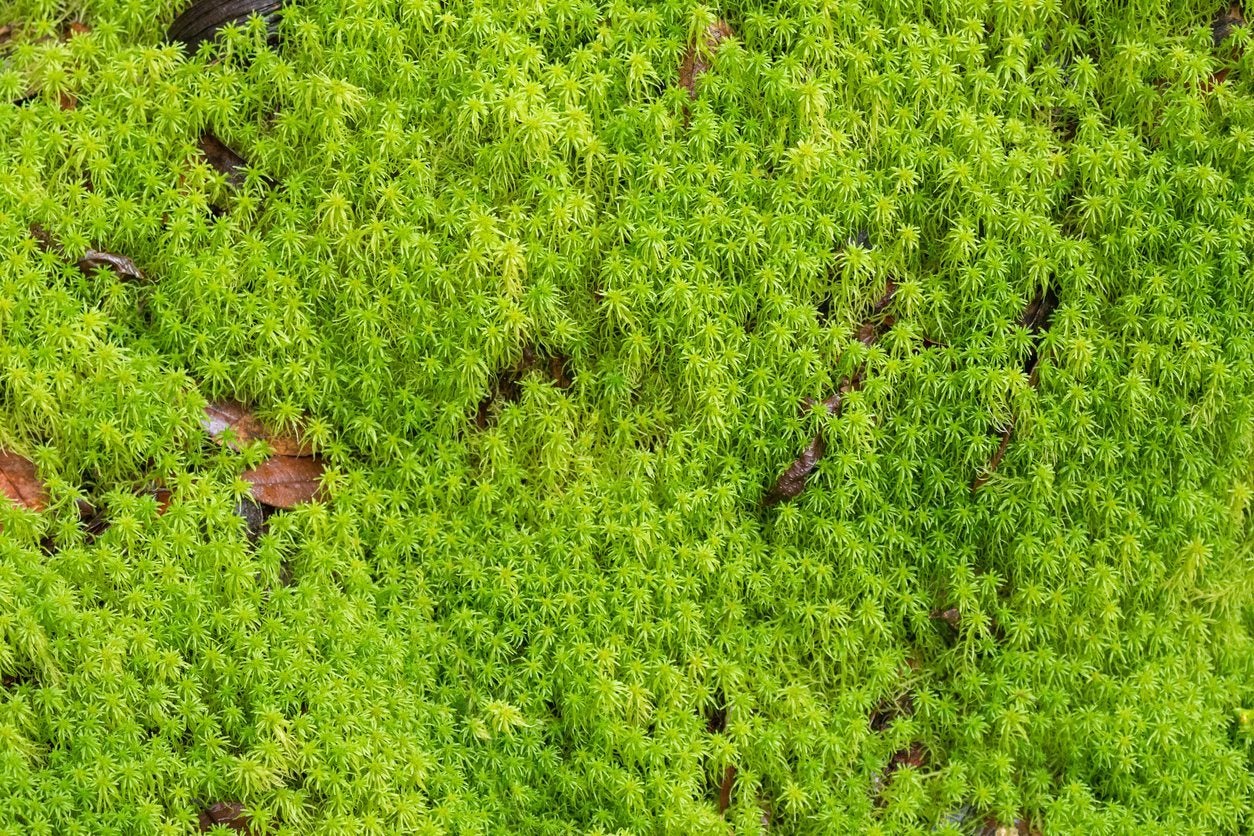
Don’t confuse sphagnum peat moss with sphagnum moss, even if their names are similar. Sphagnum moss refers to the plant material harvested when still alive and growing above water. The end product is the light, fibrous material often used to decorate line wire baskets.
Black Peat Moss
This is an important type of peat because it has high nutrient content, making it useful in growing orchids because orchids like organic material in their soil. It’s also used for potted flowering plants and nurseries that produce bedding plants. It’s a little more acidic than sphagnum peat moss and holds more water.
Black peat is harvested differently than sphagnum peat moss in a way that preserves the living plant. It’s cut from Sphagnum bogs in Canada and is probably black because of its high carbon content. It requires more processing before it’s sold but has less dust and fewer contaminants than brown peat moss.
History of Peat Moss
Peat was dried and used as a source of fuel in some countries for centuries. This is because it’s rich in carbon dioxide, just like other fossil fuels. It was until the 1940s that peat had a place in horticulture. Today, it’s used as a soil amendment, soilless mix, seed starting, and mushroom casting.
Availability of Peat Moss
Peat mosses are commonly found in bogs and wetlands of the earth’s northern hemisphere. It’s sold in gardening stores, online, hardware stores, and even supermarkets.
Mining Peat Moss
Before peat moss becomes a useful gardening product, it must be harvested by digging the ground and recomposing the bog’s ecosystem. When it comes to mining peat moss, the process is as follows:
Dig a network of ditches along the peatland to drain the water. Second, remove the native vegetation to get the peat exposed. Third, level the harvest to prevent drainage of the surface runoff. Fourth, harrow the top layer to speed up the drying process of peats. Fifth, suck up the dry peat layer using a large vacuum harvester.
Lastly, the harvested peats will be transported to a processing firm for cleaning, drying, and screening into different labels and packaging.
Pros of Peat Moss
Sterile
Peat moss has a natural ability to kill weed seeds and insects. When peat moss is added to the soil, it leaves no chance for mosquitoes and larvae to grow in your garden. This attribute can be very important if you want to avoid diseases such as malaria.
Cleanliness
Most of the growing materials are not clean. However, that’s not the case with peat moss. If you drop some wet moss, pick it up, get it dried or sweep it up.
Moisture Retention
Peat moss is believed to retain water for longer than other composts. This means that you will need less watering of your plants during dry seasons.
Peat Moss Has Slightly Acidic pH
Peat moss has a pH of 4.9 to 6.5, slightly acidic. This makes it better for soil mix because the acidity helps break down other compounds in the soil. This also makes it a good corrector, especially with plants that cannot stand alkaline soil.
It’s Fully Organic
If you are looking for an organic material to improve the content of your soil, using peat moss is a good option. It comes from bogs and is fully natural. The best part is that it’s now harvested at its optimal stage, further adding that this is an organic ingredient. Also, quarrying and transportation do burn a lot of fossil fuels, so if it’s produced organically, it’s not harvested and delivered organically.
Peat Moss Doesn’t Compact
Even though peat moss absorbs water well, it doesn’t compact, unlike soil. Compaction makes it hard to create space for the water and air to pass through. But if you add peat moss to any compact material, you’ll have solved the compaction problem and made the growing mix drain better.
The Drawbacks of Peat Moss
Poor in Nutrients
Some growers consider peat moss to be nutrient-poor. It doesn’t contain much nitrogen, potassium, or phosphorus, but it does have calcium and magnesium, which are essential nutrients for the growth of cannabis plants. Unlike other organic materials such as manure compost, peat moss is very poor in nutrients.
Dryness Issue
Since peat moss is very dry, it’s not 100% suitable for soil. It can be combined with other organic materials to improve the water retention capacity of your growing medium. When starting seeds with peat moss alone, ensure they get enough moisture. It’s also good to mix it with soils and some other soilless media.
Non-Renewable Resource
Peat bogs are made up of wetland plants accumulating for thousands of years. They are only found in areas where the average annual temperature is lower than 64 degrees F (18C). Peat moss from North America or Canada comes from old-growth forests. In other words, it’s a non-renewable resource that has to be harvested. This is not the case for peat moss harvested in Ireland or Scotland. Their bogs are managed wetland areas that grow peat moss yearly, so they can be harvested without causing permanent damage.
Peat Moss is Expensive
Peat moss exceeds the price of comparable mediums such as coconut coir. If you use it in bulk and the price is an issue, a better alternative is compost.
How to Use Peat Moss in the Garden
Soil Amendment
Peat moss is available in several grades, with different particle sizes. The larger the particles are, the more expensive it is. Use peat moss as a soil amendment to lighten heavy soils and increase water retention. For clay and heavy soils that get compact easily, it softens the soil structure and improves the drainage.
Peat moss helps retain moisture and nutrients for plant roots for sandy soil. If you intend to use it as a soil amendment, you should know that it changes soil pH levels. Ensure you measure and watch out if the pH level drifts too much by testing the soil pH.
Hydroponic Growing
Peat moss is used in hydroponic systems because it creates a soil and nutrient solution barrier. This layer increases the stability of the system, keeping the plant roots away from harmful products that are designed to kill them.
People using it use it with other growing media like perlite and vermiculite to balance the moisture and aeration. When using peat moss for pure hydroponic growing, you should know some facts about it’s not appropriate.
Because it’s an organic matter, if provided with plenty of oxygen and nitrogen, it will start to decompose, making the material compress around plant roots and choke off your plants. So, better mix it with other materials.
Seed Starting
Peat moss is often used as a base layer to germinate and grow plants like vegetables and flowers. It provides aeration to the root zone, and it’s very easy to use for newcomers in hydroponics. When using peat moss for seed starting, you also need special trays with drain holes on the bottom because if you don’t, the peat moss will expand and block the water flow out of your seedling flat.
For this purpose, use the peat moss alone or in a mixture with some soils. You can also remove the hassle by getting the peat pellets sold on the market. Many people also prefer a soilless mix of peat moss, perlite, coconut coir, and others in different amounts. This prevents diseases, fungi, bacteria, weed seeds, and other bad things commonly found in the soil.
Peat Moss for Plant Transplants
Using peat moss granules is also the best way to transplant young trees and big plants. It can be easily handled since it is lightweight; you can use it with other components like the potting mix but make sure not to include any fertilizers or pesticides.
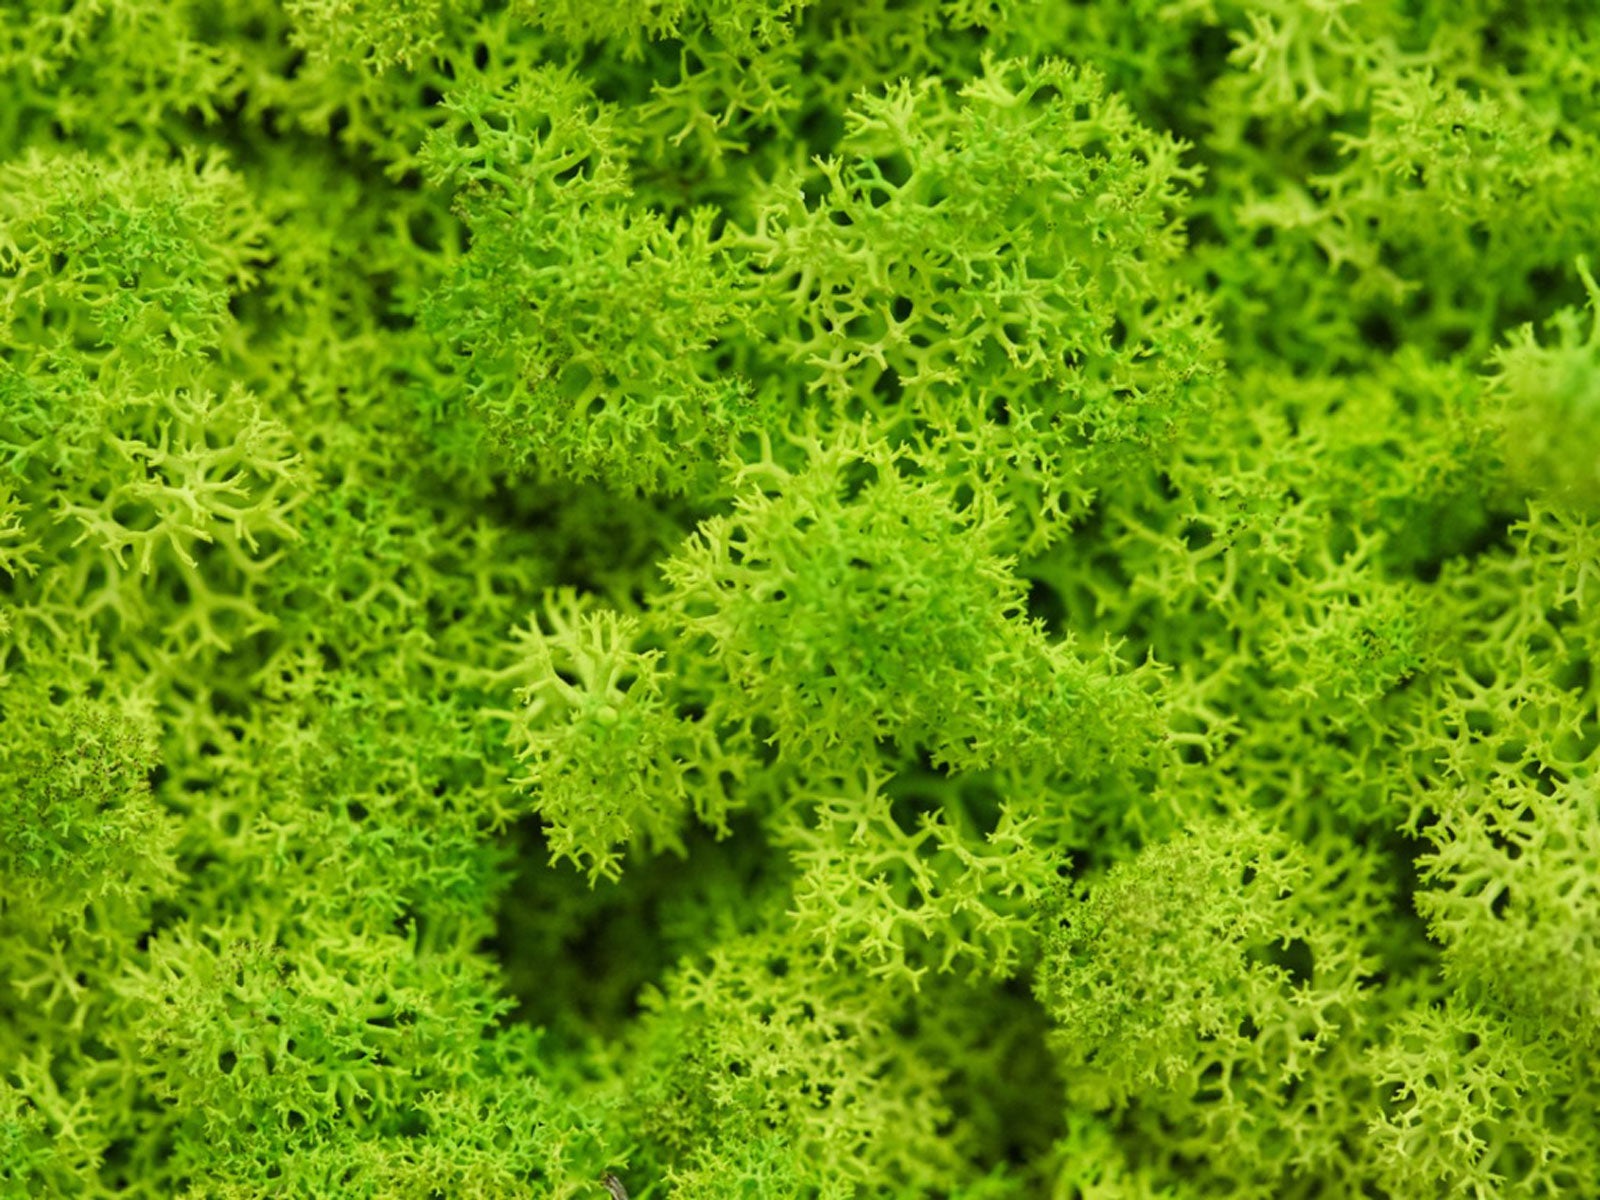
It provides nooks and crannies where new, tender roots can grow. Peat moss also keeps humidity high, essential when plants have a new home. It also corrects the acidity of the soil and breaks down the consistency and texture of the soil, especially if it’s clay soil.
Growing Acid-Loving Plants
Peat moss is also used to grow plants that prefer soil with low pHs, such as rhododendrons, gardenias, heathers, tomatoes, Pieris, azaleas, and camellias. These plants need a peat moss mixture for their acidic soil. When combined with the correct potting mix, these plants enjoy having an environment where they can take up essential nutrients from the soil and conserve water.
Peat Moss Alternatives
Compost
Compost can be used as peat moss alternatives. These are usually less expensive but do not have the pH balancing effects of peat moss, therefore it should be used in conjunction with other ingredients to create the correct balance for acid-loving plants.
Compost is made from decayed organic materials like rotted plants, leaves, vegetable scraps, and animal manures. It has a lot of commonalities with compost peat, like excellent water holding capacity and great material for soil amendment.
Compost is cheaper than peat moss and fully sustainable in that you can easily make your own. On the other hand, compost won’t last long like peat moss, and you’ll have to add compost regularly. And lastly, compost will compact faster and easier than peat moss, but to have a comparable effect, you can add sand, shells, and eggshells to the soil to improve its texture.
Perlite
Perlite is a volcanic rock heated and expanded with steam to produce a fine white, shiny-type growing medium, which lets good drainage and aeration of the roots. It is also widely used as an additive for potting soil or seed starting mixes as it helps increase the porosity of the root environment.
It provides an excellent oxygen supply to plant roots and will not compact under heavyweight. Perlite is a good natural drainage layer for the bottom of your containers, and it will also help prevent any root rot problems that can occur from sitting water in the bottom of the container.
Coco Coir or Coco Fiber
Coco coir is the partially processed fiber of the coconut husk. It’s sold compressed into bricks or blocks or in a loose form that can be expanded by adding water. Coco produces excellent drainage and aeration qualities with good retention properties.
Coco provides an ideal air to water ratio – twice as much air space compared to water-holding capacity. Coco coir is a sustainable resource that has been used for centuries to protect the health of natural shorelines and reefs. It’s highly resistant to insect, microbial, and mold attacks, making it perfect as a growing medium for both hydroponics and soil applications.
Vermiculite
Vermiculite is a naturally occurring mineral heated to expand it into wormlike particles that absorb moisture and provide aeration. Vermiculite provides the nutritional requirements of plants while allowing for excellent drainage and aeration qualities.
Organic Matter
Organic matter is what makes the nutrients in your soil available to plants. It increases the number of good, healthy microorganisms in your soil by providing them with food and habitat. Organic matter also absorbs water during irrigation, reducing runoff.
What’s more, organic matter improves porosity in your soil by opening tiny spaces between soil particles for air and water, giving your plants room to grow.
Sand as Peat Moss Alternative
Sand has very coarse particles that do not release nutrients to plants easily. It does not change the pH of your soil, but it also doesn’t hold nutrients well, so adding sand on top of a peat moss/vermiculite mix is not ideal. Sand may be preferable if you are planting trees or other plants that don’t need consistent nutrients.
FAQs on Peat Moss
What is wrong with using peat moss?
Peat moss is not a natural substance. It is the partially decayed remains of plants that have been harvested from peat bogs and mires, an ecosystem formed by the incomplete decomposition of organic matter in wetlands. Peat bogs are fragile habitats that take thousands of years to form.
When should you use peat moss in your garden?
You should use peat moss as a soil amendment or potting mix, especially when growing fruits and vegetables such as tomatoes, blueberries, and camellias which are acid-loving plants.
Final Thought on Peat Moss
There you have it. Peat moss is harvested from bogs or mires and is used in planting or potting soil mixes for acid-loving plants. Peat moss is not a natural garden soil ingredient, but it will help your garden grow lovely flowers and delicious foods.
The post Peat Moss: What It Is and How To Use It appeared first on Kitchen Infinity.
Did you miss our previous article…
https://www.conduithardware.com/?p=900