Remove Tile Grout in a Few Simple Steps
Removing tile grout can be a long, messy project. You have to use buckets for water and vinegar, wear clothes that can get dirty, and deal with the mess of paste-like grout remover floating around the room.
However, it doesn’t have to be all bad. If you want to avoid all this work, you can get your tile grout looking new again with little effort by following tips used directly by the pros.
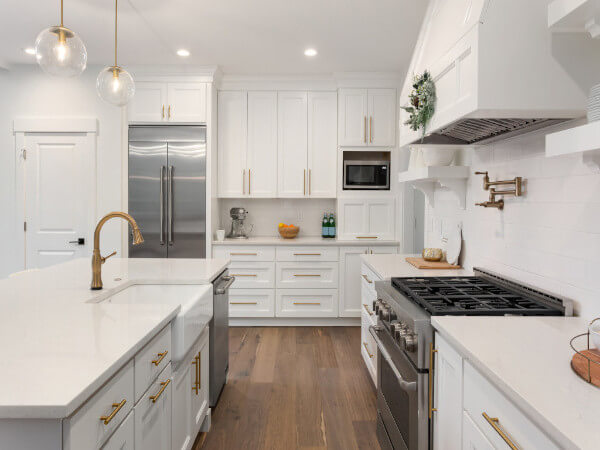
Image Credit: http://thepincer.com
In this article, we will give you the best ways to remove tile grout- with a tool, a blade, a chemical solution, or even through prevention. We will also provide some simple tips on how to clean up afterward. Let’s get started.
The Tile Grout Removal Tool
One of the best and easiest ways to remove tile grout is by using a grout removal tool. This is a handheld tool that has a small blade on the end. You can buy these tools at most home improvement stores.
To use the tool, you simply put it in between the tiles and pull out the grout that has collected there over time. The grout will come out of the tiles in small sections and may take some time to remove completely.
However, if you feel that this step is too much work, there are other methods to consider.
How To Remove Tile Grout With A Blade
Another easy way to remove tile grout is by using either a utility knife or a box cutter blade. Simply prop up one end of your tile on some spare boards or bricks so that the bottom side is facing up at an angle.
Then slide your blade into the crevice where the tiles meet, then forcefully push it forward. The grout will pop right out. Once you have removed all the grout in this way, you can then go over the tiles with a wire brush to remove any leftover bits.
If you have a lot of tiles to clean, this may be the quickest and easiest way to do it. However, it is not without its dangers- be careful not to cut yourself while doing this.
How To Remove Tile Grout With A Chemical Solution
If you don’t want to use a blade or a removal tool, you can also try removing tile grout with a chemical solution. There are many different products on the market that promise to do this job quickly and easily, but our personal favorite is muriatic acid.
Muriatic acid is a very strong chemical that can be bought at most hardware stores. It is used to clean concrete and masonry, so it is perfect for removing tile grout.
To use the acid, you will need some safety equipment- rubber gloves, goggles, and a respirator. You should also avoid any contact with your skin or clothing.
Pour the acid into a bucket and dip your brush in it. Then start scrubbing at the grout between the tiles. The acid will eat away at the grout and start to dissolve it. Keep scrubbing until all the grout is removed.
Be very careful when using this method- muriatic acid is a dangerous chemical and can cause serious injuries if not handled properly.
How To Prevent Future Buildup of Grout in the Tiles
If you want to avoid having to remove tile grout in the future, there is one simple solution – seal the grout lines with a sealant. This will create a barrier between the grout and the tiles and will help keep it from collecting dirt and bacteria over time.
There are many different sealants on the market, so be sure to do your research and find one that is right for your needs. Some sealants need to be reapplied every few months, while others can last up to 10 years.
Once you have sealed the grout lines, you will never have to worry about removing tile grout again.
Which rooms can you remove grout from?
There are various areas in your home where grout can get dirty and need removal. Here are some of the most obvious ones.
- Bathrooms: Grout lines in bathrooms are exposed to moisture regularly, which can lead to mold build-up over time. If you see signs of this phenomenon beginning to happen, it is best to remove the grout as soon as possible.
- Kitchens: Kitchen floors usually have tile grout lines with food particles stuck inside them. This attracts dirt and bacteria, which can cause dangerous cross-contamination issues if not cleaned regularly.
- Laundry Rooms: The same goes for laundry rooms- tile grout lines collect soap scum and lint from clothes, so they should be kept clean at all times.
- Shower: Grouting a shower is a tricky business- it is constantly exposed to water and can easily become dirty. If you notice that your grout is starting to look stained or mildewed, it is time for a good scrubbing.
- Basements: Basements are often damp areas, and this can cause grout lines to become discolored and dirty. Make sure to check your basement for this problem regularly, and remove the grout if necessary.
- Anywhere there are tiles: If you have any tiles in any other room of your house, it is a good idea to keep the grout clean and free of buildup. This will help keep the room looking its best and will prevent any future problems.
Removing tile grout can be a daunting task, but it doesn’t have to be. With the right tools and techniques, it can be a quick and easy job. Follow these tips and you’ll be on your way to a sparkling clean tile floor in no time.
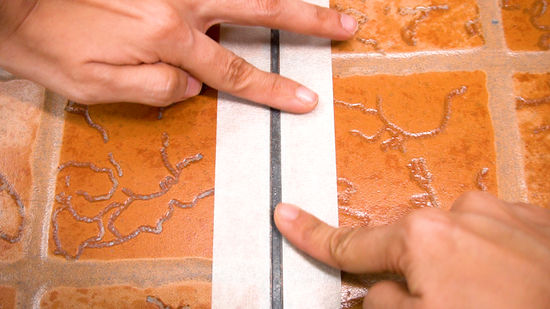
Image Credit: http://wikihow.com
Cleaning up after yourself
Once you have removed the bad grout, you should seal it with a new layer or reapply the old one to prevent future wear and tear. It is also a good idea to clean the work area so you’re not left with a mess.
Pour some diluted bleach onto the floor and use a mop to clean it up. This will remove any remaining residue from the acid and will help disinfect the area. Be sure to rinse the mop thoroughly after each pass, and don’t let the bleach come in contact with your skin or eyes.
When you’re finished, your floor should be clean and grout-free. Congratulations on a job well done.
Final thoughts on removing tile grout in a few simple steps
In conclusion, removing tile grout is a process that can be done relatively easily with the right tools and techniques. There are many different areas of your home where grout can become dirty and need to be removed, so be sure to stay vigilant and keep on top of it. A clean tile floor will brighten up any room in your house and will make it look newer and more inviting.
The post Remove Tile Grout in a Few Simple Steps appeared first on Kitchen Infinity.
Did you miss our previous article…
https://www.conduithardware.com/?p=790
Window Air Conditioning Tricks
Window AC units are a great way to stay cool during the hot summer months. But at the same time, they can be tricky to install and maintain. The wrong installation can lead to the AC unit falling out of the window, or not cooling your room as well as it should.
In this article, I will give you some tips for installing and maintaining your window air conditioner so that it works well all summer long. Let’s get right into it.
Installing and maintaining your ACs correctly
Understanding how different types of air conditioners work is the first step in learning how to maintain them.
For example, most window ACs are cooled with simple, CFC-free R410A refrigerant gas. For these types of air conditioners, water is the cooling agent that absorbs heat from inside the room and passes it through the AC’s compressor.
 Image Credit: http://popularmechanics.com
The compressor increases the pressure of the water vapour until it becomes a hot gas (steam). The gases are then released through a set coil outside your home which cools it down before pumping it back into your room. The AC fan blows cool air into your house or office space to lower its overall internal temperature window air conditioning tips
With that said, installing a window AC unit is very similar to installing a normal window. The first and most important step is measuring your window. Make sure you have the right size AC unit for your window otherwise it will not cool your room properly or may even fall out of the opening.
Once you have the correct sized air conditioner, carefully read over the installation instructions before taking any steps. A lot of units can be flipped horizontally or vertically depending on what suits your window best, so make sure you’re doing that correctly as well.
After you’ve got everything set up, it’s time to plug in your AC and enjoy some cold air. Because most units are installed inside a window, keeping them dust-free is important for keeping them running smoothly and reducing wear and tear.
Make sure to keep an eye on your filters and have them replaced when needed. Also, because you are dealing with water vapour, do not place anything that can melt or catch fire near your unit.
The last step is making sure the AC itself stays secure in the window so it does not fall out. Some ACs come equipped with locks but if yours does not have one, installing a few screws at the top of the unit will usually suffice to make sure it doesn’t accidentally slip out of its casing window air conditioning tricks
The importance of having air conditioners installed securely
As we mentioned before, one of the dangers of installing a window AC unit is that it can fall out of the window.
This happens most often when the window opening is too narrow for the AC unit, or if there is no installation support on the inside of the window frame.
To help prevent your air conditioner from falling out, make sure you are using the correct size unit for your window and that it is properly installed. You can also use a locking mechanism to keep the AC in place.
If you are still worried about your AC unit falling out, it’s best to contact a professional to install it for you. They will know how to properly secure your air conditioner so that it doesn’t move an inch over the long term.
Other factors to consider
In addition to proper installation and maintenance, there are a few other things you can do to keep your window AC unit running smoothly all summer long.
One of the most important things to do is to keep the area around your AC unit clear. This means not placing any furniture or other objects near the unit that could obstruct the airflow.
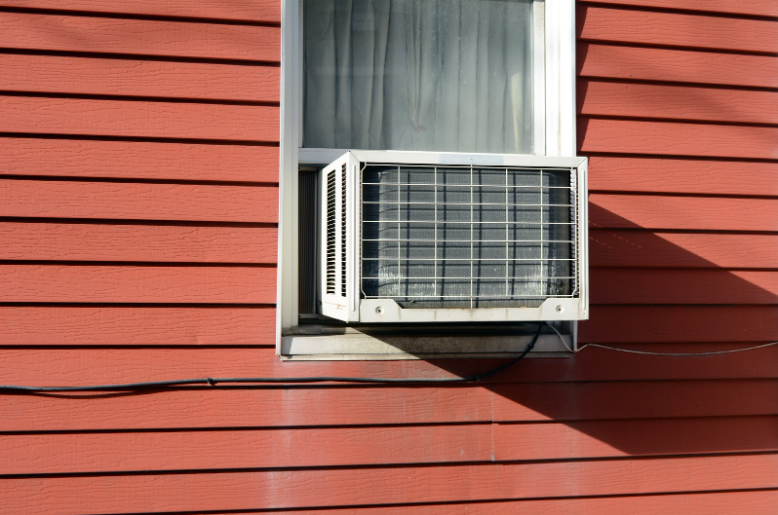
Image Credit: http://clerawindows.com
Finally, set a schedule for using your AC so that you’re not turning it on and off constantly. This will help reduce wear and tear on the unit and save you some money on your energy bill.
Window air conditioning freeze-ups
Window air conditioner freeze-ups do happen, but there are steps you can take to lessen the frequency at which they occur.
The first is keeping water out of the unit. A window AC unit pulls in air from outside and then pumps it back into your room. If that air has any moisture in it, it will lead to ice forming on the coils which prevent it from cooling down your space again.
Just like for all other units, avoiding places where frost can form is important for keeping your unit running smoothly throughout the year.
Finally, be sure not to cover your AC with blankets or furniture when it’s turned on as this can trigger ice build-up very quickly.
Window Air Conditioning Tricks – FAQ
What is the best way to clean the filters on my window air conditioner?
The most effective way to clean filters on a window air conditioner is by vacuuming them with the brush attachment. You can also use a damp cloth to wipe them down, but be sure to let them dry completely before putting them back in the unit.
How can I improve the airflow through my window air conditioner?
If you are having trouble getting enough airflow through your window air conditioner, try cleaning or replacing the filter. You can also make sure the unit is in an open area with plenty of room for air to circulate.
What should I do if water starts leaking from my window air conditioner?
If water starts leaking from your window air conditioner, the first thing you should do is turn it off and unplug it. Next, try to determine where the leak is coming from and take appropriate action to fix it. If you are unable to fix the leak yourself, contact a professional for assistance.
Can I use a space heater with my window air conditioner?
Yes, you can use a space heater with your window air conditioner as long as it is placed at least three feet away from the unit. Be sure to keep a close eye on the space heater while it is in use to avoid any potential fires or other hazards.
Final thoughts on window air conditioning tricks
In this article, we’ve gone through a few window air conditioning tricks that you can use to keep your home cool and comfortable. By following these tips, you can save money on your energy bills and make the most of your air conditioning unit.
Always take care of your window air conditioning unit by keeping it free from dirt, debris, and other materials. This will help to keep the unit running efficiently for as long as possible. If you have any trouble with your unit or you notice something is wrong with it, be sure to contact an expert who can give you specific advice for your situation.
Finally, check out this article on the best air conditioners to buy if you’d like to get your hands on the best ACs in the market right now.
The post Window Air Conditioning Tricks appeared first on Kitchen Infinity.
Did you miss our previous article…
https://www.conduithardware.com/?p=786
How to Repair Orange Peel Texture
Orange peel texture is a common issue in the home improvement industry. This problem can happen for many reasons, but most commonly it happens because of improper installation or removal of roofing materials. The good news is that there are some things you can do to fix it.
This article will outline how to repair orange peel texture and prevent future occurrences. Let’s get started.
What is orange peel texture?
Orange peel texture is a term used to describe the appearance of a surface that has been covered in a thin layer of paint or another coating. The surface appears bumpy and textured, similar to the skin of an orange. This can be caused by many factors, including improper installation or removal of roofing materials, using the wrong type of paint or sealant, or excessive weathering.
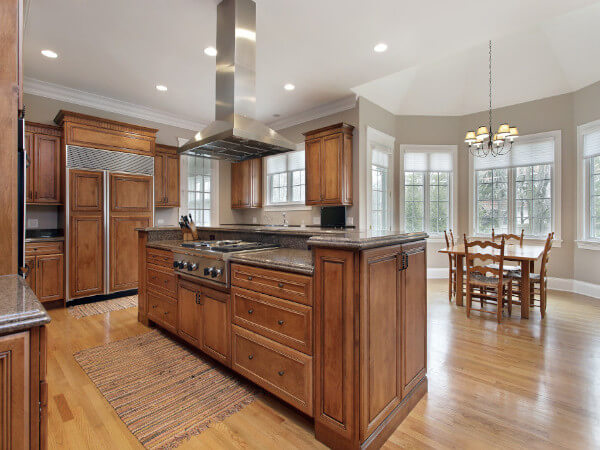
Image Credit: http://eegrestore.com
Alternatively, it may be caused by using paint or sealant that is too thick. In this case, the paint or sealant may have been applied with a sprayer instead of a roller and not properly brushed out to smooth the surface. When this happens, it can be difficult to tell which part of the roof has been painted and which parts haven’t; therefore it appears as though the entire roof is orange peel textured.
Main causes of orange peel texture
If shingles are not installed correctly, they can pull away from the roof over time, causing the underlying roofing material to appear bumpy and textured. Also, if the shingles are removed too quickly, they can tear away from the roofing underlayment, causing them to appear bumpy and textured as well.
Alternatively, orange peel texture may be caused by using paint or sealant that is too thick. In this case, the paint or sealant may have been applied with a sprayer instead of a roller and not properly brushed out to smooth the surface. When this happens, it can be difficult to tell which part of the roof has been painted and which parts haven’t; therefore it appears as though the entire roof is orange peel textured.
Finally, if your home is in a sunny or hot location, the sun may cause the paint to blister and peel, also resulting in an orange peel texture.
How to fix orange peel texture
There are several ways that you can fix orange peel texture.
In this first place choosing the best ceiling materials to buy should be done before getting started.
If the problem is caused by using paint or sealant that is too thick, then the solution is to use a roller instead of a sprayer to apply the paint or sealant. Use a medium nap and go over it about three times with the roller, brushing out any visible lines left behind by the roller.
If your home is in a hot location and has been exposed to too much sun, you can install reflective roof shingles to reduce heat absorption and lower your cooling bills. If you applied a primer that was too thick, apply a professional grade primer at half strength so that it doesn’t dry orange peel texture.
Finally, if the problem is caused by improper installation or removal of roofing materials, then the best solution is to hire a professional to come and fix it. They will be able to properly install or remove the roofing materials so that it doesn’t pull away from the roof over time.
Tips for avoiding orange peel texture in the future
There are several things you can do to prevent orange peel texture from cropping up on your roof again.
First, if you are going to be roofing your home yourself, make sure that you do a good job. Read the instructions thoroughly before getting started and use quality materials. You’ll also want to make sure that if you’re getting someone to do the job for you, they aren’t making any mistakes as they work. This could be anything such as not adding enough shingle adhesive or tearing off shingles too quickly.
Once the roof is finished, don’t walk on it for at least 48 hours so that it can be properly dry up. This will help prevent orange peel texture from forming by giving the coating time to dry completely before it has any chance of peeling away.
If you are having any other problems with your roof, be sure to contact a professional right away. They will be able to assess the situation and recommend the best course of action. Remember, it’s always better to be safe than sorry, especially when it comes to your home.
Roof texture is not always an easy thing to fix yourself. If you are not sure how to go about repairing the texture on your roof, or if you think the problem may be more serious, it is always best to call in a professional. They will be able to take a look at the situation and let you know what steps need to be taken to fix it. By taking care of the problem as soon as possible, you can avoid further damage and keep your home looking its best.

Image Credit: http://seejanedrill.com
How To Repair Orange Peel Texture – FAQ
What is orange peel texture?
Orange peel texture is a type of finish that is often seen on walls and ceilings. It is characterised by its bumpy, uneven surface.
What causes orange peel texture?
In addition to the types of roof material chosen, there are several factors that can contribute to the development of orange peel texture:
- Porous materials: If the surface material is porous, such as drywall or plaster, it will absorb the paint or primer unevenly. This will create a bumpy surface when the material dries.
- Poor surface preparation: If the surface isn’t properly prepared before painting, it will also be more likely to develop orange peel texture. The surface should be clean and free of dust, dirt, and grime.
- Incorrect application: If the wrong type of paint or primer is used, it can affect how well it adheres to the surface and may create an uneven texture when dried. It may also be hard for the finish coat to adhere to a rough surface produced by a poor-quality primer or paint.
- Drying time: Generally speaking, finishes with long drying times are more likely to develop orange peel texture than those with short drying times. This is because in some cases, the paint will begin to dry in certain areas before you have finished applying it. While this isn’t always avoidable, proper ventilation and working in small sections at a time can help minimize this risk.
- Environmental factors: Sometimes exterior painting jobs produce orange peel texture because of environmental factors such as humidity, temperature, and wind. Exterior painting jobs are especially affected by these factors as they can affect the drying time and how well the paint cures.
How do I fix the texture of the orange peel texture?
The process will depend on what’s causing it, but in general, you should start by eliminating any environmental influences that may be a factor. For example, if there is too much moisture in the air or if it’s very cold or hot outside, this may affect how your finish coat dries and contributes to the orange peel texture. You may have better results painting when conditions are more favorable for finishing work.
Final thoughts on how to repair orange peel texture
In conclusion, orange peel texture is very ugly and bad for resale. You should try your best to properly maintain and repair your roof to avoid this.
If you have any other questions or concerns about orange peel texture or any other roofing issues, be sure to contact a professional right away. They will be able to help you get the problem taken care of quickly and efficiently.
The post How to Repair Orange Peel Texture appeared first on Kitchen Infinity.
Did you miss our previous article…
https://www.conduithardware.com/?p=783
How to Prepare a Vinyl Floor for Ceramic Tile
If you’re looking to make upgrades in your home, the kitchen or bathroom floor is a great change to consider. Many older homes and rental units come with kitchen and bathroom flooring made from linoleum. Installing ceramic tiles in your kitchen or bathroom flooring is a great way to improve the look of your home.
If you’re looking for an easy and cost-effective way to redo the floors in your kitchen or bathroom without breaking the bank, then installing ceramic tiles is a great place to start.
The best part about installing ceramic tile flooring on linoleum floors is that no special tools are required for installation. You just need some basic household items like tape measures and tiling knives. You will also want access to plenty of water during installation because ceramic tiles can get hot when they dry out.
Before You Begin
When planning to install a ceramic tile in your kitchen or bathroom, you should always make sure that you test the flooring first by pressing the tiles firmly against it. Ensure there are no bumps or ridges under your tile; if there are, try sanding them down before installing the tiles. Make sure the subfloor and joists making up the floor structure are in good condition and have minimal flexing and deflection.
Soft, thin, and damaged subflooring or undersized joists can flex too much, leading to cracked tile and grout joints. If your cement subfloor is thin and lacks stiffness, install a layer of new plywood over the resilient flooring, followed by a layer of thin cement board.
If removing the vinyl or linoleum before tiling appears to be an easy task, it’s better to do this instead of tiling it. There are several reasons why it might be a bad idea to tile directly over resilient flooring. These reasons include:
The Floor Maybe Too High
An additional layer of flooring applied directly over the old vinyl flooring will make it thicker and raise the overall height of the flooring. Since vinyl flooring is thin, it’s less of an issue than laminate, engineered wood, or solid hardwood flooring. But, even with vinyl flooring, the extra floor thickness can still cause problems along with the baseboard trim or at door frames.
The Resilient Flooring May Not Be Suitable
While standard sheet vinyl flooring that’s well bonded usually makes an acceptable base for the ceramic tile, that’s not true of all forms of resilient flooring. Loose lay sheet vinyl can shift beneath the new flooring, making it unsuitable for a base for a ceramic tile. Vinyl tiles can also show the possibility of shifting.
Also, no resilient flooring with cushioned construction will work beneath the ceramic tile. Most luxury vinyl planks are also not suitable for tiling over because this flooring is laid as a floating floor with no adhesives. This means that the flooring can easily shift beneath the tile, causing damage to grout joints.
Here’s How to Prepare Vinyl Floor for Ceramic Tile
Tools and Materials
You’ll need the following tools and materials to make this project work:
- Bucket and mop
- Hearing protection
- Sandpaper
- TSP cleaner
- Eye protection
- Thin-set adhesive
- Notched trowel
- Utility knife
- Oscillating sander
- Cement board seam tape
- Drywall knife or smooth-edged trowel
- 1/4 inch thick cement board panels
- 11/4 inch cement board screws
- Breathing protection
Prepare Your Floor
Follow the manufacturer’s recommendations for cleaning your vinyl floor. Ensure the subfloor and cement underlayment have a combined thickness of at least 11/4 inches. A Cement board, tile, and grout will add significant dead weight to your flooring system, meaning you’ll need a hefty substrate with minimum deflection.

Thoroughly clean your vinyl with plain water and a scrub brush and let it dry. It must be free of dust, dirt, and any oily residue. After that, lightly sand the vinyl flooring with an oscillating sander while wearing a breathing project and eye protection. This will create some texture for the thinset adhesive to bond. Finish by wiping down the vinyl with plain water again to remove all sanding dust.
If your room is small enough and you don’t mind going down on your knees, then you don’t need to rent a floor sander. Instead, use any power hand sander such as random orbit sander to get the job done.
Clean and Repair the Floor
Clean your vinyl flooring with a TSP to remove dirt, soap, and oil residue. Check for protrusions such as nails and pound them back to place. If any of the parts of vinyl or linoleum flooring bulges out, use a utility knife to slice out the bulge. Your floor needs to be smooth as possible to accept the thinset adhesive and cement underlayment.
Skim Coat the Fabric with Mortar
Mix enough mortar to cover the floor with a skim coat. Apply it evenly over the surface of the vinyl with a notched trowel, then use a float to smooth it out. Let the mortar dry overnight. The mortar should be about the consistency of ketchup.
The skim coat needs to be very thin and only thick enough to bond with the fabric. After drying for about 30 minutes, you’ll have created a smooth masonry surface ready to install your tile.
Test-Fit Cement Board Panels
Lay down a 1/4 inch thick cement board panel over the entire floor. Wear breathing, hearing, and eye protection if you’re cutting the panels using a circular saw. You can also score the panels with a utility knife and snap them along the score lines.
Make sure you leave a 1/4 inch gap along the walls and between all cement board panels. Once you have test-fit the entire floor, remove the panels and set them aside. In most flooring installations, 1/2 inch cement board panels are always recommended as the underlayment for ceramic and stone tile. But when laying tile floor over an existing flooring material, it’s best to use 1/4 inch panels, given the thickness of the floor.
Set the Tile
Now it’s time to set the tile. Start in one corner and work your way out, using a level to ensure each row is straight. Lay ceramic tile so that the grout joints are staggered and use spacers if needed. Be sure to create even ridges over the entire surface to prevent air gaps. Air gaps can lead to cracked tiles down the line.
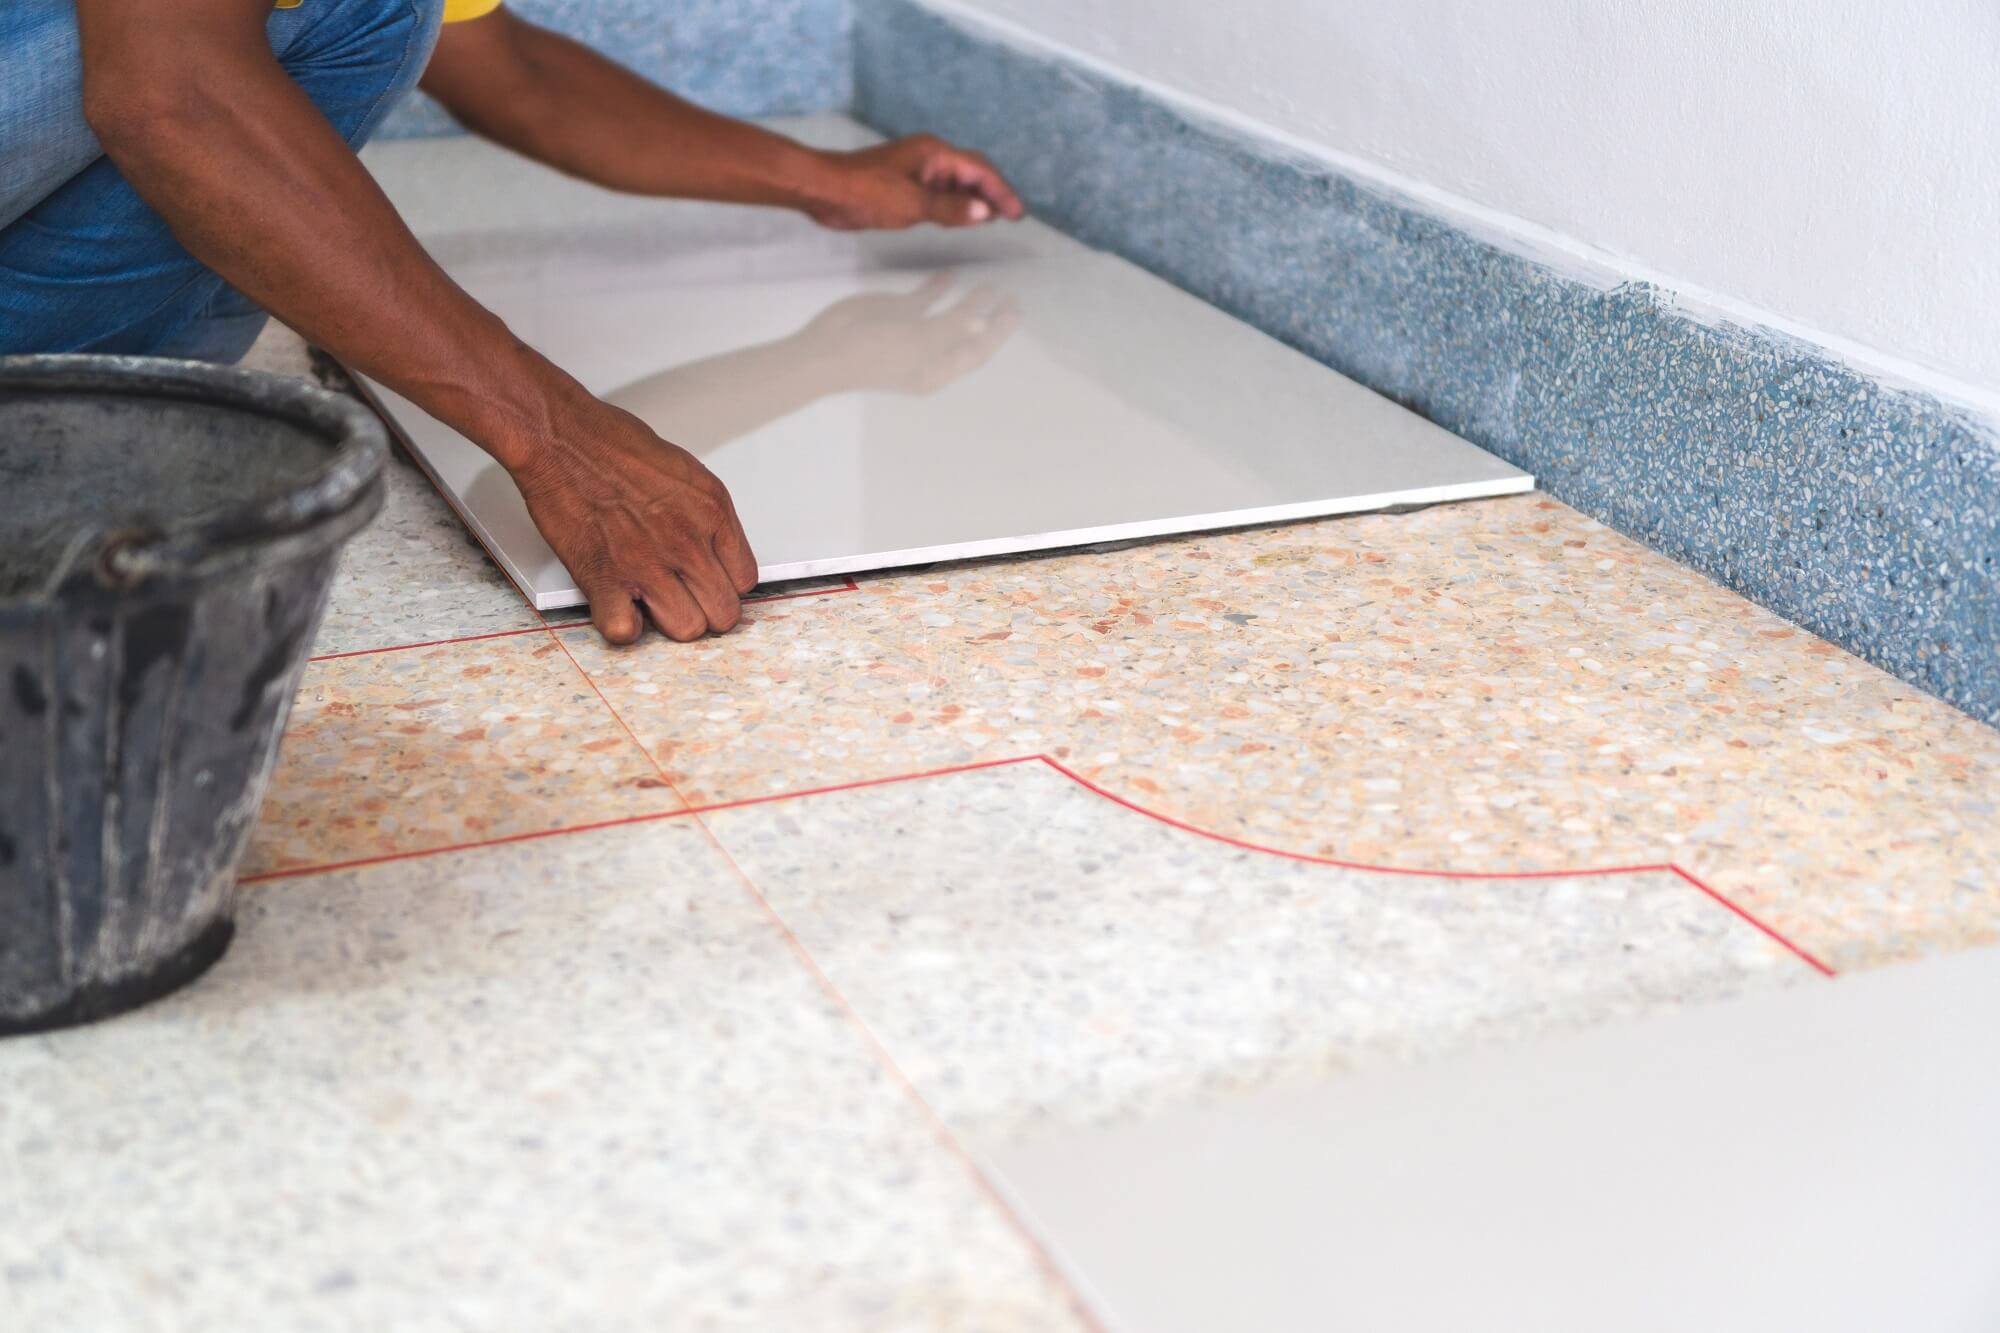
Set the tiles into the mortar, ensuring to wiggle each tile into position to ensure uniform coverage of the mortar onto the back of each tile. The edges will be cleaner if you place the edge of the tiles to edge and slide them apart to create the correct spacing.
You’ll also want to make sure you leave a 1/8-inch gap between the tile and the wall. After laying all the flooring material, remove any excess mortar from between the tiles using a grout float. Once your tile is in place, cut it to size using a wet saw.
Install Cement Board Panels
Lay cement board panels into position, starting at the wall and working your way to the center of the room. This will prevent creating a gap between two panels next to each other if you ever decide it’s necessary to remove one.
Tape the Joints
Use self-adhesive cement board joint tape to cover the joints, working from one side of the room to the other. The seams are where all your tiles will connect, so make sure they’re tight. Use a drywall knife or a smooth trowel to apply a layer of thin-set adhesive over the taped joints, filling in the gaps between panels. Allow the thin-set adhesive to dry completely before laying the ceramic tile.
Install the Grout
After setting all the tiles, carefully spread the grout across their surfaces using a rubber trowel. Use enough grout to fill in all the little nooks and crannies, but be careful not to use too much, or it will start to ooze out from between the tiles.
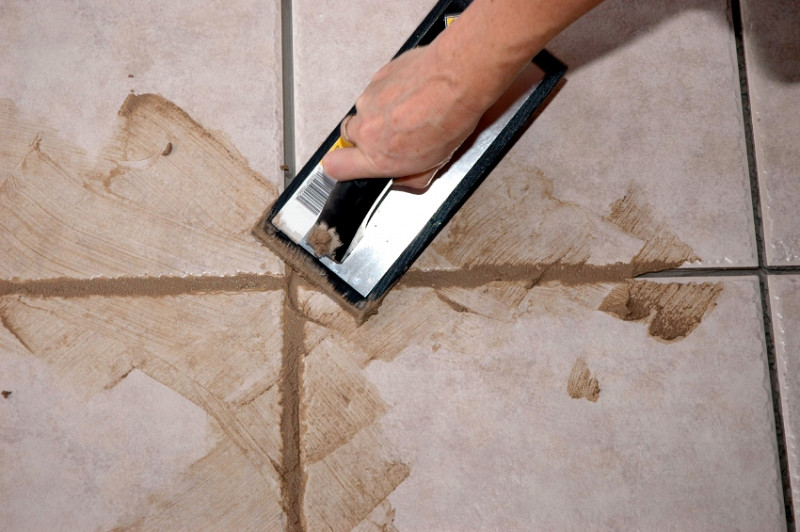
Wipe away any excess grout with a damp cloth, then allow the grout to dry completely. Polish the tiles once the grout has dried, use a soft cloth to polish the tiles until they shine.
FAQs on Preparing a Vinyl Floor for Ceramic Tile
What should you use when installing ceramic tile over an existing vinyl floor?
In most flooring installations, 1/2 inch thick cement board panels are used to ensure a stable base for the tile.
Final Thought on How to Prepare a Vinyl Floor for Ceramic Tile
Installing ceramic tile over linoleum flooring requires a significant change to the existing floor. However, you can still create a beautiful finished product by choosing the right tile and completing the installation process correctly over the existing floor.
The post How to Prepare a Vinyl Floor for Ceramic Tile appeared first on Kitchen Infinity.
Did you miss our previous article…
https://www.conduithardware.com/?p=778
Creative Bathroom Organizing Ideas
Bathrooms can be a total mess. It seems like you never have enough storage space, and every time you need something in there, it’s always at the bottom of a pile somewhere. Most bathrooms are small spaces that make organizing hard, if not impossible.
On top of that, we all have our personal preferences for keeping things clean and tidy. Luckily we have lots of easy ways to organize your bathroom with little to no cost involved. We’ve rounded up some bathroom storage ideas below so you can get started on making yours look neater immediately.
Add a Shelving Unit Above the Toilet
There are lots of ways to store toiletries above the toilet. You can put up a cabinet, use a wall-mounted shelf, or get creative with what you have around your bathroom. Many companies also sell shelving units made to fit around standard-size toilets.

Another great option is to build open shelving above the toilet for additional storage. Doing it on your own provides more opportunities to match the shelving with your home decor style. Also, consider open shelving.
These open vanities are classic and can make any sink look like a modern floating style and they don’t take up too much visual space in small bathrooms. You can easily add floating shelves underneath for attractive storage baskets that can even disguise the plumbing.
Lean a Ladder for Towel Storage
The space between the bottom of your shower and the ceiling is a great place for storing towels if you have an old ladder lying around. This is one of the straightforward ways to hang towels in your bathroom, especially when you add hooks or a towel bar to the wall.
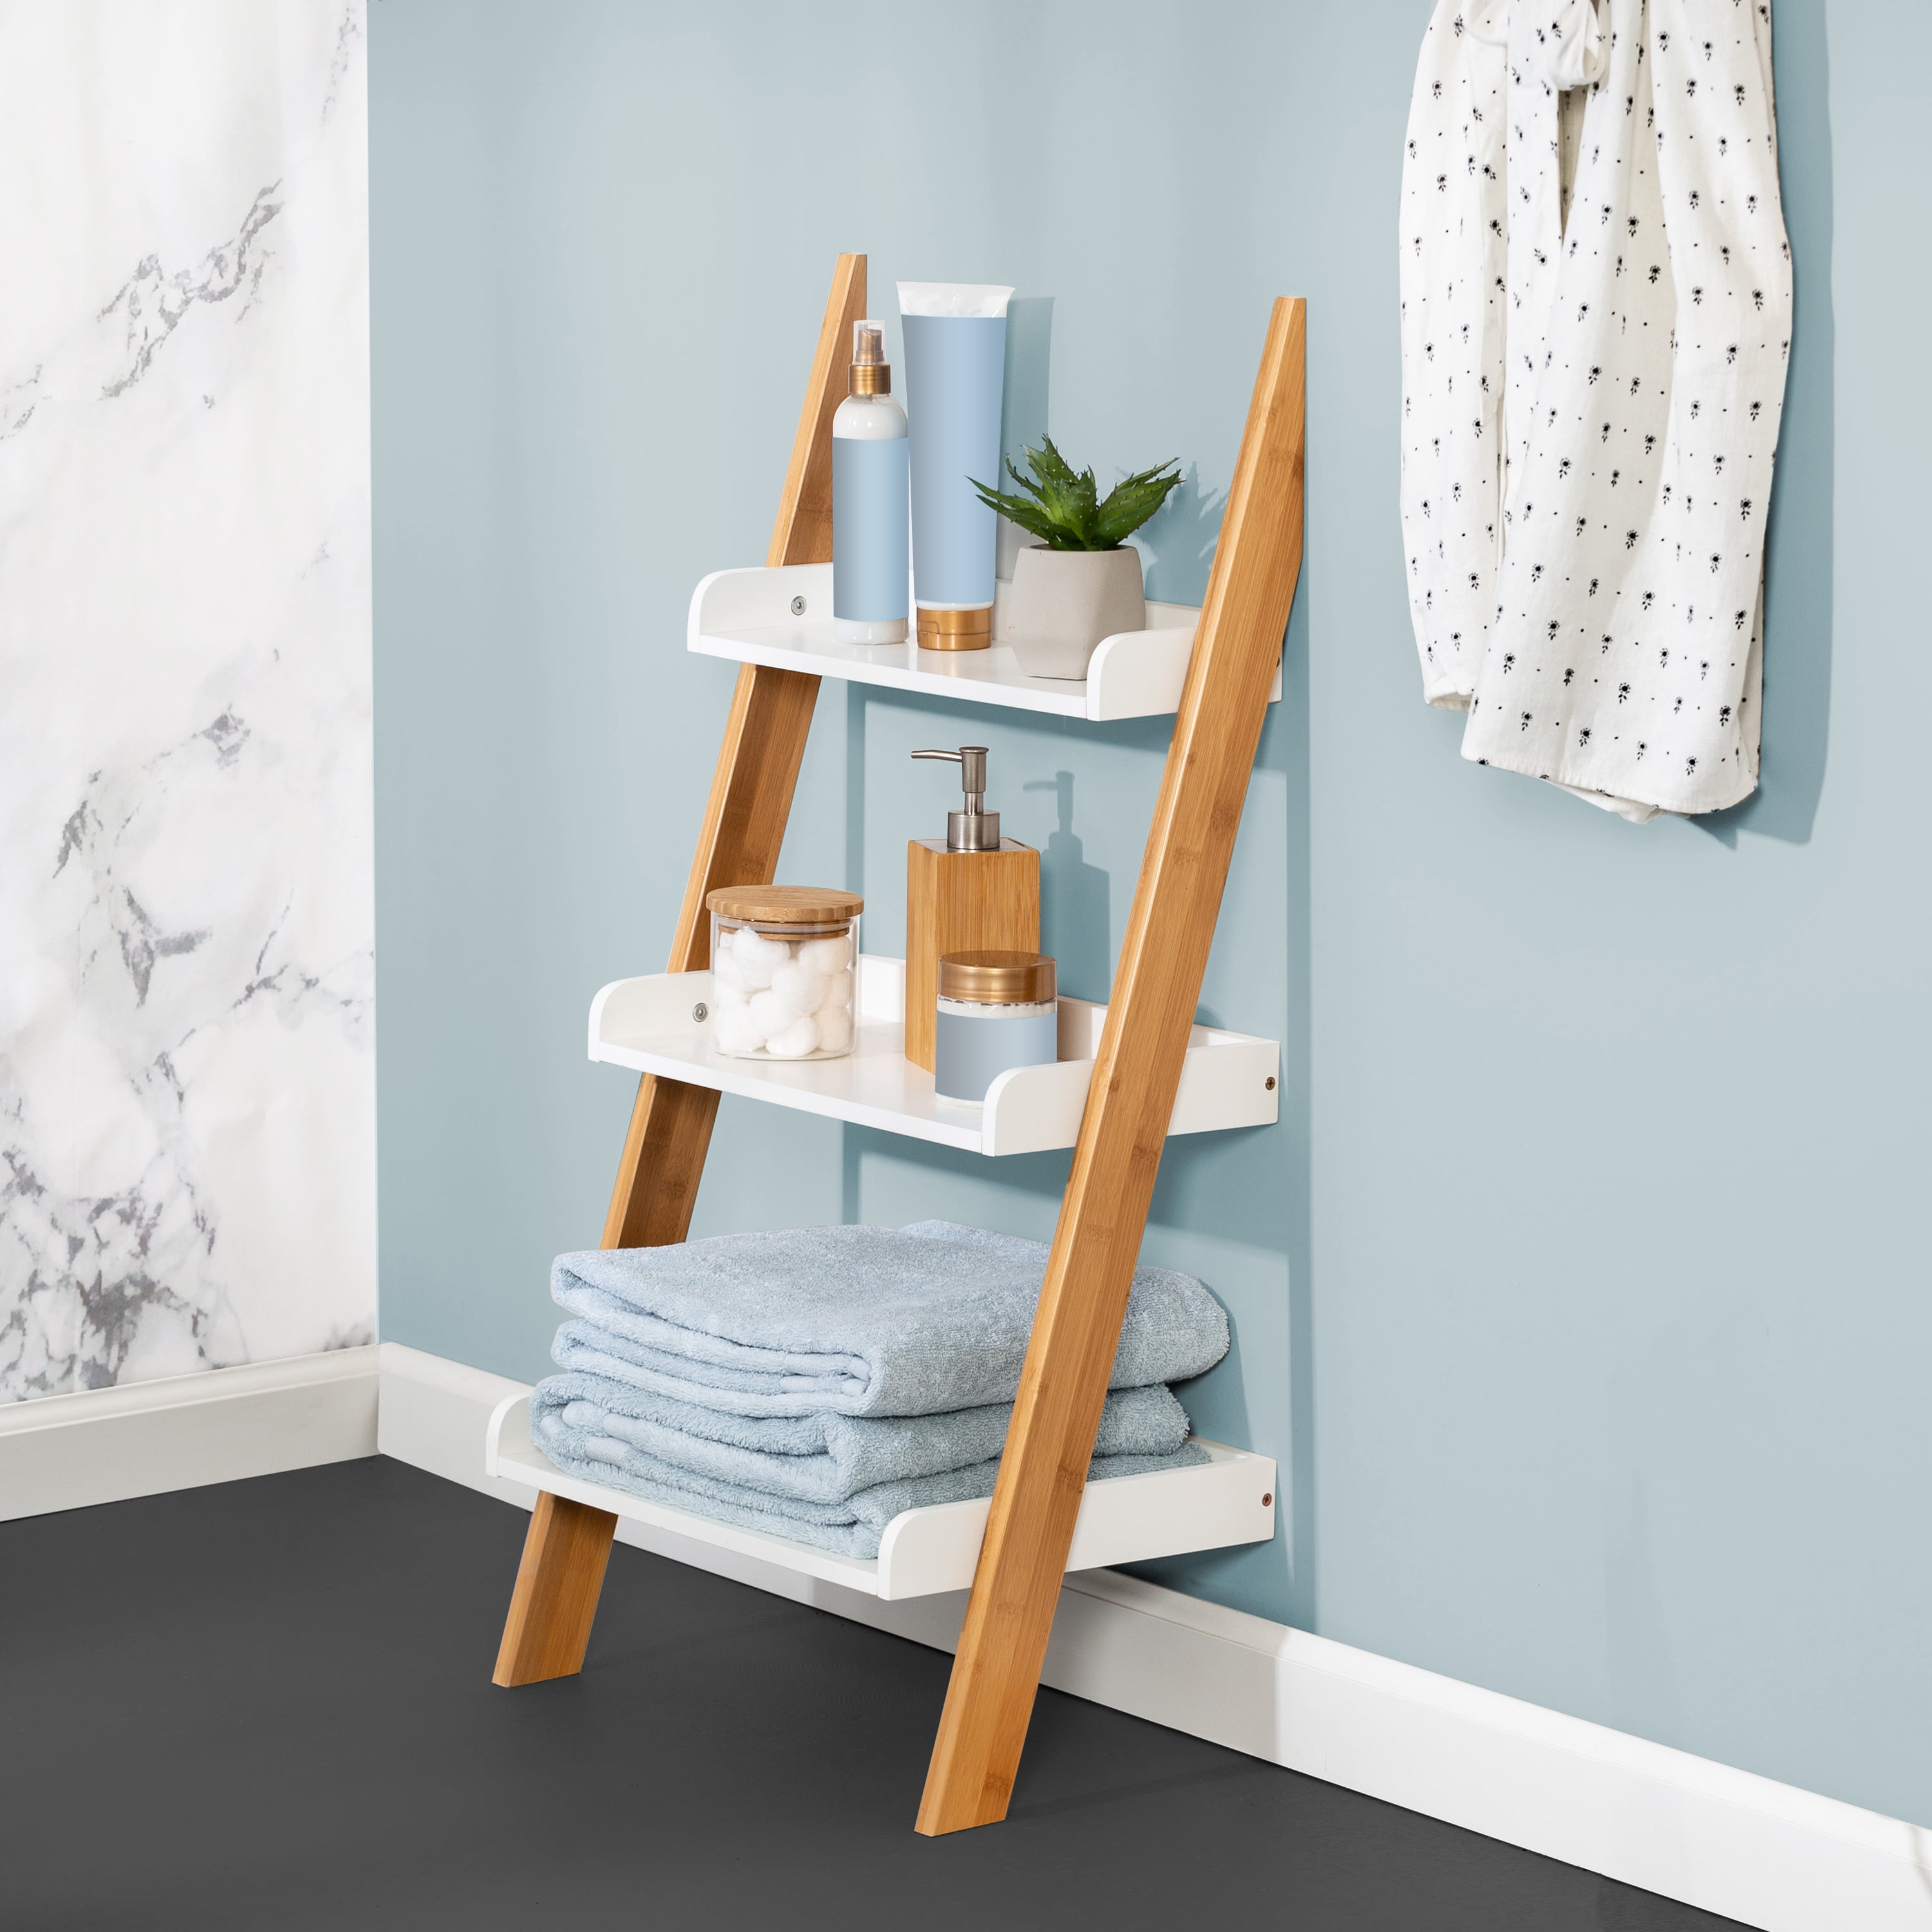
Incorporating ladders into your modern bathroom for hanging towels lets you maximize that vertical storage. Plus, you can hang hooks and baskets from a ladder to store washcloths and other toiletries.
Mount Shower Caddy Using Suction Cups
Hanging a shower caddy from the ceiling is an easy way to free up space in your bathroom. All you have to do is screw a hook into your ceiling, then fix strong suction cups or adhesive hooks to the shower surround. This frees up both counter and floor space while also giving you easy access to your bath products, linens, candles, and other toiletries when you’re in the shower.
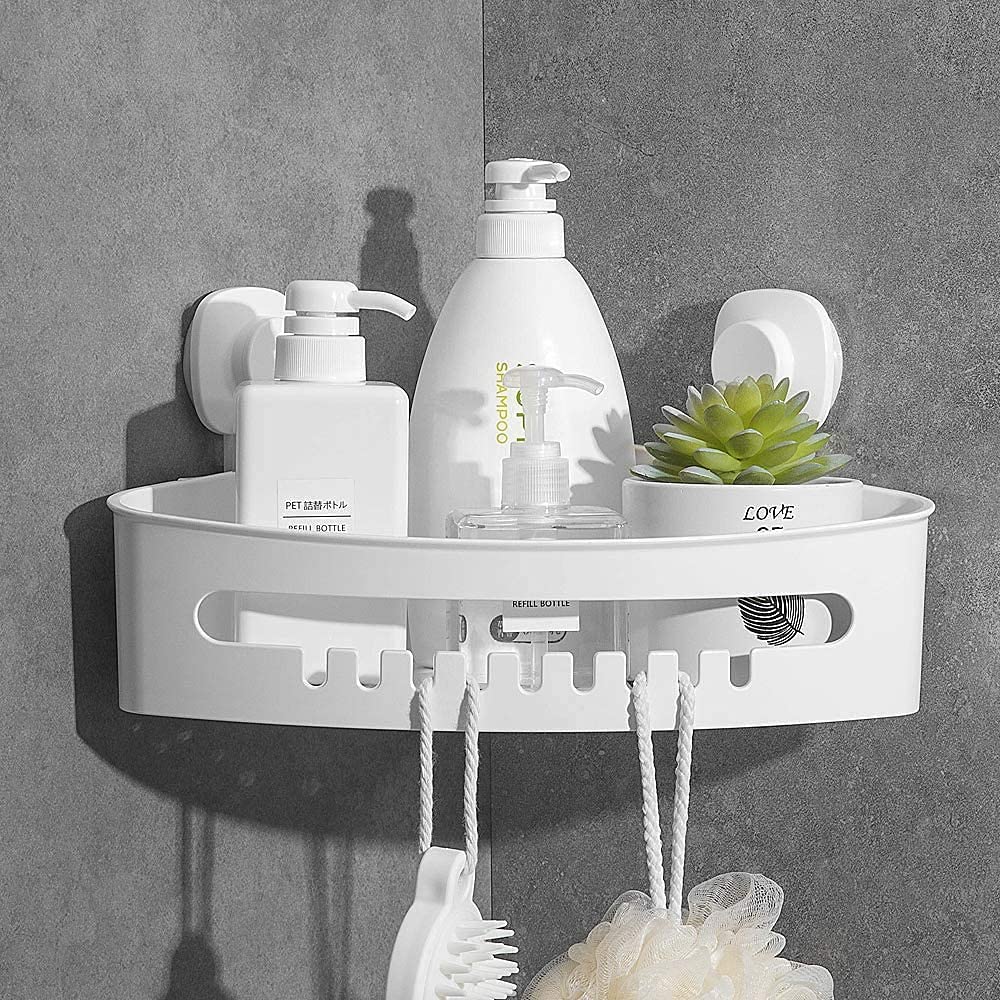
A wall-mounted bath caddy allows you to store more items without taking up any extra storage. A bath caddy is one of the easiest and inexpensive small storage bathroom ideas to implement.
Store Your Reading Material
One of the best ways to free up counter space is to store your reading material elsewhere when it comes to bathroom organization. A great place to put it is in a magazine rack or bookcase that’s mounted next to the toilet. This way, you can grab your reading material when you’re finished with your business, and you won’t have to clutter up the countertop.
Store Items on the Inside of a Cabinet Door
If your bathroom doesn’t have a great deal of counter space, every inch is valuable. However, there are several items you can store on the inside of cabinet doors to free up room. For example, place an over-the-door shoe rack on the back of your bathroom door or in another inconspicuous area so you can store extra towels or shampoo bottles.
You can also buy a tension rod and hang it on the back of your cabinet door to store washcloths. You can also take advantage of this space by attaching clear bins to the doors in which you can store everyday essentials. Label each bin and add dates to items that have an expiration. This way, you’ll know where everything is, and nothing will go to waste.
Create Some Space for a Hair Dryer
If you don’t have a lot of space in your bathroom, try to find an alternate spot for your hairdryer. You can hang it on the back of your bathroom door or a hook on the wall. This way, you’ll have more room to store other items.
To implement this bathroom organizing idea, you can use an over-the-door rack to fit wider items, including hair tools. The nest part is that you won’t need to drill holes to hang it.
Keep Stylish Items on a Tray
If you want to keep your bathroom looking stylish, try placing all of your luxury items on a tray. Everyday household items, such as hand lotion, perfume, jewelry, cotton swabs, makeup brushes, and tissues can be placed in canisters or jars so they don’t take up room on the counter. Decorate your bathroom countertop with a stylish tray to hold some of your most-loved and visually appealing items.
Use Lazy Susan in Your Bathroom Cabinet
A Lazy Susan is a round turntable that can be installed into your bathroom cabinet. You can use this to store all kinds of items, including makeup, hair appliances, and personal hygiene products. Simply spin the lazy Susan to find what you need.
Use Cups or Jars for Storage
Add three mason jars to your medicine cabinet to make quick work of organizing toothbrushes, cotton balls, and swabs. You can even use cups or votive candle holders for storage on the countertop to hold your makeup brushes or favorite perfumes.
By storing items vertically inside a jar or cup, you can make better use of the vertical space inside the cabinet. This bathroom organizing idea requires you to keep items together. These include one jar for cotton balls, one jar for cotton swabs, and another for other necessities.
Create a Skinny Alcove
Use a skinny alcove in your bathroom to store smaller items like lip balm, sunscreen, or hand sanitizer. You can also fit larger items into the space by turning them to their sides. By using the vertical space within the alcove, you can stack extra towels and hold baskets with all your skincare products without sacrificing surface area in your bathroom.
Designate a Place for Dirty and Clean Towels
You can keep your bathroom neat and organized by designating a place for dirty towels. After you’re done in the shower, hang the towel on a hook right next to the shower or tub. If possible, create a small spot for a hamper so clothes and wet towels don’t end up in a pile on the floor. You can roll some clean towels and store them on top of the hamper to save space.
Roll Up a Bar Cart
If you have an unused bar cart sitting around, grab it and roll it into your bathroom. You can fit the cart perfectly in the corner, so you will free up some counter space if there’s no room next to your sink. You can also use this area as a makeshift vanity area since there are many drawers for all of your beauty. This is also a good place for flowers to freshen up a guest bathroom or powder room.
Blend It in with Colors and Patterns
If you’re aiming for a more sophisticated and chic style, match your bathroom organizer with the colors and patterns on your shower curtain. For example, if your shower curtain is white with colorful flowers, an all-white or cream laundry hamper will fit right in.
Paint it the same color as your wall for a clean, cohesive look if you’re looking to keep your bathroom storage shelving from standing out as a focal point. This also allows the entire space to feel sleek, clean, and fresh. Check how to paint the bathroom to get some amazing ideas.
Create Storage Unit Under the Sink
If you’re short on storage space, consider creating a hidden storage unit under the sink area. This is a great place to store bins for toiletries, cleaning supplies, and towels. You can even buy a special cabinet or organizer specifically for this purpose. While a decorative shelf is mounted on the wall for decorative items, the under-sink area offers you room to stow items out of sight, even if you have a tiny bathroom.
Fake a Linen Closet
Don’t panic if you’ve got a space that doesn’t have room for an actual linen closet or the previous owner took the closet when they purchased your home. Instead of having no place to hang damp towels and hand towels, give this idea a try. Take advantage of the free corner wall and add a shelving unit there. You can also attach baskets to the wall for a spot to fold extra towels and washcloths. A slim wall unit will also work.
Organize Bath Toys in Waterproof Bins
Do your kids have bath toys that they never seem to put back when it’s bath time? Turn a cheap plastic organizer into something functional. Niches in the wall are a great spot for storing such toys in a small plastic bin. If you don’t have a niche, turn to a strong suction cup near the bath. You can also hang an extra shower curtain tension rod along the back wall of the tub and add hooks so that you can hang toy bins.
Divide Vanity Drawers into Sections
Don’t let your bathroom vanity drawers look like junk drawers. Instead, purchase drawer dividers and group items together to make your drawers functional and appealing storage spaces. Curate your new vanity drawers with commonly used products that make sense in your household.
FAQs on Creative Bathroom Organizing Ideas
What are the three types of bathrooms?
Bathrooms are categorized as the master bathrooms, containing a shower and a bathtub adjoining the largest bedroom. There is also a full bathroom or full bath, containing four plumbing fixtures, including a toilet and a sink, and a half bathroom or powder room, containing just a toilet and sink.
Final Thought on Creative Bathroom Organizing Ideas
As you can see, bathroom organization isn’t as simple as throwing everything into a cabinet and closing the door. You have to plan out where things will go and what you want to bring together in one place.
Try these bathroom organizing ideas to spice up your space. Don’t let the lack of storage or time be an excuse for not washing your hands after using the restroom! Take some time out of your day to organize, and you will thank yourself later.
The post Creative Bathroom Organizing Ideas appeared first on Kitchen Infinity.
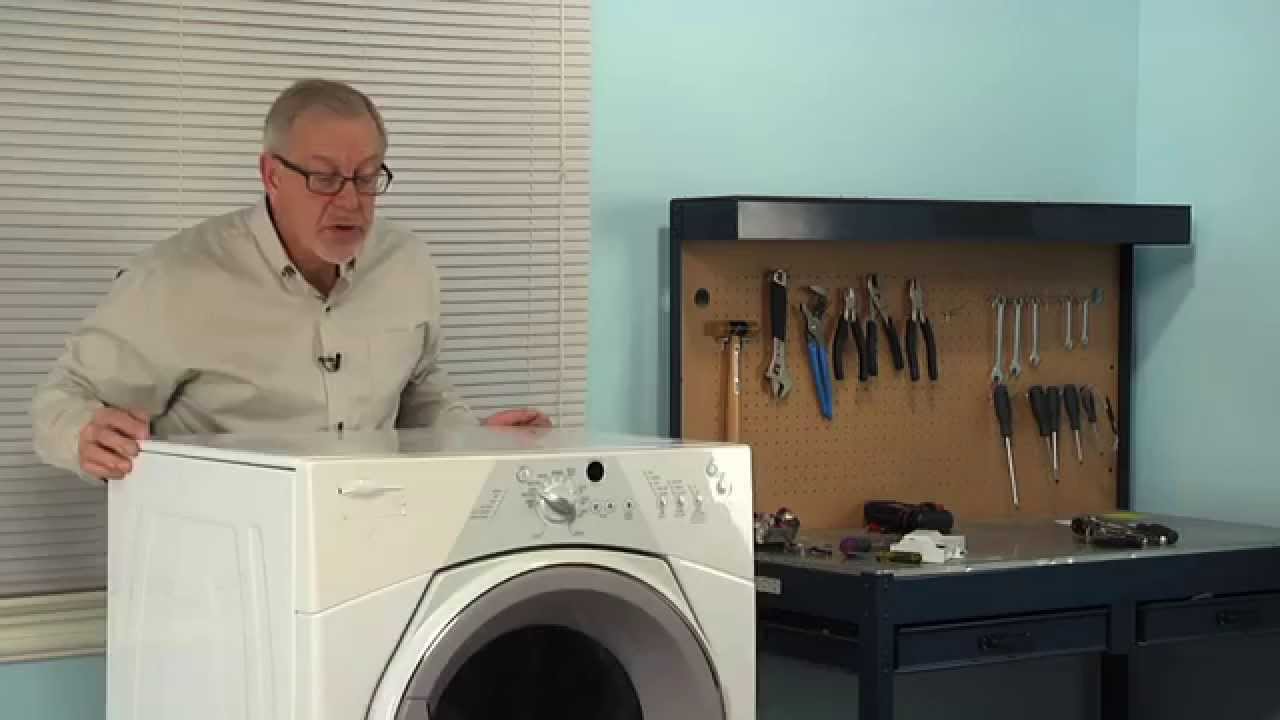
How to Troubleshoot Your Clothes Dryer
Your clothes dryer is a very important appliance in your home. It helps you save money by drying the laundry at home instead of going to the Laundromat. However, there are times when it breaks down and stops working properly.
Since most people don’t know how to fix their broken clothes dryers, they will buy a new one or take their laundry elsewhere for drying. You don’t have to do that as fixing the clothes dryer is as easy as how to do laundry itself. Below is how to troubleshoot your clothes dryer without calling the repairman or buying a new one. Let’s get started.
Tools and Materials
- Voltage meter
- Long-handled bristle brush
- Rigid dryer vent
- New dryer fuse
- New dryer power cord
- Cotton swab
- Rubbing alcohol
- New dryer belt
Instructions
1. Check if the Dryer is Plugged In
Dryer problems happen because of power interruptions. Before you do any troubleshooting, make sure your dryer is plugged in. Check the voltage meter if there is electricity running through it.
If not, check the circuit breaker or fuse that provides energy to your dryer. Make sure that all electrical connections are tight and secure to avoid loose wiring. If you have an electric dryer, it runs on two circuits, including one for heating the element and one for the rest of the dryer.
So, if your dryer is getting hot but not drying, it could be that one of the two circuits is tripped. In this case, check the circuit breaker and reset the circuit as necessary. Also, learn how to install a dryer electric cord to avoid any electrical issues.
2. Make Sure Your Dryer is Not Overloaded
If you’re trying to dry a lot of clothes at once, your dryer might be too overloaded to function properly. In this case, try drying fewer items or use a larger dryer. Overloading the dryer can cause drying performance and noise issues when too much weight is inside the dryer.
When you squeeze too many clothes into your dryer, you decrease the airflow needed to dry clothes properly. Overloading also makes your dryer work harder, use more energy and increase drying time. Avoid filling your dryer drum more than three-quarters full.
3. Check the Breaker or Fuse
If your dryer is plugged in but won’t turn on, the power source is the first thing you want to check. It’s possible that the breaker has been tripped or the fuse needs to be replaced. Check the Breaker Box If you have an electric dryer, turn off the circuit with a tripped breaker switch and reset.
If you have a blown thermal fuse, replace it with the same amperage and rating. Also, check the voltage in the outlet using a voltage meter and make sure your outlet is functioning properly. If it’s not functioning, call the electrician immediately.
If you have a gas dryer, make sure the pilot light is lit and that you have an adequate supply of gas if the dryer is fueled with liquid propane. Both electric and gas dryers require 240 volts to operate. And if the dryer power cords fail, check the voltage and replace it if needed.
4. Inspect the Fuse, Switch, and Belt
If you have a power outage or surge in your home, it’s possible that the thermal fuse in the dryer control panel is damaged. Dryers also require a door switch to engage for the appliance to work. However, these switches can break.

You can get them coated with lint or use a cotton swab and a bit of rubbing alcohol to clean the contact areas. Check the rubber belt that connects the motor to the drum if your dryer heats up, but the drum doesn’t turn. If it’s loose or broken, replace it. It’s a good idea to inspect the fuse, switch, and belt before a service call.
The fuse is located on the dryer wall and is usually a small, round glass tube. If it’s blown, replace it with one of the same amperage and rating. The switch is located near the dryer door and is either a toggle or rocker switch. If it’s not working, replace it.
The belt is located around the dryer’s drum, and if it’s broken, worn, or loose, it will need to be replaced. After getting the new belt, place it on the drum where the old belt had been and wind it onto the idler pulley and the motor pulley.
5. Check and Clean the Temperature Sensor
If the sensor is dirty, it will not read the correct temperature, and your clothes will not dry properly. To clean it, unplug the dryer and remove the screws that hold the sensor in place. Clean it with a soft brush and replace it.

Test the dryer to see if it’s working properly. If your dryer turns on and shuts off very quickly, the problem could be either the thermostat or thermal resistor. The thermal fuse blows and turns off the dryer to prevent overheating.
Use a voltage meter to check the temperature sensor to determine if it’s working properly. Also, check the heating element and timer to be sure they’re receiving power. Check the user or repair manual.
6. Clean the Lint Trap
Clean the lint trap after every load of laundry to ensure your dryer is running properly and efficiently. A clogged lint trap can cause your clothes to take too long to dry. Hard lint buildup in the trap can cause your clothes to dry slowly, if not at all.
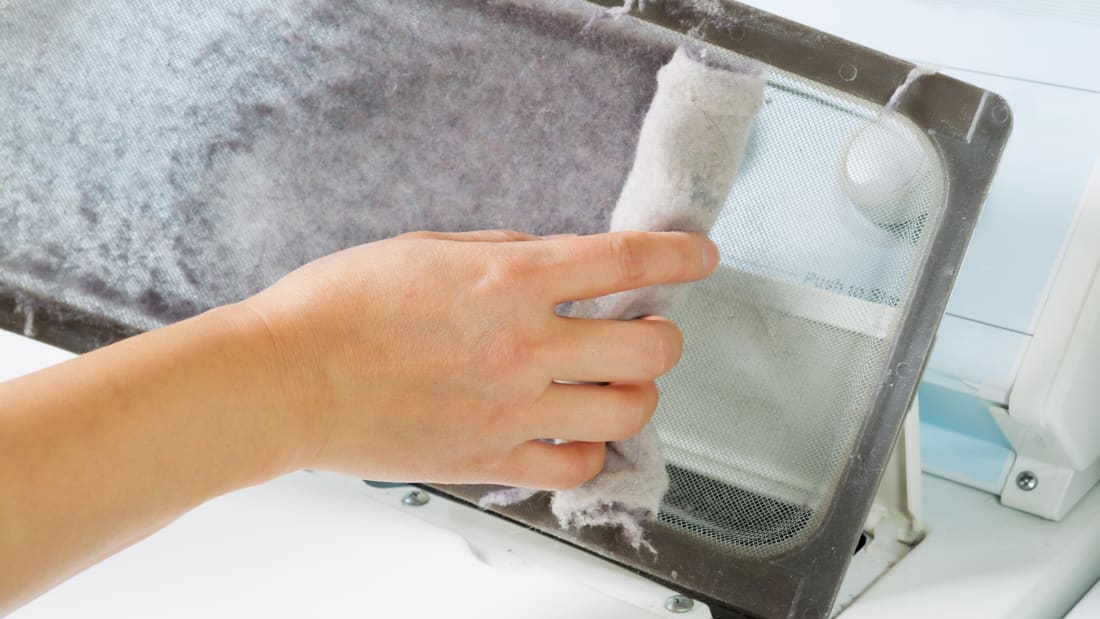
If your lint filter is full, the air is not flowing freely, and your machine is forced to work longer than necessary. After emptying your lint filter, wash with warm soapy water and let dry completely to remove any residue from the dryer sheets. Use a bit of rubbing alcohol to clean the electronic moisture sensors. This will leave your dryer working more efficiently and prevent a possible fire.
7. Check the Air Vent and Ducts
The air vent and exhaust duct play a key role in the drying process. Make sure they are clear of any debris or obstructions. If you have pets, their hair can clog up the vents and ducts, resulting in a clothes dryer that does not work properly.
If your dryer vent system is kinked, clogged, or disconnected, use a long-handled bristle brush to clean out the dryer vent. The vent should be as short as possible between the machine and the outside exhaust vent to prevent clogs. If your venting system is long and you can’t reach the entire length with a brush, use a leaf blower to clean the system or hire a professional.
If you still have a flexible white plastic dryer hose, replace it because this is a fire trap waiting for a disaster. And that’s why new building codes require a rigid dryer vent. Make sure you check the outside vent as well.
Most of them are designed with a trap door that only opens when dryer air and lint are blown out. The trap door won’t open if the vent hood gets coated with lint, especially in high humid climates.
8. Make Sure the Dryer is in a Ventilated Space
Your dryer needs to be in a well-ventilated space so the hot air can escape. If the dryer is too close to a wall, the air won’t circulate, and your clothes will take longer to dry. In fact, if the back of the dryer is against a solid surface, it can cause the motor to overheat.
If you’re installing your dryer in a closet, make closet doors have ventilation openings at the top and the bottom of the door. The front of your clothes dryer requires a minimum of three inches of airspace, one inch on the sides.
9. Check for the Heat Problem
If your clothes take too long to dry, first check the heat problem. The most common reason for clothes not drying is that the dryer isn’t getting hot enough. Hold your hand under the outside exhaust hood to check air movement. If the air movement is less than a hair dryer at high speed, clean the lint from the entire length of the system and exhaust hood.
The dryer isn’t heating if you can’t feel any air coming out. One way to test if the dryer is getting hot is to use a thermometer. Put the thermometer in the exhaust pipe and ensure it reads at least 130 degrees Fahrenheit. If it’s not reading that high, you need to troubleshoot your heat problem.
10. Check the Dryer Blower Wheel
Another common reason for the lack of heat is a blocked dryer blower wheel. This can happen if the lint screen isn’t cleaned often enough. To check if the blower wheel is blocked, open the dryer’s back panel and look at the blower wheel.
If it’s dirty, clean it with a vacuum cleaner. With the back panel open, check the blower wheel for cracks or obstructions that may be preventing it from spinning. To remove the blower wheel, open up the dryer by separating the top and front panels away from the main dryer cabinet. Pull the drum off the drum bearing to have full access to the motor and then unscrew the blower wheel from the motor.
11. Replace the Control Panel
If the dryer isn’t getting any power, you’ll need to replace the control panel. Before doing this, unplug the dryer and remove the back cover. During this step, you will find your thermal fuse, and its location will be dependent on where it is in your particular model of appliance. Read your owner’s manual for information about control panel components to order the correct replacement.
FAQs on Troubleshooting Your Clothes Dryer
What is the common problem with dryers?
Excessive noise is the most common problem with dryers. A new drum belt can help eliminate some of the noise during operation, but there could be other problems if it doesn’t work.
How do I know my dryer isn’t working?
If you have no power, your dryer isn’t working. Begin troubleshooting by unplugging it and checking the power at your electrical outlet to be sure.
Does my dryer need an electrical reset?
If your dryer is making some noise but isn’t tumbling, you can check to see if the drum needs to be reset by pulling the lint out of the back of the machine where you would normally clean it. There’s a small red button on the motor that you can push with a paperclip or something similar to reset it.
Final Thought on How to Troubleshoot Your Clothes Dryer
As you can see, troubleshooting your clothes dryer can be easy if you know what to look for. If you don’t, it can be difficult and time-consuming to learn while trying different things that may or may not work.
Before getting a new dryer, make sure you try these troubleshooting methods, and if you have no clue where the problem might be coming from, don’t hesitate to call a professional.
The post How to Troubleshoot Your Clothes Dryer appeared first on Kitchen Infinity.
Did you miss our previous article…
https://www.conduithardware.com/?p=767
How to Build a Wooden Gate for Your Yard
A wooden gate that is not maintained will look ugly and uninviting. It can also be a safety hazard for your family, pets, or guests. The good news is that you don’t need to hire a professional to build or repair your gate. You can do it yourself with the right tools and instructions.
You can build your good-looking wooden gate from start to finish and make it as durable as you like. Here’s how to do it.
The Tools and Materials Needed for the Job
Other than the gate, you’ll need a few common hand-held carpentry tools to get started. These include:
- Tape measure
- Wheelbarrow
- Screwdriver
- Pencil
- Miter saw
- Cordless drill
- Small diameter drill bit
- Carpenter’s glue
- Straight edge ruler
- Hammer
- Shovel
- Safety glasses
- Speed square
- Posthole digger
- Hearing protection
- One-handed bar clamps
Steps to Building a Wooden Gate
Step 1: Preparations
When planning the materials needed to build your gate, it’s important for you to do a little math to make sure that both of the posts will be at the same height. The idea is to set one post in concrete in one corner of your yard and then make another post on the opposite side of your yard match up with it. Think through the location and weigh out all the considerations and locations where you want to build your gate.
Step 2: Dig Holes and Plumb Posts
Take the time to dig your post holes to have the same depth and size. You will also want to make sure that your posts are plumb before you set them in the concrete. Use a level or speed square to test for plumb and adjust as needed.
Step 3: Measure and Cut the Tongue and Groove Boards
Once you have the posts in place and are sure of the height, it’s time to measure and cut the tongue and groove boards. You will want to cut four pieces that are each 72 inches long. Use a measuring tape to make a pencil mark at 72 inches on each tongue and groove board. After that, cut the boards 72 inches long using your miter saw.
The frame for a basic wooden fence gate should be a simple box with four sides, usually smaller than the gate opening. Typically, you would use the same variety of wood you used on the fence. If you want a different color, redwood is sometimes used for large gates.
Step 4: Measure and Cut the Horizontal Bases
Next, you will need to measure and cut the horizontal bases for your gate. You will need a measuring tape to measure three 42-inch segments on two of the 1×6 cedar boards and not tongue and groove boards. Cut these segments, so you have three boards that are 42 inches long.
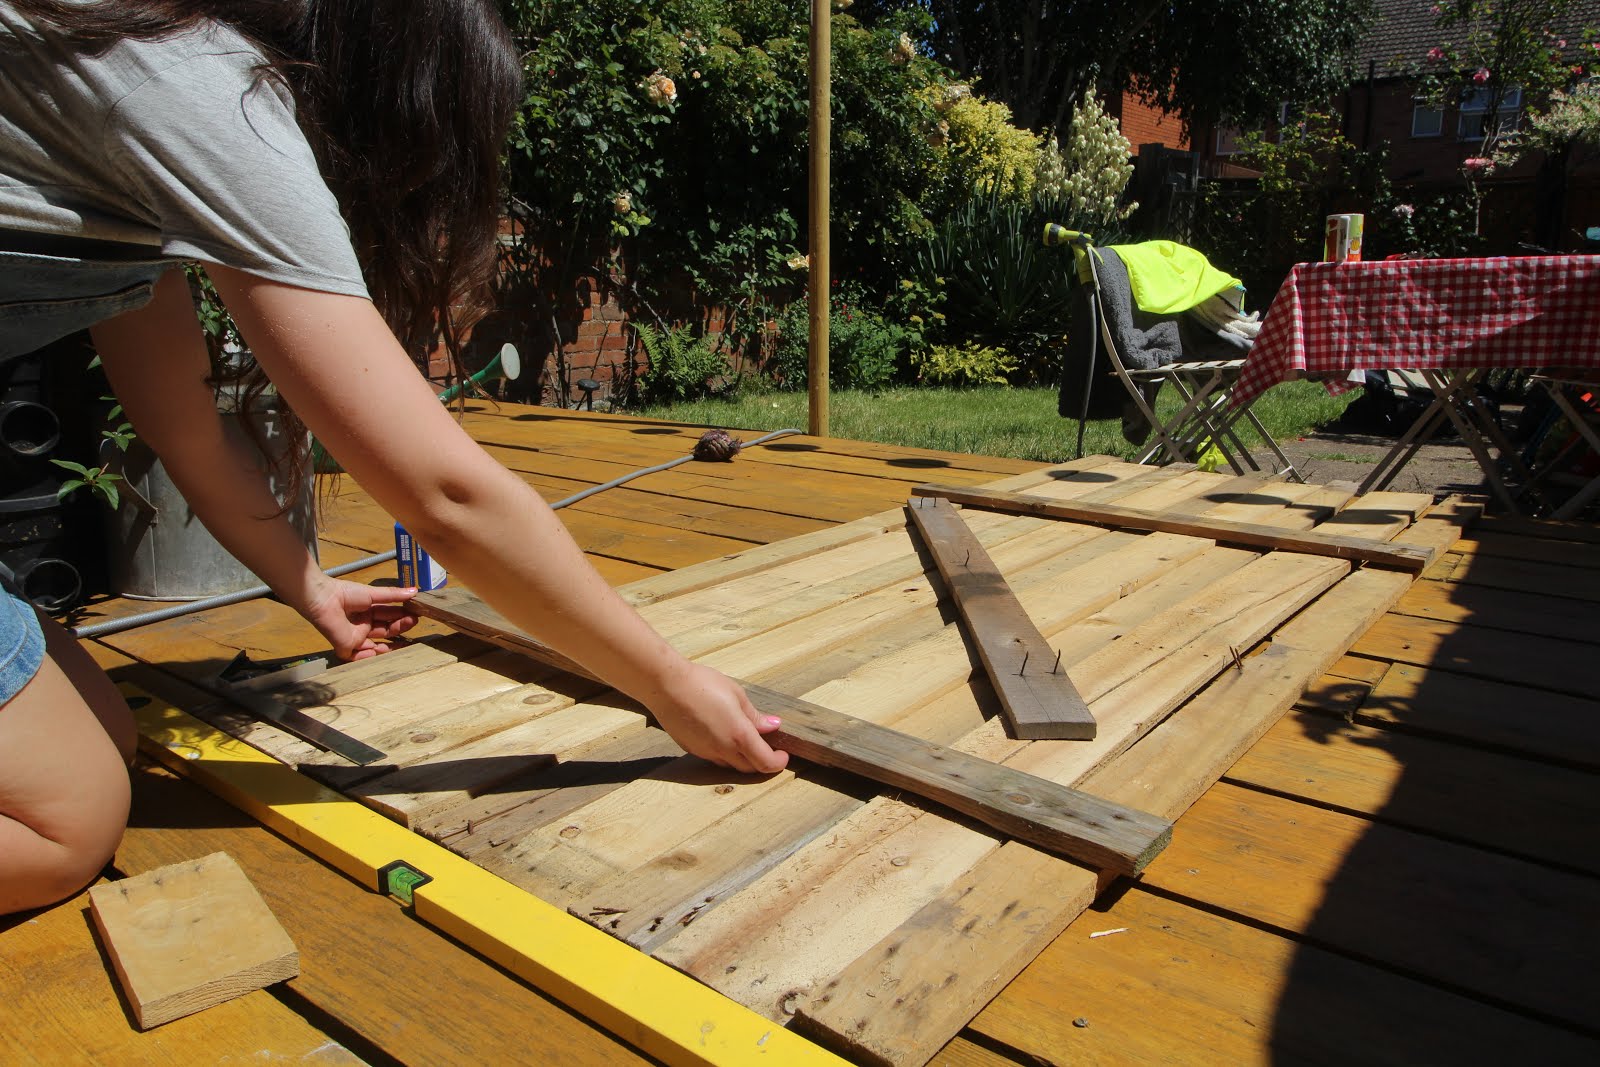
Step 5: Lay Out the Boards
Once you have your boards cut, lay them out on a flat surface and make sure they line up with each other. If the tongue and groove boards fall apart while doing this step, then move them to where they will not get in the way of your layout. This won’t be hard if you understand other carpentry work such as building a floating deck.

Step 6: Attach the Tongue and Groove Boards
You will need to clamp the boards together while attaching them with screws. This keeps the boards in place while you attach them. Attach them to the 1×6 horizontal brace boards underneath the 7/8-inch exterior screws. Pre-drill holes for the screws to eliminate splitting. Keep a close eye on the lower boards, so they don’t move out of position when you work.
Step 7: Anchor and Plumb the Brace Posts
You will want to make sure the posts are plumb or vertical. You can use a level to check this. To keep them in place, you will need to anchor them to the ground. If your soil is soft, you can use a post hole digger to make a hole deep enough for the post to be stable. Post length should be at least ⅓ longer than the planned height of your gate.
Pour some gravel into the bottom of the hole to allow for drainage and place a cement brick at the base of each post. Make sure your posts are tall enough to reach about three feet off the ground when they are all put together or tall enough to be bent around by hardware cloth. Cover with soil and tamp down until it is solid.
Take your next two posts and place them about a foot from each other. The closer they are, the more support you will have. Decide which direction you want your gate to swing, then place one of the corner posts in between them so that it is even on both sides. Use a level again to make sure this post is straight.
Step 8: Measure and Cut the Diagonal Brace
Next, use a measuring tape to measure the length of your hardware cloth and cut it so that it is just a bit longer than the width of your yard. You can use wire cutters for this task. Put the hardware cloth into place and attach it at each corner with hog rings, pushing them down on either side of the post.
Now it is time to install the diagonal brace. This will help keep the gate stable and prevent it from sagging. Measure from the top of one post to the opposite of the other post. Mark this spot on each post and then use a level to draw a line between the two marks. Lay your straight edge over this diagonal brace, staying parallel with the lines of the horizontal slats.
Make six pencil marks on a diagonal brace parallel to the top and bottom of each horizontal brace. Remove the temporary screws, then cut the diagonal brace with your miter saw at those six marks. Three cut pieces will be discarded, leaving two cut pieces that you’ll use as the diagonal brace.
Step 9: Attach the Diagonal Brace
Run a line of carpenter’s glue over the end of the diagonal brace, then drive in a 3-inch screw. Then, press the pieces on the gate in between the horizontal braces. Weigh down the two glued pieces with cinder blocks, rocks, and anything sufficiently heavy. Let the glue dry for about two hours, then remove the weight. Drive-in two more screws, one at each end of the diagonal brace.
Step 10: Cut Frame Pieces to Size with a Miter Saw
Using a miter saw, cut the pieces of the frame to size. You can start the gate by cutting the top and bottom pieces to the same width or length as you planned for, slightly smaller than the opening in the fence. Cut the upright side planks about 3 inches shorter than the height of the gate.
Step 11: Screw-in Top and Bottom Planks
Screw the top and bottom boards to the gate frame. Position the plank, so its edges are flush with the frame, then screw into place every 16 inches or so, using three screws per board. Drill a pilot hole for the screws before putting them in to not split to the wood. Fasten with deck screws, pre-drilling to keep the wood from splitting.
Measure from the top bend to the opposite bottom corner and make sure both sides are the same. As you start assembling the gate framing, it’s good to lay it out on a flat surface such as a patio or driveway. Attach the top and bottom rails to the side rails, ensuring it’s square.
Step 12: Cut an Angle Cross-Brace and Attach it to the Top and Bottom Rails
This will help to maintain strength and rigidity. Connect these to the frame boards that match the rest of the fence by using deck screws, pre-drilling. Use a miter saw to make your diagonal cut and place diagonally onto the box and trance with a pencil where the angles go. Place the cross-brace at a 45-degree angle extending from the bottom corner of the gate to the opposite corner of the top of the gate. But if it’s a rectangular frame, make a drawing to scale and measure the angle you’ll need with a protractor.
Step 13: Cut and Install the Planks
Place the first plank with its bottom side against the foundations and side rails and tight in between them at both ends. Use a combination square to ensure all of your planks are even before screwing down. Cut the planks using a table saw and secure them using deck screws, drilling pilot holes to keep your planks nice and clean.
Step 14: Design the Top of Your Gate
The top of your gate should have a nice curve to it. Cut the two 2x6s to the desired length and then use a jigsaw to cut out the arch. Drill pilot holes and then screw the boards together using deck screws.
Start by drawing an arc across the top of the fence gate using a string and a pencil, filling it with decorative curves of your taste. If you’re a woodworker, feel free to get fancy with your decoration. Use the jig to cut along your pattern.
Step 15: Install Hinges and Mount Your Gate
Once the top is finished, it’s time to install the hinges. Place them on the upper left and right corners of the gate. Pre-drill holes and then screw the hinges in place using 3-inch screws. The final step is to hang your gate. Have someone help you hold it in place while you screw it into the hinges.
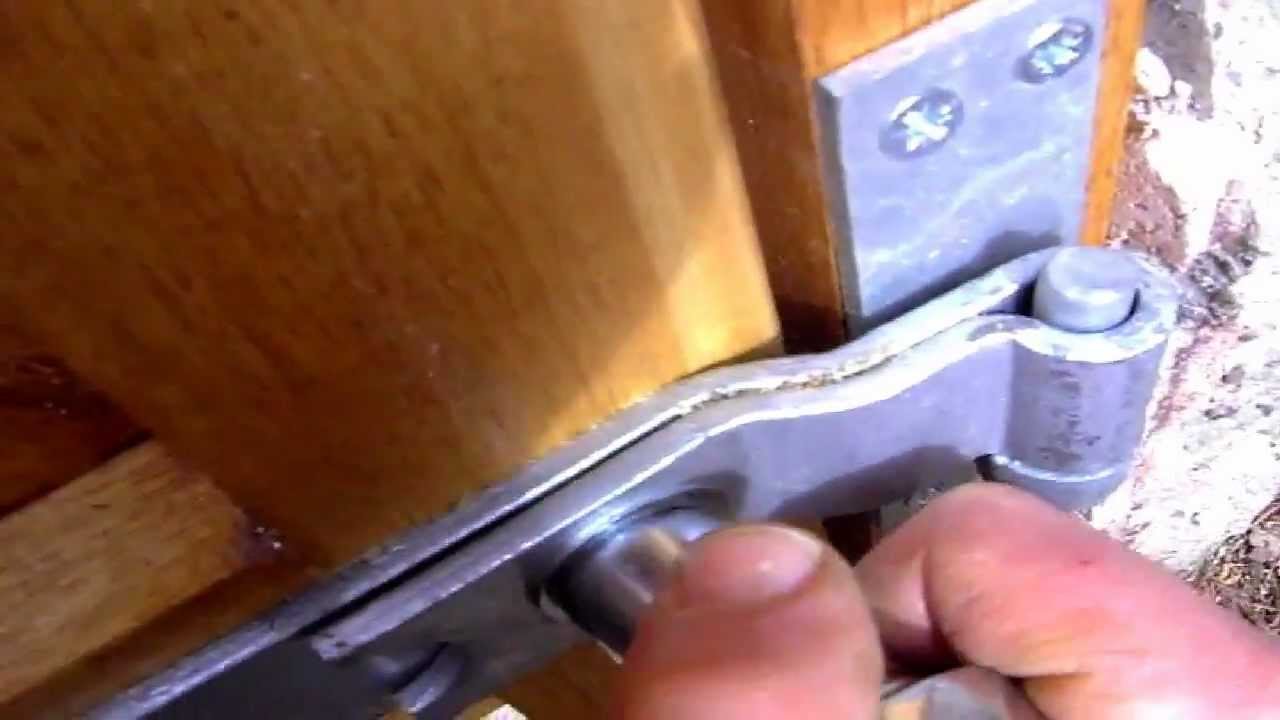
Leave about a 1/4 inch of distance on the hinge side of the gate. Using the cordless drill and screws included with the hinges, screw the hinges at the top, middle, and gate frame. Check to ensure the gate swings properly. Adjust the hinges to level, tighten or loosen the gate if necessary. Add diagonal cross brace to keep the gate square and prevent sagging. Remember that installing a brace with a little pressure in the opposite direction will make your gate warp. So, take diagonal measurements to check for squareness.
Step 16: Mount the Gravity Latches
Mount the gravity latches on the gate frame, one near the top and one near the bottom. The latch should be positioned so that it will snap into place when the gate is closed and hold the gate shut. Drill pilot holes and then screw in place using 2-inch screws.
Use a cordless drill and the screws included in the latches to screw the slide latches in place on the top and bottom of the gate. Screw the receiving section of the latches to the gate frame and mount the flip latch in a similar fashion at the center of the gate.
Step 17: Seal the Wood
Seal the wood with a sealant or weather proofing product. This will help protect the wood from the elements and keep it looking nice for years to come. You can use a paintbrush or garden sprayer to apply your sealant.
Try to cover the whole surface evenly, making sure you hit the bottom of the planks, which absorb more water than the end grain. This area is likely to rot or become discolored so let it dry for a couple of hours in dry climates or a day in more humid climates.
Step 18: Use Your Wooden Gate
Now that your wooden gate is complete, it’s time to enjoy it! Not only will it add beauty and privacy to your home, but it will also provide a secure barrier for your family and pets.

FAQs on How to Build a Wooden Gate for Your Yard
What are the benefits of having a wooden gate at home?
The benefits of using a wooden gate over another material are many. If you’ve already learned how to build your own house, adding a gate with the traditional look can be the best decision. It can blend in with all home styles, from modern to Victorian to an earthy farmhouse. Unlike other materials, it requires very little maintenance and looks as good as the day you installed it years later.
How can you attach pickets to the frame?
Use one angled piece from the bottom of the hung side to the corner of the latch side. Lay out pickets on the frame to check spacing and mark when you’re not satisfied.
Final Thought on Building a Wooden for Your Yard
Wooden gates provide a sense of privacy and security for your home and yard. They also add beauty and value to your property. Installing a wooden gate is a relatively easy project that can be completed on the weekend.
If you have any questions or need assistance with this project, don’t hesitate to contact a professional contractor. They will be able to help you with the planning and installation of your wooden gate, ensuring that it is a beautiful and safe addition to your home.
The post How to Build a Wooden Gate for Your Yard appeared first on Kitchen Infinity.
Did you miss our previous article…
https://www.conduithardware.com/?p=761
VA-Based Supplier Dave’s Cabinet is Acquired

CHESAPEAKE, VA — Dave’s Cabinet, a leading cabinet manufacturer in the Mid-Atlantic region, has announced that the ownership interest of company founder David Alderman CMKBD, has been purchased by John K. Morgan, CEO of Green Forest Cabinetry.
Terms of the transaction were not disclosed.
Dave’s Cabinet, founded in 1980, occupies three manufacturing buildings on approximately 40 acres of land in Chesapeake, VA. The business consists of a fully equipped end-to-end cabinet manufacturing/finishing facility, a retail division, plus a modern granite/quartz fabrication unit.
“I am incredibly proud of the 40+ years of Dave’s Cabinet’s success, especially the commitment and work to better our local community,” said Morgan, who, along with Alderman, is a past president of the National Kitchen and Bath Association (NKBA).
“I could not be more pleased to have the opportunity to lead his legacy to the next level of tomorrow’s micro-manufacturing world,” Morgan added.
Under the terms of the agreement, Julie Boone will retain her existing ownership interest in Dave’s Cabinet, said the company, which also announced a continuation of an annual $5,000 grant/scholarship to both the Great Bridge Baptist Church, a local parish, and the student program at the NKBA nationally.
The post VA-Based Supplier Dave’s Cabinet is Acquired appeared first on Kitchen & Bath Design News.
William Ohs Acquires PA Luxury Cabinet Supplier
DENVER — William Ohs, the Denver-based manufacturer of luxury cabinetry and furniture, has acquired Draper DBS, a Bucks County, PA custom cabinet supplier, “merging two companies that are well-established and respected in the luxury cabinet industry,” the companies announced.
Terms of the transaction were not disclosed.
“The combination of Draper DBS and William Ohs brings together the ideas and manufacturing concepts of two legendary visionaries in the luxury kitchen market,” said Rick Casey, v.p./manufacturing for William Ohs, founded in 1972 by industry pioneer Bill Ohs. “The combined synergies create both exciting and unparalleled opportunities moving forward,” Casey added.
William Ohs and Draper DBS “will be able to provide the same detail-oriented approach to a larger market while capitalizing on increased manufacturing efficiencies,” corporate officials said.
“I am excited and humbled to be drawn into the most creative act of wood joinery in the industry, the dovetailing of the crafts, hearts, and creative legacies of Draper DBS and William Ohs,” said William Draper, founder of Draper DBS. “This will be an intertwining of our combined strengths, histories, and visions to cultivate the future inspirations of all those who love great and evolving furnishing design.”
The post William Ohs Acquires PA Luxury Cabinet Supplier appeared first on Kitchen & Bath Design News.
Did you miss our previous article…
https://www.conduithardware.com/?p=755
10 Elegant, Traditional Living Rooms
Thanks to their comfort, the traditional living room style has stood the test of time. However, decorating a traditional style living room can sometimes be hard. There are so many rules and regulations that you have to follow.
Many people don’t know what they should do with the furniture or how to decorate living rooms to achieve the perfect look. We created this guide for those who want to create an elegant, traditional living room but don’t know where to start. Here are 10 elegant traditional living rooms you can copy.
Go Gray in a Traditional Living Room- The Lighter Shade, the Better
When you think about elegant traditional living room colors, dark shades like maroon should be the last thing on your mind. Keep in mind that a lighter color is a sign of sophistication and wealth, so try to paint your walls in a shade of gray or white. You can also opt for some light blue or beige tones.

These colors will create a sense of openness and airiness in your living room. Gray is one of the most popular colors in any living room, but it can blend well in traditional living rooms. Pick some lighter hue with some grays and charcoals in your cushions and rugs for the floor.
Choose the Best Paint for Your Traditional Living Room
To choose paint colors for your room, opt for darker but muted paint colors like Benjamin Moore’s HC-146 Coventry Gray or Sherwin Williams SW6103 Spanish Cloth for an elegant, traditional look. These colors will give your room a rich and classic feel. If you want to add a pop of color, try painting an accent wall in a bolder hue.

This can be a great way to show your personality in your traditional living space. A warm color scheme would also be perfect for your traditional living design, especially if you’re sticking religiously to the style.
So, opt for warm neutrals, purples, reds, and forest greens. In addition, bright white and cool gray tones can create a simple, clean backdrop for your more traditional furniture.
Breezy Plains and Prints, Lafayette Residence, San Francisco
This is one of the great examples of traditional living room ideas. The dark-walled living room is softened with large white windows, high ceilings, and a fireplace. The pairing solids in the comfortable sofas, armchairs, and rugs give the room a curated, comfortable feel.
Choose Striped Upholstery for Timeless Feel
Whether you choose chic, wide stripes, or rustic french ticking linens, striped fabrics are a brilliant choice when it comes to upholstery and window treatments in traditional rooms. They are inoffensive and easy to live with because they can stand the test of time and come in all manner of weaves, weights, and different colors to match your scheme.
Consider Contemporary Features
The key to a traditional living room that doesn’t feel stuffy is to add contemporary features. This could be a sleek fireplace, a minimalist coffee table, or even pops of color. The contemporary sofa and armchair contrast beautifully with the more traditional features like the rug and fireplace in this living room.
Contemporary interiors feature sleek furniture and smooth lines. With these contemporary interiors, you won’t see a lot of tufting, piping, and patterns with contemporary pieces. The favored shape is rounded. You’ll see lots of coffee tables, lamps, and end tables in contemporary spaces.
You can use accessories such as candle holders, figurines, and other tabletop accents to keep it at a minimum. Other than traditional interiors, you can bring in wall art to bring that traditional feel.
Blue and White Glamor in a Living Room
For a more traditional living room, you can use dark paint colors and add dark accents such as chandeliers and even rugs. Use lighter colors like whites, grays, and yellows for contemporary spaces. You can add lots of light fixtures, such as track lights, to give off that contemporary vibe.

You’ll also see hardwood floors in contemporary spaces, whereas traditional living rooms will have carpeting or rugs. Although you’ll see delicate armchairs in traditional living rooms, the emphasis when it comes to seating is on comfortable, sit-back, and relaxed pieces. Traditional roll arm or birch sofas are right at home more often when loaded with throw pillows to increase comfort.
High Ceiling Living Room
In traditional living rooms, you’ll often find more ornate details like crown molding and detailed woodworking. You’ll also see a lot of wallpaper, which can be used to create a luxurious or formal look. Rugs will usually be oriental or Persian, and flooring will be hardwood.
When it comes to furniture, a traditional living room will have a lot of dark wood pieces with upholstery in a neutral color. Traditional seating is made from leather, velvet, or tweed. There may be some tufting on the arms and back of sofas and chairs, as well as nailhead trim. Apart from tightly upholstered furniture, there will also be an iron lantern and architectural details to make the room look current.
Exposed Beams in a Living Room
Traditional living rooms will often have a large fireplace. You should avoid wallpaper with a busy pattern and choose something solid in color. If your furniture isn’t upholstered in a neutral color, you can add it yourself using slipcovers.
Lighting has to be traditional or even antique in these kinds of living rooms. Chandeliers and sconces are perfect, and you can also use floor lamps with shades that match the walls. Area rugs are a must in traditional living rooms, and you should choose something with a very traditional pattern like oriental or Persian. Leave the modern patterns for other parts of your home.
When it comes to accessories, keep them simple and elegant. Traditional living rooms don’t need a lot of clutter, so choose a few select pieces and display them carefully. Think vases, figurines, paintings, ornaments, and even plants. If you want to create a cottage-style charm in your living room, consider a botanical theme.
The rustic wooden beam and spare furnishings of the cottage work well with botanical prints and indoor flowering plants. You can also create a timeless vintage-inspired appeal by including shabby chic. Shabby chic takes the antique pieces from the traditional to vintage-inspired appeal.
Hang Curtains in Archive Fabric Prints
There are all sorts of window treatments to choose from but nothing says traditional style like classic floor to ceiling drapes. In that case, inject luxurious patterns and history into your living space using a rich archive of velvets, weaves, and embroideries. Traditional homes are often roomy with high ceilings and large windows, making it important to scale up.

Choose large-scale patterns to get the proportion right, and don’t be afraid to match the same pattern on the walls and the curtains. Make sure your decoration pays respect to the past and lives today to enable them to work well with both traditional and contemporary furniture.
Furnish with Antique Pieces
One of the easiest ways to add traditional elegance to your home is by including antique furniture in your design scheme. Not only will you have unique pieces that are sure to impress guests, but you’ll also get the benefit of their classic style and craftsmanship.
Fine crafted using traditional methods and boasting a quality of manufacture inimitable by many modern designs. Antique furniture makes a great choice for furnishing a traditional living room, whether you have a period property or looking to create a traditional look.
When choosing antique furniture, consider the era it comes from so that you don’t accidentally choose too mismatched pieces or from different periods. A dated color scheme may also complement the look you’re going for. For example, a rich gold finish with dark wood tones may work well with a traditional style, while a gilded mirror will shine against a neutral-colored wall in an entryway. Also, go for items that will sit on open shelves without taking much space.
Fit Floor to Ceiling Bookshelves
No traditional living room is complete without floor-to-ceiling built-in bookshelves. Not only do they provide functional storage for all of your books, but they also add architectural interest to the room.
Consider having your carpenter build a custom design that perfectly fits your space. Or go for a vintage look by choosing wooden shelves and painting them a dark, contrasting color.
Decorate with Mirrors and Art
Mirrors and artwork make for great focal points in any room – but this is especially true in a traditional living room. Fill your walls with large-scale wall art either grouped or spread apart to create visual interest and conversation pieces. Plus, mirrors will bounce light around the room and make it feel larger.
Go All-Cream for a Luxurious Look
A traditional living space so sumptuous that it feels like a bedroom is not always a good idea, especially when you have kids and pets around. But if you want a living room with lots of luxury, then consider piling in the cream color. You can’t go wrong with the warmth that this color brings to a room. Plus, all cream-schemes will bring out all the different textures of your soft furnishings.
FAQS on Elegant, Traditional Living Room Ideas
What makes a room traditional?
Elegant shapes, refined textures are hallmarks of a traditional living room. Plus, a charmingly predictable sense of order makes traditional style one that’s always warm and charming. While decorating may change the trend, traditional living rooms will always be style.
What is the difference between a traditional and a classic living room?
The classic living room is more formal and elegant than the traditional style, meaning that modern pieces will elevate a space and give it a more formal, elegant vibe, while the traditional style will be a lot more relaxed and approachable.
Final Thought on Elegant, Traditional Living Rooms
As you can see, there’s no style that lends itself to elegance and sophistication better than the traditional style. In fact, traditional interior design has paved the way for several modern design styles you see today. If you want to give your home a classic and elegant look, traditional design is the way to go. You can even mix and match styles if you choose to.
The post 10 Elegant, Traditional Living Rooms appeared first on Kitchen Infinity.
Did you miss our previous article…
https://www.conduithardware.com/?p=749