Home » Articles posted by James Hern (Page 2)
Author Archives: James Hern
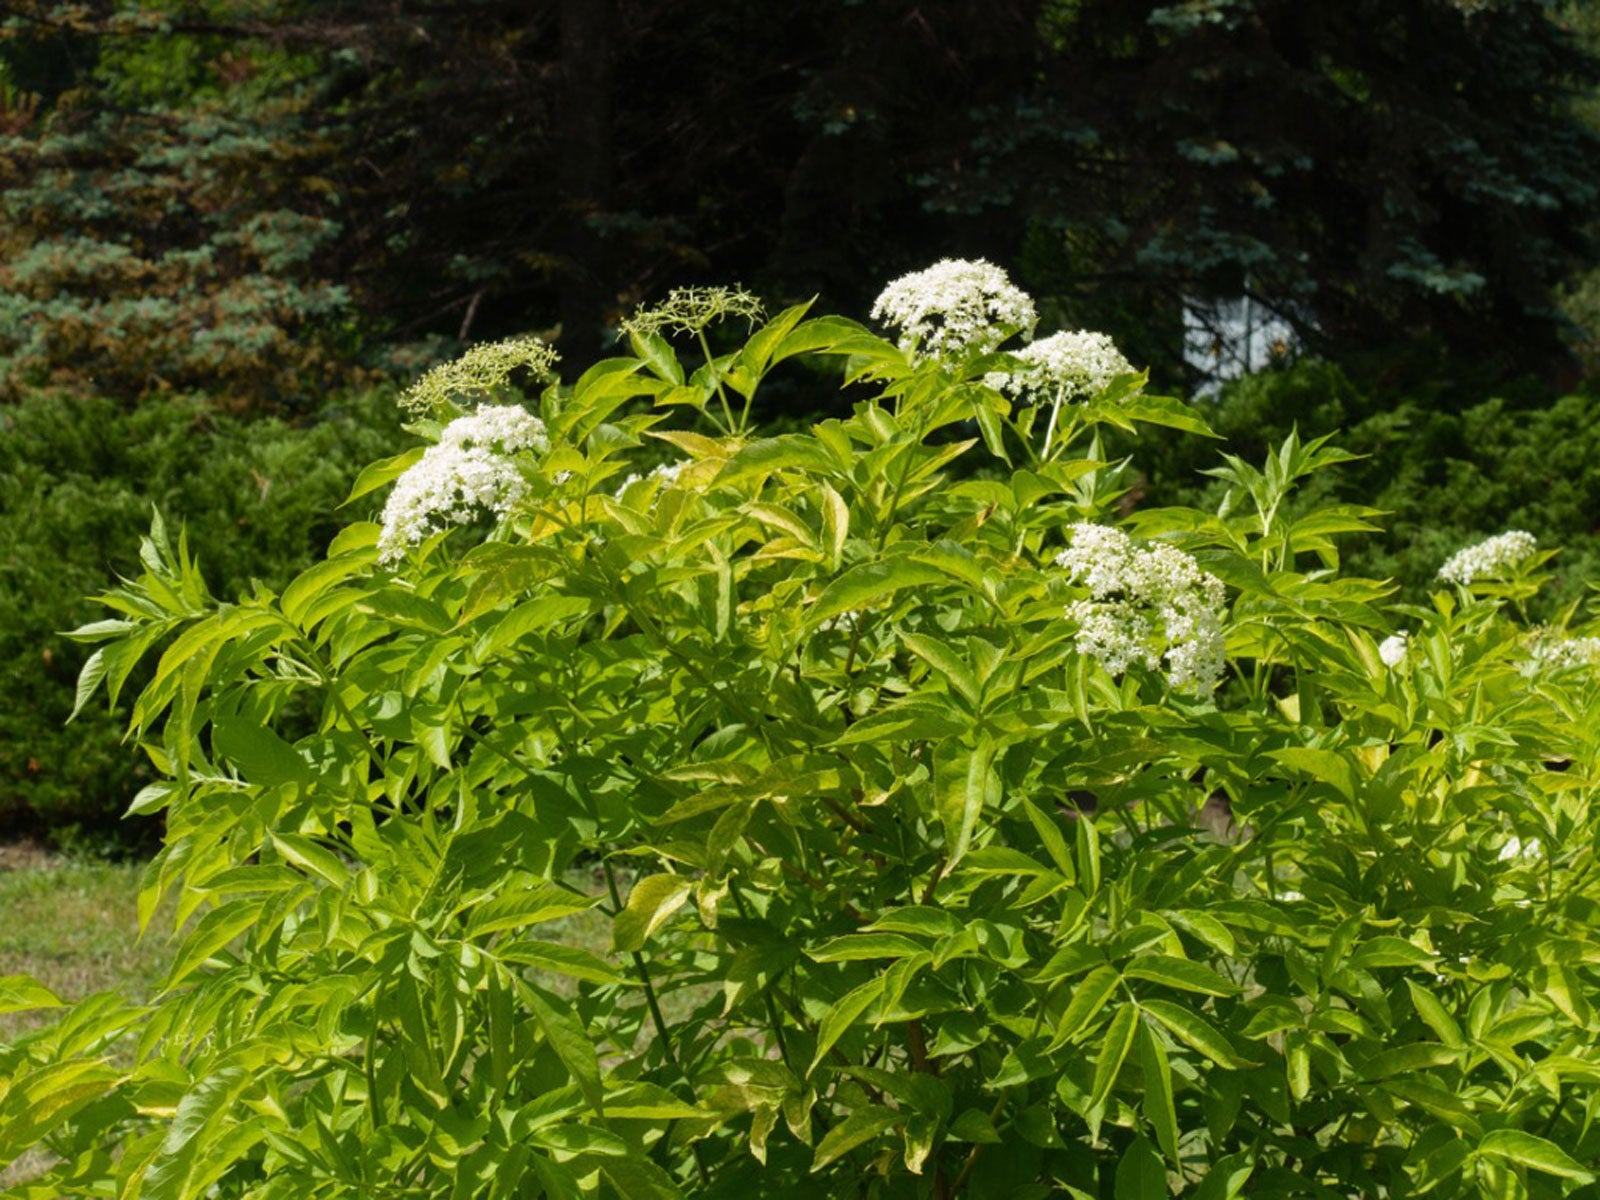
How To Grow Black Lace Elderberry
If you are looking for a beautiful and unique ornamental plant, black lace elderberry is an excellent choice. It has dark purple foliage and blackberries, making for a dramatic landscape focal point during the growing season. This beautiful shrub goes by many names, including black lace, elderberry, common elderberry, black elder, European elderberry, Judas tree, and blue or black elderberry.
This versatile plant provides year-round beauty without much effort on your part. Whether you’re looking for a new ornamental shrub or simply want fresh fruit at your fingertips, this variety of Sambucus canadensis is sure to please. In this article, we’ll talk about everything you need to know about growing black lace elderberry.
Uses of Black Elderberry
Elderberry plants have gained popularity thanks to their lovely appearance and important uses in traditional industries, culture, and medicine. They fall under early spring flowers since they bloom creamy pink flowers in the spring. These are followed by blackish-red fall berries, which can be harvested for making elderberry wine and jam. You can also leave the elderberry wine on the plant to attract birds and other wildlife.

Black lace berries are also edible and high in vitamin C. If you want to plant them for food and drink, then the American elderberry, also known as Sambucus canadensis, is the better choice than the European type known as Sambucus nigra.
The intense purple black foliage is finely cut, giving it an effect similar to Japanese Maple, also known as Acer palmatum. Some designers are even using it in the more tender maple varieties since black lace is extremely durable and adaptable.
It can also be used as a dramatic accent plant, planted en masse for a troublesome high hedge, or incorporated into the mix or perennial border. Black lace is also suitable for use in woodland gardens, rain gardens, and attracting birds and butterflies to the yard. You can also plant a black lace next to a shrub with brightly colored leaves to create contrast and interest.
This is a very cold hardy, and easy-to-grow plant adaptable to most sites. In addition, this plant is deer resistant, drought tolerant, fall heat tolerant, and a landscape plant. It can also be used as a potted shrub on the patio. It’s good in groupings or masses or perennial and shrub borders.
Common elderberry plants are deciduous plants or small trees that can reach up to 20 feet in height and width. Some specimens have grown as tall as 33 feet in their natural habitat.
Planting Black Lace Elderberry (Sambucus racemosa ssp. melanocarpa)
Black lace elderberry can grow in USDA plant hardiness zones 4-7 but is susceptible to winter damage. It is best planted in fertile, loamy soil with excellent drainage and receives full sun or partial shade. If planting specimens near homes or other structures, it is a good idea to place a barrier of mulch or fencing around the plants to protect them from being damaged by lawnmowers, mower debris, and deer.

They are relatively easy to grow. They can be propagated from seeds, softwood cuttings, or semi-hardwood cuttings. Seeds need cold stratification. Seeds should be sown in the autumn and kept moist for 60 days before planting. A thin layer of vermiculite on top of the soil helps retain moisture. It also does well in wet soils.
These plants also do well in acidic to alkaline soils, but it’s also important to look for slightly acidic soil. Before planting this shrub, amend the soil with compost to ensure healthy growth. You can easily make your compost to use for the purpose. After that, it will benefit from regular fertilizing with compost once every year in the spring.
Due to their sporadic growth, elderberry plants tend to form a lot of suckers. So prune it regularly if you want to maintain size and shape for your shrubs. Pruning involves removing unhealthy, damaged, old, or dead branches in early spring.
Black Lace Elderberry Care
Black lace elderberry is self-pollinating, but if you wish to have as many berries as possible, you can plant another cultivar near your black lace elderberry for increased pollination.

Light Requirement
In the North, while black lace elderberry will tolerate partial shade, it will produce more flowers and a more attractive foliage color if grown in full sun. At the southern end of its range, it will benefit from afternoon shade.
Soil Requirements
Black lace elderberry grows best in slightly acidic, loamy soil that is moist but well-drained. The black lace elderberry bush also tolerates clay soil types better than many shrubs, but it performs better over time if planted in soil that drains well. Black lace does best in moist soil, although it will tolerate dry soils. It thrives under acid or alkaline soils.
Watering Common Elderberry
Black lace elderberry is a drought-resistant shrub and does not require large amounts of water to thrive. However, it benefits from supplemental watering during dry periods and in hot summer climates. The plant prefers evenly moist soil. And since elderberry shrubs often grow near wetlands, it tolerates wet soil better than many other plant species.
Fertilizer and Transplanting
This deciduous shrub needs to be fertilized in early spring by applying a slow-release fertilizer specialized for trees and shrubs. If you wish to transplant an existing plant, do so in spring or early summer while the soil is moist and warm. Elderberry shrubs do not recover well from root disturbance, so take care when moving them. You may harm or kill the plant with poor planning or execution.
When growing elderberry bushes in the home garden, plant them near a water source such as a drip irrigation system or pond, especially if rainfall is infrequent. Ensure that the roots get at least 1 inch of water weekly and keep an eye on soil moisture levels so you can provide supplemental watering during dry spells.
Pruning Elderberry
Best if pruned immediately after blooming. The correct time for pruning this plant is late winter or early spring. Pruning will keep it attractive, vigorous and check its spread. As the woody stems become older, they become weaker and less attractive. So, remove the older stems to direct more energy into the newer, more attractive ones.
Propagating Common Elderberry
Cutting the branches of the elderberry bush back to four inches gives you a convenient place to collect cuttings.
To propagate common elderberry, remove the smaller tip shoots from grown branches’ end and dip them into rooting hormone. The best time for this operation is fall or early winter. Remove all leaves on the cutting except the top two pairs. This makes it easier to dip into rooting hormone and reduces the chances of disease spores falling into any open cuts.
Shorten all side branches by half their length to direct energy into the main stem. Root the cuttings in a pot filled with sand, peat moss, and perlite at a ratio of 1:1:1. Water sparingly until roots form.
After three weeks, the cuttings should be ready to plant in your garden or for overwintering. Select a location that gets at least six hours of sun per day and has well-drained soil.
Common Pests and Diseases
Prone to a number of diseases, including canker, leaf spot, and powdery mildew. Apply Neem oil once pollination begins for best results. Also, make sure there is proper spacing to promote good air circulation, irrigate at soil level, and keep mulch six inches away from the main stems of the bush.
FAQs on How to Grow Black Lace Elderberry
What plants are compatible with black lace elderberry?
White pine trees and quaking aspen are good elderberry companion plants, especially if you’re looking for something taller than the shrubs.
Final Thought on How to Grow Black Lace Elderberry
Elderberry plants are very popular plants that you can never miss. Not only do these shrubs look splendid and very familiar, but they’re also low maintenance in almost any environment and growing conditions.
The post How To Grow Black Lace Elderberry appeared first on Kitchen Infinity.
Did you miss our previous article…
https://www.conduithardware.com/?p=903
Peat Moss: What It Is and How To Use It
Peat moss is a natural growing medium with many applications, but it can be hard to know how to use it in your garden. But what exactly is peat moss? How does it differ from other types of soil or mulch?
This guide covers everything from the types of peat moss available to how much water each type holds. We’ll cover everything from planting trees and shrubs with peat moss as a potting medium or using it as alternative mulch material in vegetable gardens. You’ll also find out which kinds of plants grow best when grown directly in peat moss without any additional soil mixed into the mix. Let’s get started!
What Is Peat Moss?
Peat moss is a soil amendment that is harvested from peat bogs. Many of these peat bogs are found in wet areas of Canada. Peat bogs are formed over a long period as organic materials partially decompose.

Although sometimes referred to as peat, peat moss and peat are not the same things. Peat moss is one of the products harvested from peat bogs. Other types of peat moss come from the partial decomposition of other organic materials. If you know how to make compost then you must know this type of peat moss. The moss in peat moss refers to sphagnum moss.
Where Does Peat Moss Come From?
Peat moss comes from your flower pot or garden from wetlands or bogs. It’s not decomposed material because the surface of the blogs doesn’t allow oxygen and air to filter underground. This makes the fibers of the sphagnum moss remain intact.
Types of Peat Moss
Sphagnum Peat Moss
The most commonly used type of peat moss is sphagnum peat moss. Sphagnum peat moss has a high ability to absorb moisture and holds ten times its dry weight in water. After it’s harvested and dried, sphagnum peat moss is light in color, making it retain 10-12 times its weight in water.
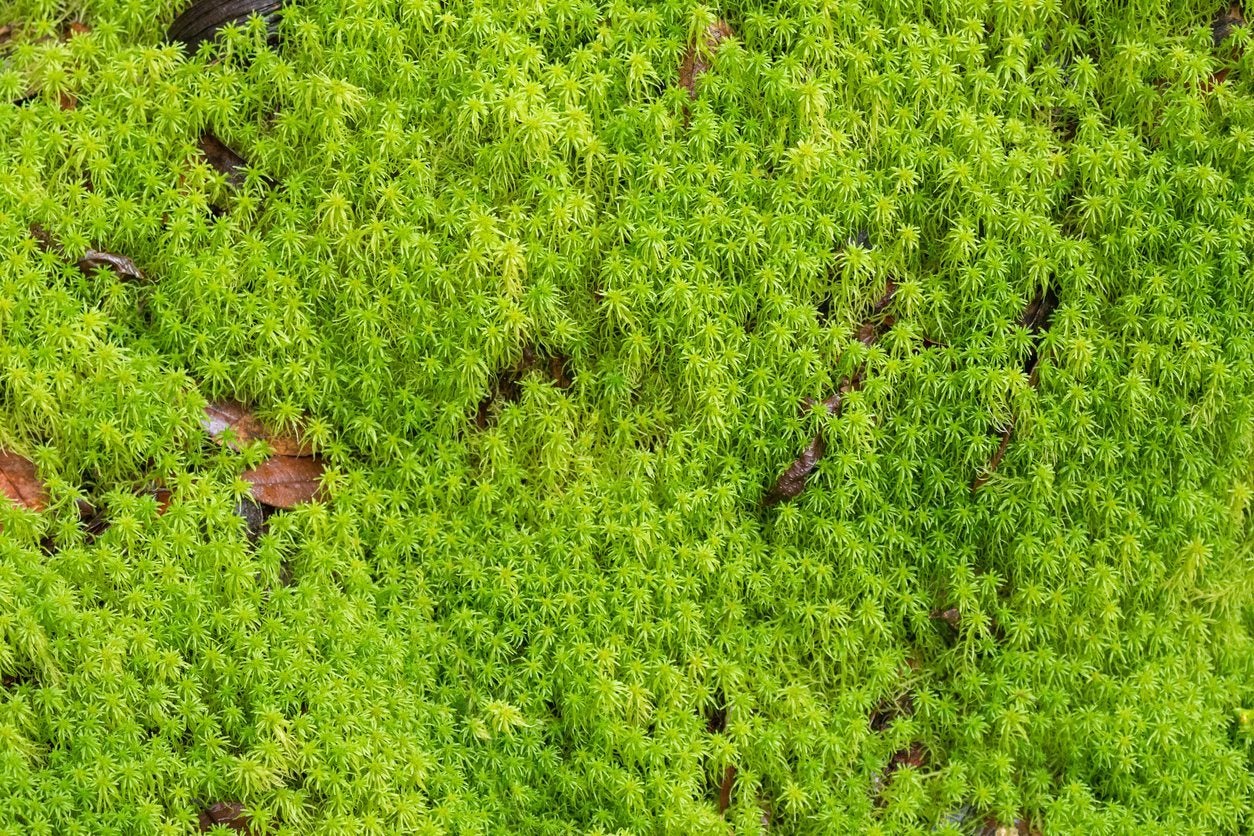
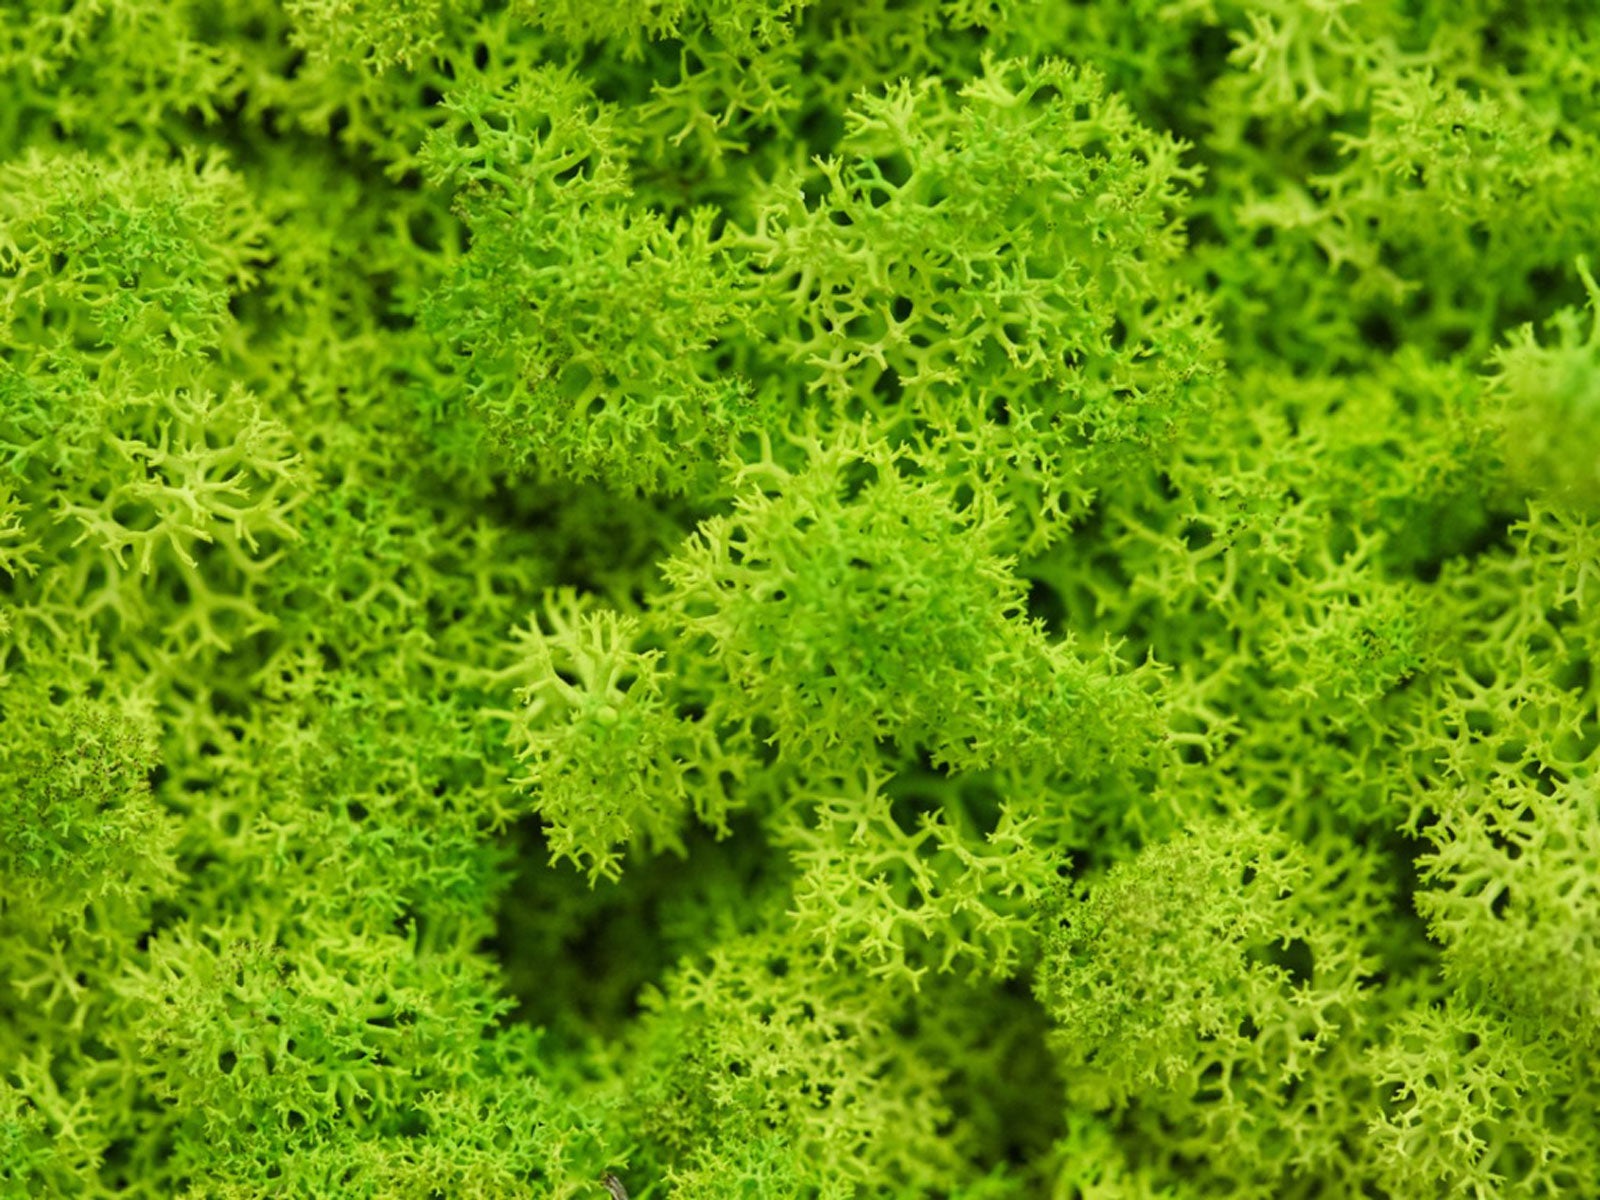
Don’t confuse sphagnum peat moss with sphagnum moss, even if their names are similar. Sphagnum moss refers to the plant material harvested when still alive and growing above water. The end product is the light, fibrous material often used to decorate line wire baskets.
Black Peat Moss
This is an important type of peat because it has high nutrient content, making it useful in growing orchids because orchids like organic material in their soil. It’s also used for potted flowering plants and nurseries that produce bedding plants. It’s a little more acidic than sphagnum peat moss and holds more water.
Black peat is harvested differently than sphagnum peat moss in a way that preserves the living plant. It’s cut from Sphagnum bogs in Canada and is probably black because of its high carbon content. It requires more processing before it’s sold but has less dust and fewer contaminants than brown peat moss.
History of Peat Moss
Peat was dried and used as a source of fuel in some countries for centuries. This is because it’s rich in carbon dioxide, just like other fossil fuels. It was until the 1940s that peat had a place in horticulture. Today, it’s used as a soil amendment, soilless mix, seed starting, and mushroom casting.
Availability of Peat Moss
Peat mosses are commonly found in bogs and wetlands of the earth’s northern hemisphere. It’s sold in gardening stores, online, hardware stores, and even supermarkets.
Mining Peat Moss
Before peat moss becomes a useful gardening product, it must be harvested by digging the ground and recomposing the bog’s ecosystem. When it comes to mining peat moss, the process is as follows:
Dig a network of ditches along the peatland to drain the water. Second, remove the native vegetation to get the peat exposed. Third, level the harvest to prevent drainage of the surface runoff. Fourth, harrow the top layer to speed up the drying process of peats. Fifth, suck up the dry peat layer using a large vacuum harvester.
Lastly, the harvested peats will be transported to a processing firm for cleaning, drying, and screening into different labels and packaging.
Pros of Peat Moss
Sterile
Peat moss has a natural ability to kill weed seeds and insects. When peat moss is added to the soil, it leaves no chance for mosquitoes and larvae to grow in your garden. This attribute can be very important if you want to avoid diseases such as malaria.
Cleanliness
Most of the growing materials are not clean. However, that’s not the case with peat moss. If you drop some wet moss, pick it up, get it dried or sweep it up.
Moisture Retention
Peat moss is believed to retain water for longer than other composts. This means that you will need less watering of your plants during dry seasons.
Peat Moss Has Slightly Acidic pH
Peat moss has a pH of 4.9 to 6.5, slightly acidic. This makes it better for soil mix because the acidity helps break down other compounds in the soil. This also makes it a good corrector, especially with plants that cannot stand alkaline soil.
It’s Fully Organic
If you are looking for an organic material to improve the content of your soil, using peat moss is a good option. It comes from bogs and is fully natural. The best part is that it’s now harvested at its optimal stage, further adding that this is an organic ingredient. Also, quarrying and transportation do burn a lot of fossil fuels, so if it’s produced organically, it’s not harvested and delivered organically.
Peat Moss Doesn’t Compact
Even though peat moss absorbs water well, it doesn’t compact, unlike soil. Compaction makes it hard to create space for the water and air to pass through. But if you add peat moss to any compact material, you’ll have solved the compaction problem and made the growing mix drain better.
The Drawbacks of Peat Moss
Poor in Nutrients
Some growers consider peat moss to be nutrient-poor. It doesn’t contain much nitrogen, potassium, or phosphorus, but it does have calcium and magnesium, which are essential nutrients for the growth of cannabis plants. Unlike other organic materials such as manure compost, peat moss is very poor in nutrients.
Dryness Issue
Since peat moss is very dry, it’s not 100% suitable for soil. It can be combined with other organic materials to improve the water retention capacity of your growing medium. When starting seeds with peat moss alone, ensure they get enough moisture. It’s also good to mix it with soils and some other soilless media.
Non-Renewable Resource
Peat bogs are made up of wetland plants accumulating for thousands of years. They are only found in areas where the average annual temperature is lower than 64 degrees F (18C). Peat moss from North America or Canada comes from old-growth forests. In other words, it’s a non-renewable resource that has to be harvested. This is not the case for peat moss harvested in Ireland or Scotland. Their bogs are managed wetland areas that grow peat moss yearly, so they can be harvested without causing permanent damage.
Peat Moss is Expensive
Peat moss exceeds the price of comparable mediums such as coconut coir. If you use it in bulk and the price is an issue, a better alternative is compost.
How to Use Peat Moss in the Garden
Soil Amendment
Peat moss is available in several grades, with different particle sizes. The larger the particles are, the more expensive it is. Use peat moss as a soil amendment to lighten heavy soils and increase water retention. For clay and heavy soils that get compact easily, it softens the soil structure and improves the drainage.
Peat moss helps retain moisture and nutrients for plant roots for sandy soil. If you intend to use it as a soil amendment, you should know that it changes soil pH levels. Ensure you measure and watch out if the pH level drifts too much by testing the soil pH.
Hydroponic Growing
Peat moss is used in hydroponic systems because it creates a soil and nutrient solution barrier. This layer increases the stability of the system, keeping the plant roots away from harmful products that are designed to kill them.
People using it use it with other growing media like perlite and vermiculite to balance the moisture and aeration. When using peat moss for pure hydroponic growing, you should know some facts about it’s not appropriate.
Because it’s an organic matter, if provided with plenty of oxygen and nitrogen, it will start to decompose, making the material compress around plant roots and choke off your plants. So, better mix it with other materials.
Seed Starting
Peat moss is often used as a base layer to germinate and grow plants like vegetables and flowers. It provides aeration to the root zone, and it’s very easy to use for newcomers in hydroponics. When using peat moss for seed starting, you also need special trays with drain holes on the bottom because if you don’t, the peat moss will expand and block the water flow out of your seedling flat.
For this purpose, use the peat moss alone or in a mixture with some soils. You can also remove the hassle by getting the peat pellets sold on the market. Many people also prefer a soilless mix of peat moss, perlite, coconut coir, and others in different amounts. This prevents diseases, fungi, bacteria, weed seeds, and other bad things commonly found in the soil.
Peat Moss for Plant Transplants
Using peat moss granules is also the best way to transplant young trees and big plants. It can be easily handled since it is lightweight; you can use it with other components like the potting mix but make sure not to include any fertilizers or pesticides.
It provides nooks and crannies where new, tender roots can grow. Peat moss also keeps humidity high, essential when plants have a new home. It also corrects the acidity of the soil and breaks down the consistency and texture of the soil, especially if it’s clay soil.
Growing Acid-Loving Plants
Peat moss is also used to grow plants that prefer soil with low pHs, such as rhododendrons, gardenias, heathers, tomatoes, Pieris, azaleas, and camellias. These plants need a peat moss mixture for their acidic soil. When combined with the correct potting mix, these plants enjoy having an environment where they can take up essential nutrients from the soil and conserve water.
Peat Moss Alternatives
Compost
Compost can be used as peat moss alternatives. These are usually less expensive but do not have the pH balancing effects of peat moss, therefore it should be used in conjunction with other ingredients to create the correct balance for acid-loving plants.
Compost is made from decayed organic materials like rotted plants, leaves, vegetable scraps, and animal manures. It has a lot of commonalities with compost peat, like excellent water holding capacity and great material for soil amendment.
Compost is cheaper than peat moss and fully sustainable in that you can easily make your own. On the other hand, compost won’t last long like peat moss, and you’ll have to add compost regularly. And lastly, compost will compact faster and easier than peat moss, but to have a comparable effect, you can add sand, shells, and eggshells to the soil to improve its texture.
Perlite
Perlite is a volcanic rock heated and expanded with steam to produce a fine white, shiny-type growing medium, which lets good drainage and aeration of the roots. It is also widely used as an additive for potting soil or seed starting mixes as it helps increase the porosity of the root environment.
It provides an excellent oxygen supply to plant roots and will not compact under heavyweight. Perlite is a good natural drainage layer for the bottom of your containers, and it will also help prevent any root rot problems that can occur from sitting water in the bottom of the container.
Coco Coir or Coco Fiber
Coco coir is the partially processed fiber of the coconut husk. It’s sold compressed into bricks or blocks or in a loose form that can be expanded by adding water. Coco produces excellent drainage and aeration qualities with good retention properties.
Coco provides an ideal air to water ratio – twice as much air space compared to water-holding capacity. Coco coir is a sustainable resource that has been used for centuries to protect the health of natural shorelines and reefs. It’s highly resistant to insect, microbial, and mold attacks, making it perfect as a growing medium for both hydroponics and soil applications.
Vermiculite
Vermiculite is a naturally occurring mineral heated to expand it into wormlike particles that absorb moisture and provide aeration. Vermiculite provides the nutritional requirements of plants while allowing for excellent drainage and aeration qualities.
Organic Matter
Organic matter is what makes the nutrients in your soil available to plants. It increases the number of good, healthy microorganisms in your soil by providing them with food and habitat. Organic matter also absorbs water during irrigation, reducing runoff.
What’s more, organic matter improves porosity in your soil by opening tiny spaces between soil particles for air and water, giving your plants room to grow.
Sand as Peat Moss Alternative
Sand has very coarse particles that do not release nutrients to plants easily. It does not change the pH of your soil, but it also doesn’t hold nutrients well, so adding sand on top of a peat moss/vermiculite mix is not ideal. Sand may be preferable if you are planting trees or other plants that don’t need consistent nutrients.
FAQs on Peat Moss
What is wrong with using peat moss?
Peat moss is not a natural substance. It is the partially decayed remains of plants that have been harvested from peat bogs and mires, an ecosystem formed by the incomplete decomposition of organic matter in wetlands. Peat bogs are fragile habitats that take thousands of years to form.
When should you use peat moss in your garden?
You should use peat moss as a soil amendment or potting mix, especially when growing fruits and vegetables such as tomatoes, blueberries, and camellias which are acid-loving plants.
Final Thought on Peat Moss
There you have it. Peat moss is harvested from bogs or mires and is used in planting or potting soil mixes for acid-loving plants. Peat moss is not a natural garden soil ingredient, but it will help your garden grow lovely flowers and delicious foods.
The post Peat Moss: What It Is and How To Use It appeared first on Kitchen Infinity.
Did you miss our previous article…
https://www.conduithardware.com/?p=900
How to Remove Gasoline Stains and Odors
Gasoline is one of the most difficult stains to remove from clothing or carpeting. The stain will not only be hard to remove, but it can also cause an unpleasant odor. Since gasoline evaporates quickly, you have a short time frame to clean up and treat the stain before it becomes permanent.
Luckily, there are several ways that you can go about removing gasoline stains and odors from your clothes and carpets. Below, we’ll cover some of the more popular removal methods.
Before You Begin
Before you start, make sure you test any detergents or cleaning solutions in an inconspicuous area to avoid damaging the fabric. Cleaning chemicals and the dryer’s high heat can interact with the gasoline, so it’s not safe to use a home dry cleaning kit for these stains.
If it’s dry clean only, immediately take the garment to a professional dry cleaner. Do not dry the clothes in a clothes dryer until the stain is entirely gone. This is because if gasoline is still present in the garment, it can ignite your dryer and cause a fire.
Tools and Materials
- Paper towels
- Soaking basin
- Washing machine
- Scrub brush
- Baking soda
- Water
- Stain remover stick, spray, or gel
- Ammonia
- Vinegar
- Orange cleaner
- Dish soap
Instructions
Remove Excess Gasoline
If the gasoline splashes on your clothing and has begun to soak into the fibers, you need to remove it as much as possible immediately. Place a couple of paper towels over the stained area’s top, press down, and then pat dry with another clean paper towel until no more gasoline transfers from the garment.

You can also use baking soda to absorb gasoline from a wet spot on your clothing. Make sure you prevent the flammable towels or cloths used for blotting from starting a fire by setting out the cloth or towel to air dry. Flammable gas fumes will dissipate in the open air.
Once your item is dry, find a sealable metal tin, put the towel or cloth in it, and wet the material until it’s damp. Seal the container and discard it with your trash.
Pre Treat with Stain Remover
Before you treat the stain with a stain remover, test the product on an inconspicuous area of the garment to ensure that it does not cause any discoloration or damage to the fabric. Apply a liberal amount of the stain remover to the clothing.
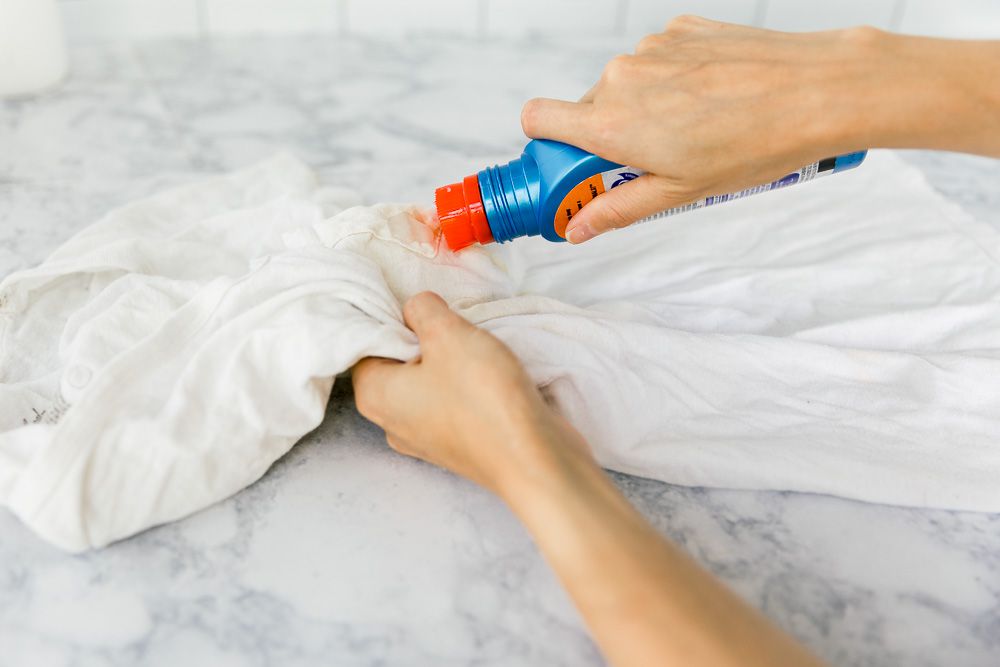
Stain removers can be found at most local grocery stores in either an aerosol can or a liquid form. Wash the clothing at the hottest setting appropriate for the fabric. Hot water is necessary to remove the gas fully from the clothing.
Use Liquid Dish Soap or Heavy-Duty Laundry Detergent
Dish soap has powerful enzymes that can help it break down oil and grease left behind by food, and it can work very well for other stains such as gasoline. You can also use enzyme-based heavy-duty liquid detergent.
Apply two tablespoons of dish soap or liquid detergent with a soft-bristled brush. Allow your clothing to sit for up to five minutes before soaking it in hot water for 30 minutes. Make sure you use the hottest water safe for the fabric type. Remember not to use DIY laundry detergent as it won’t be effective enough.
Treat with Baking Soda Paste
Another great way to remove gasoline stains and odors is to make a baking soda paste. Mix two parts baking soda to one part water in a bowl. Apply it to the stain, then use a scrub brush to rub it into the fabric. Leave your clothing out to air dry to absorb the paste, then brush off the excess baking soda.
If the stain and odor remain, repeat the step or soak the stained clothes overnight submerged in water with one cup of baking soda added. Wash, rinse, and check for odor. Repeat the baking soda paste application or baking soda soak until the odor is gone.
Soak Lingering Odors White Vinegar
If you still have a gasoline smell after trying baking soda, you can try using white vinegar. Pour white vinegar into a spray bottle and spritz the area where the gasoline odor is present. Let the vinegar sit for about 30 minutes, then blot it up with a cloth.
The vinegar smell will dissipate over time. If you want to get rid of the gas smell in your car, soak the gas with old towels or clean rags as quickly as possible. Then use a mixture of equal parts baking soda, white vinegar, and hot water to neutralize the odor.
Rub and wipe it away with a clean rug. If the smell lingers, use a few sprays of Febreze to get rid of the smell.
Soak Heavily Soiled Items in Ammonia Solution
Another way to remove gas stains and odors is by using ammonia. Soak the clothing in the washer full of warm water and one cup of non-sudsing household ammonia. This will smell, so make sure you shut the lid. Let them soak for several hours overnight, then drain and wash as usual.
The ammonia will neutralize the gasoline odor. Never use chlorine bleach or detergent containing chlorine with ammonia. This mixture can make a dangerous chlorine gas that produces toxic fumes.
Remove Gasoline Stain with Coca Cola
Another household remedy for gasoline odor and stains is Coke. Soak the stained clothing in a bucket of Coca-Cola and let sit overnight before washing as usual. This will also remove any grease, oil, or tar stains from items such as motor oil and grease stains on clothes, driveway spills, and grass trimmings stuck to your clothes after cutting the lawn.
You can also add two cans of Coke and one box of baking soda to a sink filled with cold water. The Coke will break down the stain while baking soda absorbs the odor.
Fast Orange Laundry Detergent
If you have a severe gasoline odor, Fast Orange is a laundry detergent that can help. This detergent is formulated to remove stains and odors on clothes caused by gasoline, oil, and other mechanical fluids. Add one cup to your washing machine and let it run through the entire cycle.
You can also use this detergent for hand washing by pouring a little of it into the water, stirring it up, and letting the fabric soak for about 30 minutes. Then rinse the clothing, and the gasoline stain and odor will be removed.
FAQs on How to Remove Gasoline Stains and Odors
Can you put gasoline-stained clothes in the dryer?
It’s not good to put gasoline stained clothes in the dryer because the heat will set the stain and make it harder to remove. The best way to dry clothing that has been stained with gasoline is to line dry or air dry the clothing outside. This will help to dissolve the fumes and reduce the risk of fire.
Can you use bleach on gasoline stains?
You should never use bleach on gasoline stains because it will make them worse. Gasoline stains are oil-based, and bleach will only set the stain, making it more difficult to remove.
Final Thought on How to Remove Gasoline Stains and Odors
Gasoline can be a tough stain to remove. But if you follow the above tips carefully, removing gasoline stains and odors won’t be a problem. Also, consider pre-heating the clothing with the right products to break down the stain and odor before washing to effectively remove these types of stains.
The post How to Remove Gasoline Stains and Odors appeared first on Kitchen Infinity.
Did you miss our previous article…
https://www.conduithardware.com/?p=896
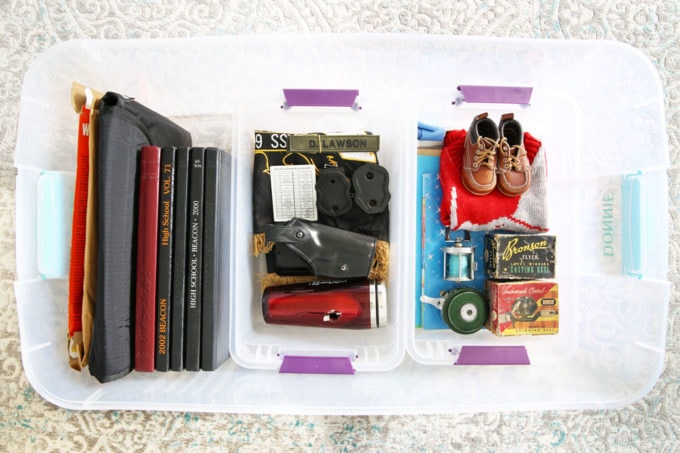
What is the KonMari Method?
Many people live in cluttered homes which end up complicating their life as well. It’s not that they don’t know how to declutter your room but the process itself is very complicated.
Well, if you could focus on the things in your home that give you joy, then everything else would fall into place. Marie Kondo has developed a method that makes this easy and simple, so you can get rid of clutter fast without having to sort through every item in your house one by one. It’s called the KonMari Method because she says we should only keep items that spark joy.
Here’s everything you need to know about the KonMari method.
What is the Konmari Method?
KonMari, also known as KonMarie or Marie Kondo, is a tidying expert in Japan. She has written several bestselling books on the process she uses to transform individuals and families. Created by Marie Kondo, professional home organizer and author of the bestselling book, The Life-Changing Magic of Tidying Up, the Konmari method emphasizes removing clutter from your home and surrounding yourself with things that spark joy.

In other words, the konmari method is a simple but effective tidying method that ensures you’ll never relapse to clutter again. It uses unique selection criteria by choosing what sparks joy. Through this tidying process, you can reset your life and spend the rest of your life surrounded by the people and things you love most.
After the release of the Netflix TV show Tidying Up with Marie Kondo in 2019, many people globally have been using Marie Kondo’s tips to declutter their homes and stay organized.
How Does the KonMari Method Work?
KonMari has six basic rules that can help you declutter, get organized and create a home filled with items that make you happy. Here’s how the KonMari method rules work:
Commit Yourself to Tidy Up
The KonMari method is not a quick fix for a messy room. Instead, it’s a chance to reset your entire life, but only if you commit to following its principles. The first rule of tidying is setting your intention to seriously tidy up and resolving to put in the time and effort required.
When approaching your tidying festival with a clear vision and a can-do attitude, you’ll find the energy and motivation you need to tidy all your belongings in one go. The effort will be worth it in the end, and you’ll not only experience the joy of living with objects that you love, but you’ll also be on the path of establishing your ideal lifestyle.
Marie Kondo’s theory is the more you can get rid of, the easier it will be to tidy up and remain organized. So, don’t get discouraged if the process takes longer than a day.
Imagine Your Ideal Lifestyle
Before you start, imagine your ideal lifestyle and identify the objects that make it a reality. If this is your first time tidying up, you might not be able to picture what your perfect life looks like. But it’s never too late to change and improve after all.
Marie Kondo’s tidying process isn’t about decluttering your house or making it look neat on the spur of the moment for visitors. It’s all about tidying up in a way that will spark joy in your life and change it forever.
Consider what kind of a house you want to live in and how you want to live in it. Make sure you describe your ideal lifestyle. You can draw and sketch out what it looks like if you like. You can also describe in a notebook or cut out photos from magazines.
When you imagine your ideal lifestyle, you’re clarifying why you want to tidy and envision your best life. The tidying process represents a turning point, so make sure you consider the ideal lifestyle you inspire.
Finish Discarding First
Once you know what your ideal lifestyle is, you’ll be able to decide which items have value in your home and fill a purpose for that lifestyle. Considering each item and sorting them to keep and discard piles allows you to create more space for the organization and storage solutions that come later in the Konmari method.
Discarding items is not the point of the Konmari method, but it’s important because it provides the opportunity to determine the items that will help you live your life as you envision it as well as those items that no longer fit into your lifestyle. After you’ve discarded, you can turn your full energy and attention to what sparks joy.
Sort by Category, Not Location
The Konmari method advises sorting by category rather than the room. This allows you to work on one type of item at a time and ensures that each category is treated with equal importance. In other words, you’ll have a hard time getting motivated to finish if all of your clothes are in one room and the books are in another.
If you’re cleaning your home room by room, you’re most likely rearranging items and tossing out only a few things since it doesn’t feel like a ton of clutter for that room. Tidy by categories such as clothes, books, papers, miscellaneous items and sentimental items.
This way, you’ll be on the right track to success. If you find yourself doing this, try to give each category its own dedicated space and do your best not to keep related items together. The Konmari method prefers that you spread out categories throughout your entire home.
Follow the Right Order of Tidy
This is probably the most important aspect of Konmari. You want to tidy up in the correct order to meet your tidying needs by starting with what’s most necessary first.
The right order for this method includes clothes, books, papers (all documents and manuals), miscellaneous items like small electronics and accessories, and mementoes.
Ask Yourself if it Sparks Joy
Deciding if something sparks joy is the criteria for keeping and discarding items when decluttering. In the Konmari method, your feelings are the standard for decision making, especially knowing what sparks joy. To determine this when tidying, you need to pick up each object at a time and ask yourself quietly if it does spark joy.
Pay attention to how your body responds. Joy is personal, so that everyone will experience it differently. By selecting only those things that inspire joy, you can precisely identify what you love and what you need.
How to Use The Konmari Method at Home
Clothes
The first category you need to tackle for a tidy house is clothing. While you might be used to cleaning out clothes in your closet and then your drawers, the Konmari method suggests gathering clothes and accessories from all over your home, including your bedroom closets, coat closets, drawers and under the bed and put them all in one pile.
This will allow you how much you have and help you realize how much you don’t wear. If an item sparks joy, keep it and if not, give it to gratitude and donate your clothing. You can then learn how to iron the clothes remaining ones correctly and arrange them the right way.
Books
After clothes, the next category on the Konmari method checklist books, gather every book in your home and put them in a pile to decide which ones spark joy and which ones don’t. If your ideal lifestyle means that your space is filled with books, keep them.

Papers
Every paper in your home, including documents, letters, bills and receipts, should be sorted using the Konmari method. Keep only what you need or use daily, plus one copy of everything else.
Miscellaneous Items
Any other items that don’t fit into the above categories should be put in a pile to determine what sparks joy and what doesn’t. Sort through everything carefully. Create groups like electronics, beauty supplies, home decor, canned goods and writing utensils.

It might be tempting to go room by room for an extensive category; make sure you gather items from all over your home and put them in one pile. That way, you’ll be able to store similar items together to easily find them and not have anything to spread out.
Sentimental Items
Sentimental items hold deep meaning and can be tough to part with. If you’ve ever seen the episode of ‘Hoarders’ where the woman won’t get rid of her deceased mother’s old suitcase, this method isn’t for you.
Keep only those sentimental objects that truly bring you joy and store them in a designated area. That way, you’ll have them but won’t be reminded of them at every turn.
How to Store Items that Spark Joy
After deciding what to keep in your home, good storage solutions will help you keep everything organized. Here are some of the best Konmari organization and storage tips:
Try Konmari Folding
The Konmari folding method is perfect for organizing your clothes. Marie Kondo didn’t only create her method of decluttering and organizing, but she has also shared a unique folding technique for clothes and linens. The Konmari method of folding helps keep drawers, baskets and bins neat and tidy.
Use Boxes in Drawers
Don’t toss them out if you have gift boxes, shoe boxes, and jewelry boxes. These are great DIY home storage solutions for keeping small things like jewelry, beauty supplies, phone chargers and other miscellaneous things organized in drawers and cabinets.
Store Papers in File Organizers
The paper file organizer is perfect for storing mails, bills and other papers. It protects your documents from getting lost in the clutter of the drawer.
Invest in Wicker Baskets
Wicker baskets are great for keeping your cupboard free from clutter. Use them to store foodstuffs, dry fruits, snacks and other kitchen essentials.
FAQs on What is the KonMari Method
Is the Konmari method effective?
The Konmari method is a highly efficient and effective organizing strategy that has helped many people declutter their homes. The beauty of this method is that it doesn’t follow any specific order in tidying up – you can start from anywhere and go on to the next activity.
What are the benefits of the Konmari method?
The Konmari method advises people to get rid of useless, unnecessary belongings. If applied correctly, this will help you find more relaxation and peace in your life. It also teaches you not to keep hold of things that do not bring joy into your life.
Final Thought on What is the Konmari Method
Do you have items that spark joy that you can’t fit in your home? Well, get organized with these temporary storage solutions with extra space storage to keep items that fit your ideal lifestyle, even if you don’t have room for them now.
The post What is the KonMari Method? appeared first on Kitchen Infinity.
10 Houseplants You Can Grow in Water
Growing plants in water is not a common practice. Houseplants that grow in water are beautiful and easy to care for. You don’t need any green thumb or special equipment to start growing these plants. All you need is a jar, fill it up halfway with clay pebbles at the bottom, add soil on top of the pebbles. You can then plant your seeds or seedlings and wait until they bloom.
The best part about houseplants that grow in water is that they will last forever without replacing them every year like other types of plants do. These are low maintenance indoor plants which means there’s no need for watering them very often or fertilizing them.
What which ones are those plants? This article outlines 10 houseplants that grow in water and would be perfect for your home.
1. Spider Plant
This is a very decorative and popular houseplant with many small white flowers, perfect for decorating your home. Spider plant also makes one of the best plants for the bedroom, thanks to its beauty and air purification. It’s great because the leaves on the Spider Plant are so big and add contrast if you place them in a group with other smaller plants or flowers around them.
To grow this plant, take a few cuttings from the parent plant and place them in a glass jar or any container filled with water. You can leave them there or move them into a pot with soil after they root. If you plan on moving them to a pot, let the roots grow until they seem strong enough to support the plant.
2. Lucky Bamboo
Lucky bamboo is one of the easiest plants to grow in water without much sunlight or maintenance. It’s a popular type of houseplant because it’s believed to bring good luck and fortune to the owner. The hardy stalks of lucky bamboo can become a living centerpiece, no soil required.
The indoor plants grow in water, and a narrow vase is a perfect fit for them. You can purchase these plants online, and their basic versions are inexpensive. The lucky bamboo tends to become top-heavy and will topple in smaller containers, so look for a container that’s sturdy enough.
Plant them in a wider container and surround them with colorful gravel or pebbles, which will add to the ornamental value and provide some support.
3. The Chinese Evergreen
The Chinese evergreen plant is also known as the claw or peace lily plant. The dark green leaves of this houseplant are shaped like claws, and they can grow to be four feet tall. This lush greenery is the perfect indoor plant for beginners because it’s hardy and doesn’t require too much attention.
Chinese evergreen plants are also carefree indoor plants tolerant of low light conditions and general neglect. These features make it a popular indoor plant for those looking for no-fuss greenery. This plant also makes an excellent office or dorm room plant. To grow it in water, clip six-inch-long stems, placing them in a bright room and indirect sunlight as too much light can cause algae growth.
4. Heartleaf Philodendron
Heart leaf philodendron is an easy-to-grow houseplant that thrives even in low light. To grow heartleaf philodendrons in water, cut off any stems hanging over the edge of a container and place them in indirect light until new leaves appear. These vining plants are harder to kill than to keep alive.

It has glossy, heart-shaped leaves with stems that can cascade down four feet or more. If you want a more compact plant, occasional pinching back leggy stems will help maintain a bushy growth habit. To grow this tropical plant in water, take a four to eight-inch long stem cutting, remove the bottom leaves, and place them in water.
Keep the container in a site with bright light but away from direct sun. Also, avoid keeping the plant in a cold room as it grows best in temperatures above 70 degrees Fahrenheit. Feed philodendron plants occasionally by adding a drop of liquid organic fertilizer to the water.
5. Sweet Potato Vine
Although the sweet potato vine is a tender tropical, it can be grown in water indoors. Cuttings should be made from green stems and allowed to heal for at least 24 hours before planting them in containers filled with peat-based potting mix or a mixture of perlite or gravel and sand. This trailing plant can grow four to five feet long.
It has lime green, heart-shaped leaves, but many cultivars offer unique and eye-catching foliage. Leaf colors range from burgundy to purple to bronze, and foliage is also varied for layers of interest. You can clip pieces of the stems in autumn to grow indoors over winter, then take six to eight-inch long cuttings, clipping just below a leaf node.
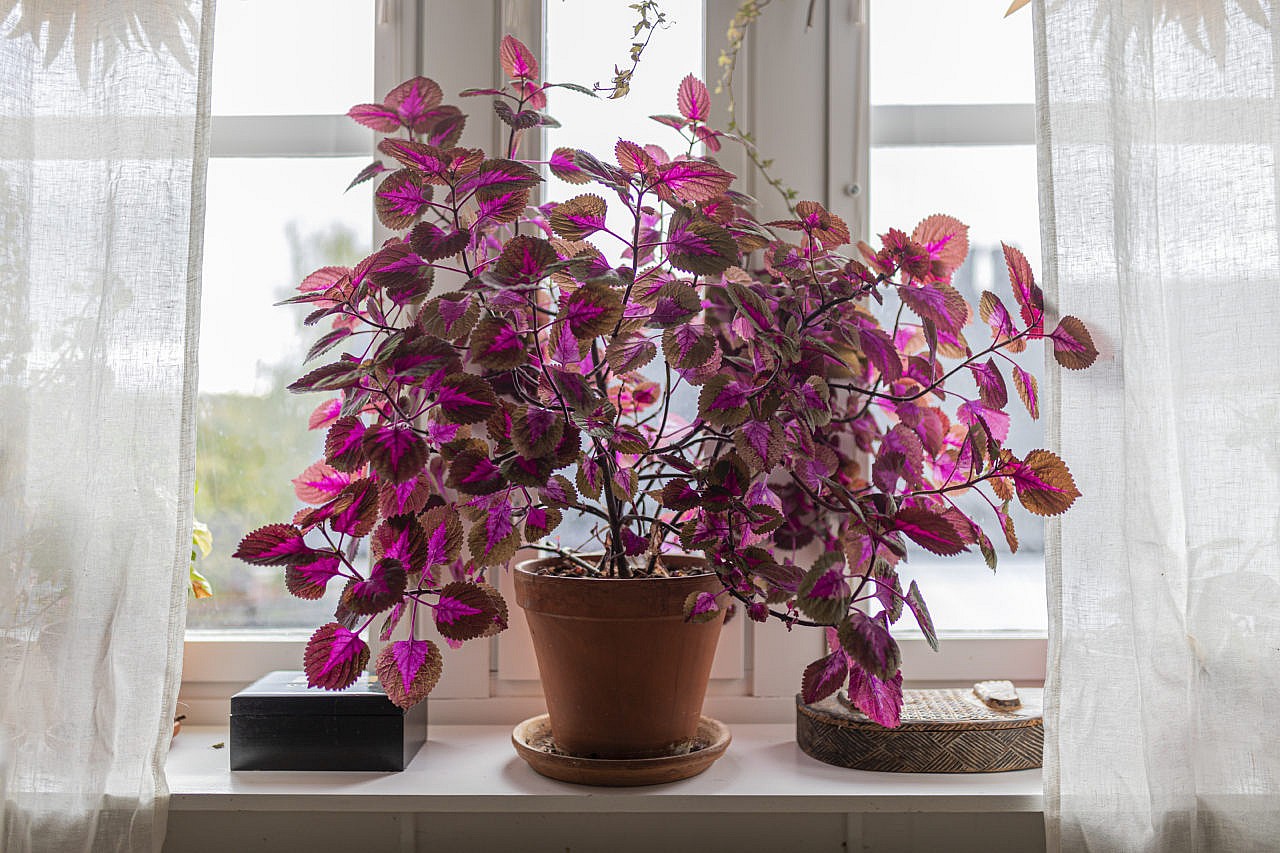
6. Coleus
Coleus plants are easy to propagate and grow by rooting stem cuttings in water, allowing you to create a colony of handsome coleus houseplants. They make a lovely counterpiece in a mason jar filled with water.

To grow coleus, take a six-inch cutting and remove the leaves from the bottom four inches, then immerse it in a jar filled with water and watch it grow for several weeks. Adding a bit of compost tea to the water during monthly changes will help your coleus plants thrive. This plant also requires indirect sunlight, making it a great choice to grow indoors all year round.
7. Peace Lily
The peace lily is a lovely tropical plant with showy white flowers, which enjoys the humidity of the bathroom. It will grow in water as long as you provide it with indirect light and room to spread. In order for your peace lily plants to thrive, you should rinse them carefully before putting them into their jar of water.
This will help remove any built-up fertilizer salts. If you buy peace lilies, examine their roots carefully for damage before planting them. Fill a container with distilled water and not chlorinated water, which will damage the plant. Cut a hole on the top of a plastic stopper and use this to keep the plant in place by placing it at the top of the container.
Insert your lilies in the container and ensure the roots are completely submerged. You can add a few drops of liquid fertilizers or a small quantity of water soluble fertilizer. However, be careful with a peace lily in the house as it’s among the plants that are toxic to pets.
8. Wandering Jew
Wandering Jew is one of the easiest houseplants to grow using this method. The plant should be well watered before you place it in its container. You don’t have to worry about fertilizer because it has no nutritional needs.
To grow a wandering Jew in water, submerge the cuttings from the mature wandering Jew plant in a jar of water, submerging only the stem and not the leaves as the latter submerged in water will rot the cutting. Leave in an area with plenty of sunlight and watch it root in just a few weeks.
9. Impatiens
The key to successfully growing impatiens in water is to select the right kind of stem cuttings. Take young, soft shoots that are just pink in color with no flowers or buds. Cut off about 1 inch of these shoots under running water.
Impatiens can also grow as marginal pond plants, and that’s how much they adore water. Snip off a few stems at the end of the growing season and overwinter them in a vase where they’ll root and grow as clones of the parent plant.
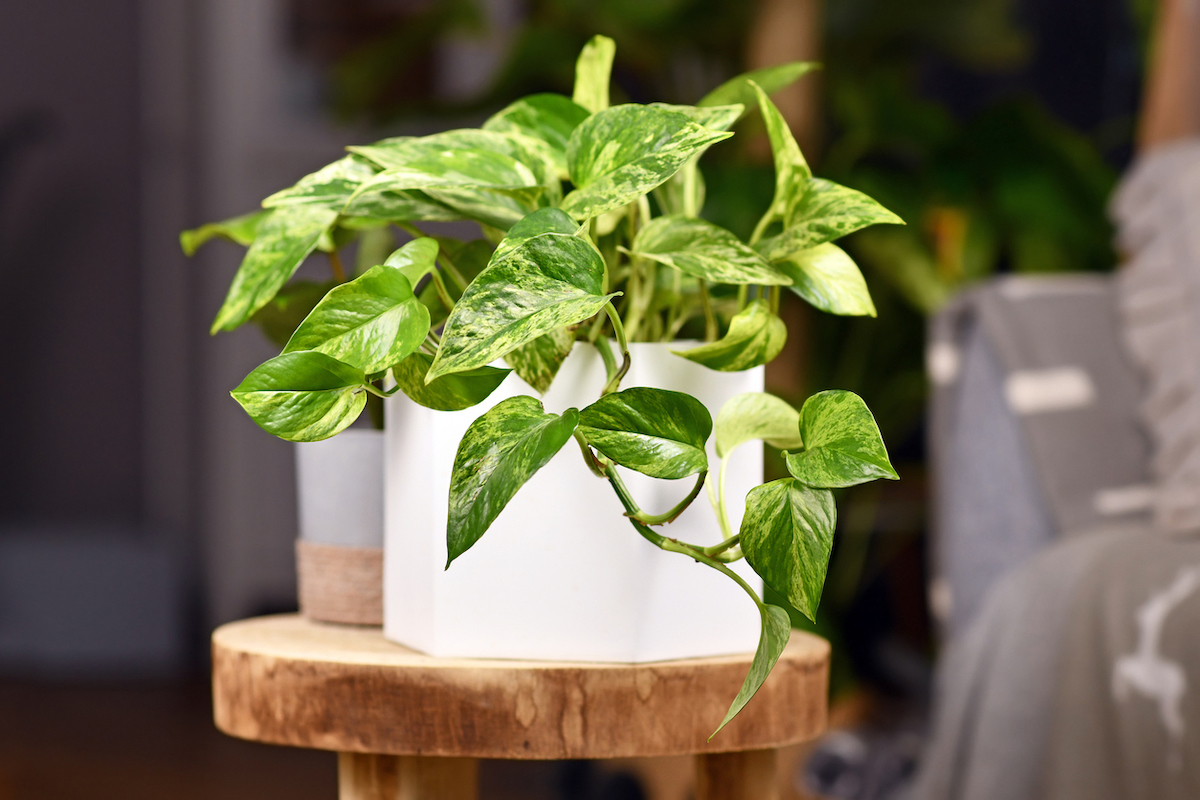
10. Pothos Plant
Pothos plants are some of the easiest houseplants to grow in water. Cut off a stem or two from an existing pothos plant and place them in a vase or jar of water. Plant the stems in the soil as soon as they root (usually within 2-3 weeks). Make sure the potting soil is damp but not wet.
FAQs on Houseplants You Can Grow in Water
What are growing plants in water called?
The technique of growing plants in water without soil is called hydroponics.
What are the benefits of houseplants grown in water?
Houseplants grown in water generally have more vigorous growth and lush foliage than those grown in soil. They’re also easier to care for because you don’t have to worry about watering them regularly or fertilizing them.
Final Thought on Houseplants that You Can Grow in Water
Are you looking to add some green cover but lack space and time in your home? Well, with these house plants that need only water to grow, it’s easy to have some plants around that don’t require much attention. In addition, these indoor plants add life to an otherwise dull dorm or living room. So, what are you waiting for? Plant these house plants and enjoy the beauty they bring.
The post 10 Houseplants You Can Grow in Water appeared first on Kitchen Infinity.
Did you miss our previous article…
https://www.conduithardware.com/?p=881
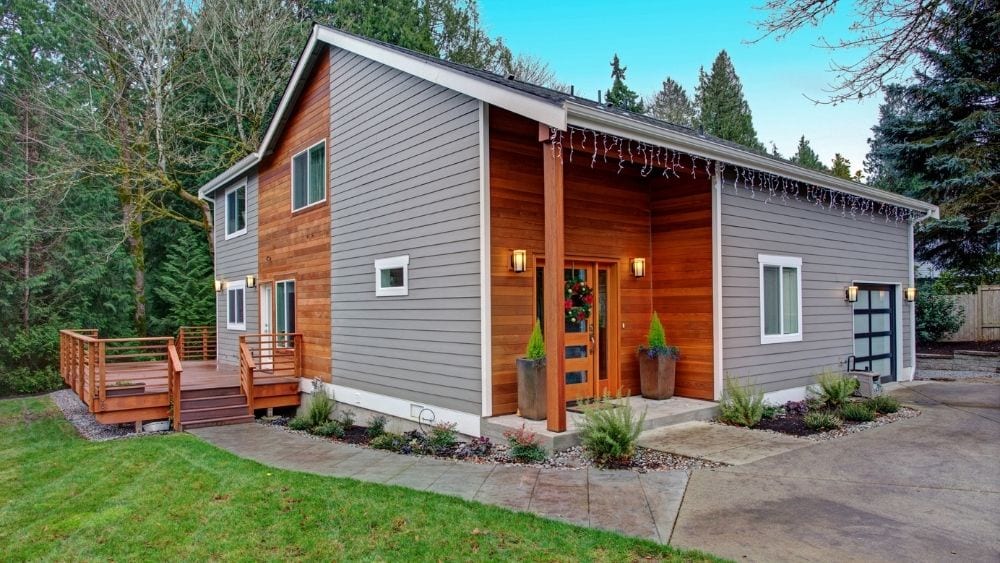
Vinyl House Siding: Pros and Cons
Vinyl siding is a great material for anyone looking to improve the look of their home. This type of siding can be very durable and resistant to damage, making it a good choice if you have kids or pets who tend to destroy your property.
However, vinyl siding has some disadvantages that you should consider before installing this product in your home. For example, vinyl is not as energy efficient as other siding materials such as wood siding or fiber cement panels. Also, vinyl siding tends to fade over time due to exposure to sunlight and other weather conditions than fiber cement siding and wood siding.
In this article, we’re going to look at some of the pros and cons of vinyl house siding to help you make an informed choice. Read on.
What is Vinyl House Siding?
Vinyl siding is a durable form of plastic commonly used in residential and commercial buildings. Vinyl siding comes in a variety of styles, colors, and textures, even imitating the look of wood siding and other siding materials to suit your needs. You should know which one to choose when building your own house so you don’t end up with what you don’t like.

Vinyl siding is also very easy to install, which is why it has become one of the most popular types of exterior siding in the United States.
Pros of Vinyl Siding
Easy Installation
Vinyl siding is made to be easy to install, which means that you can get the job done in less than half a day. That’s why most homeowners choose to install it themselves. However, it’s always recommended to seek professional help and advice before tackling this project.
The installation process requires the help of a contractor for their expertise. Proper installation means less likelihood that the siding will expand or crack over time, leading to bigger and more expensive maintenance issues. Construction warranties may also be voided by faulty or improper installation, so make sure you do your research and seek professional help if needed.
Material Durability
The material used in vinyl siding is also very durable, meaning it will last for many years. Vinyl doesn’t warp, rot, crack, or peel with time, so you don’t have to worry about costly replacements down the road as a homeowner.
When installed properly, vinyl also won’t shrink, expand or contract over time. This is beneficial to the homeowner who wants a trouble-free product that requires minimal upkeep and maintenance. In case a rock flies from your lawnmower and pierces the siding, you can replace the plank fairly easily and cheaply.
Most manufacturers also boast a lifespan for the vinyl siding of up to 30 years. A properly installed and well-maintained vinyl siding does a good job of protecting a building’s exterior surfaces while keeping its interior well insulated.
Relatively Inexpensive Compared to Other Siding Materials
Like stone or brick, vinyl is an investment. For around $1 per square foot installed (the average cost for new home construction), you get long-lasting siding that will protect your home in many climates. It’s also relatively inexpensive compared to other popular materials such as wood clapboard siding, wood pulp, fiber cement siding, and aluminum.
Though the prices will vary depending on the manufacturer and the installation process, you can expect vinyl siding to cost between $3.50 and $7 per square foot. Fiber cement siding is double that price. So, if you want the most bang for your buck, you can never go wrong with vinyl flooring.
No Painting Required
One of the biggest benefits of vinyl siding is that it does not require painting. This is because the material, made from polyvinyl chloride (PVC), has a color built into it that makes it resistant to sun damage and ultraviolet rays. With no need for paint or maintenance, you will save yourself time and money.
Vinyl siding colors cannot be mechanically abraded, scratched off, or stripped. So, if you wish to restore or change the color of your vinyl siding via residential exterior painting, this siding material is highly receptive to paint. With vinyl siding, you can easily outfit your home or business with any color scheme of your choice as long as you know how to choose paint colors.
Vinyl Siding is Low Maintenance
Although vinyl house siding does not require paint, it will wear down over time and need to be replaced. The occasional cobwebs, bugs, mud, and other debris can easily be sprayed down using a garden hose. Never use a power washer on your vinyl siding, as this could cause serious havoc if the water enters your home through cracks around the siding or exacerbate minor tears in the crevices.
Cons of Vinyl Siding
Despite all its benefits, vinyl siding has its setbacks. Here are the cons of vinyl siding:
Moisture Problems
Vinyl houses siding does not absorb moisture; rather, it creates a waterproof barrier between your home and the outside elements. Vinyl siding is installed over a styrene insulation board which can cause water vapor to become trapped in the wall cavity without an escape route.
Thus, if water seeps into small cracks and holes in the vinyl, this can cause major damage to the wood foundation or create conditions that attract mold, mildew, rot, and termite infestation.
Vinyl Siding is Less Eco-Friendly
Vinyl siding is plastic and is made of polyvinyl chloride, which isn’t eco-friendly. The manufacturing process produces greenhouse gasses such as nitrogen oxide and carcinogens, including dioxin. Another by-product of vinyl siding manufacture is sulfur dioxide which causes acid rain and smog.
This process also requires a vast amount of electricity. These gasses and chemicals can contribute to climate change and pollute the air. That’s why most recycling plants do not accept PVC products because they’re both challenging and expensive to recycle.
Vinyl Siding May Lower Your Home’s Value
Although it is cost-effective, vinyl siding still requires a large initial investment. If you’re looking to sell your home soon, this may be a deterrent for potential buyers who might not want the inconvenience of dealing with maintenance and replacement costs on their own.
Vinyl siding may decrease your home’s value since many homebuyers tend to view it as inferior to real wood, masonry, or other materials. It could potentially result in lower offers if and when you decide to move to your home later.
Maintenance Issues
Even though vinyl siding can withstand harsh conditions such as strong winds and heavy rainfall, it can have some maintenance issues. Vinyl siding is sensitive to extreme heat and cold. If you live in an area with harsh winters or summers, your vinyl siding may warp because of the temperature changes.
Besides irregular coloring, warping can also affect how tightly your panels lock together, leading to water damage if it’s not fixed immediately. Siding planks often split or break due to the expansion and contraction caused by temperature changes. If a lawnmower sends a rock flying at your house, it may pierce the siding. Vinyl siding cannot be patched, so the entire plank must be replaced.
Installation is Simple But Not Full Proof
Although vinyl siding is easy to install, it can be expensive to have a professional do the job for you. Vinyl will not bend around corners, so if your house has rounded corners, you’ll need someone with experience installing vinyl siding to do this part of the job. And if your siding is nailed too tightly, it will expand, crack, bulge or warp.
Construction warranties often last only one year, and the product warranty may be voided by faulty installation. Not every contractor has invested in proper training and certification, which is loosely regulated and expensive. Whether you’re investing in a brand new vinyl siding or seeking a siding replacement, you must do your homework well while hiring contractors for this project.
Color Fading
Many vinyl siding brands have been tested to resist color fading when exposed to UV light from the sun. Inferior materials may fade in just a few months, causing homeowners lots of headaches and expenses. In fact, some contractors refuse to use certain products because they don’t hold up well over time.
While there are many vinyl siding manufacturers, not all of them are equal in quality. Indeed, some vinyl house siding brands require homeowners to use specific cleaners and paints. Using the wrong products can destroy your beautiful new siding over time.
FAQS on Vinyl House Siding
What happens if water gets behind vinyl siding?
Rainwater leaking from your gutter ends up behind the siding and causes a wall to rot. However, vinyl is a rare siding product that remains completely unaffected by the water behind it.
What do you put under vinyl siding?
You can install vinyl siding over common wood sheathings such as plywood, oriented strand board, or other materials.
Final Thought on Vinyl House Siding
Whether the pros of vinyl siding outweigh the cons or vice versa, there are many reasons to select vinyl as your siding material or consider other options. But whatever the case, make sure you hire a siding specialist that can install, repair, and replace your property’s siding.
The post Vinyl House Siding: Pros and Cons appeared first on Kitchen Infinity.
Collaboration Transforms Kitchen
Rowayton, CT — Karen Berkemeyer and Leslie Dunn often work together to create their clients’ dream kitchens and baths, with the former focusing on kitchen/bath design skills and the latter incorporating interior design touches for their respective companies of Karen Berkemeyer Home in Westport, CT, and Dunn Designs in Norwalk, CT. This kitchen, along with the master bath and a guest bath, was no exception…however, this time the resultant collaboration was showcased in Dunn’s personal residence.
“We work really well together,” says Berkemeyer, noting a mutual respect for each other’s talents, which makes for great collaborations. “As a kitchen and bath designer, I focus on making sure these spaces technically and functionally work correctly. Partnering with another professional, such as an interior designer, gives clients the best of two worlds since multiple people are working on the same project. I love working with Leslie because she is so creative and has great taste. She is especially talented and creative with paint.”
Contrasting color
Paint, at opposite ends of the color spectrum, is a focus of Dunn’s kitchen, where the bright white island is contrasted with dark black perimeter cabinets.
“The use of color – combined with very simple cabinet door styles, which are a great choice for today’s kitchens – makes this design stand out,” says Berkemeyer.
Black perimeter cabinets served as the starting point for color. “She really wanted to do black cabinets,” Berkemeyer indicates.
As a contrast, the island was designed to look like a table that Dunn found, notes the designer. “Island and perimeter cabinets don’t necessarily have to match in cabinet style or color,” she says. “In fact, when done well, like in this kitchen, having them not match shows a lot of creativity and makes for an interesting design.”
Keeping cabinet styles simple is the key to making a ‘mismatch’ work, says the designer in reference to the flat-panel, flush-inset Wood-Mode perimeter cabinets and full-overlay, shallow-cut, Shaker-style Signature Custom Cabinetry cabinets on the island. Both are sheathed with custom colors selected by Dunn.
“You would never do this perimeter with oak raised-panel doors on the island,” she says. “This perimeter features a very simple door style, as does the island. They play off of each other well. This entire kitchen has created so much interest from people. They see things they would have never thought of doing…and they like the result.”
The designers also kept the cabinet hardware unpretentious. Pulls on the perimeter cabinets bring to mind cleats used to anchor boats to a dock, giving the space a bit of a nautical vibe that pays homage to the water just beyond the kitchen windows. For the island, they incorporated drawer pulls that resemble those found on a filing cabinet. Berkemeyer also designed the island with seating for four, positioning stools at a right angle to facilitate conversation between guests. The designer also added custom brushed steel accents at each leg base.
“They add another texture to the space and make the island more interesting,” she says.
To continue the contrast between light and dark, Berkemeyer topped the island with white marble, which she built up with a 2″ mitered edge. The perimeter features median-black, charcoal-colored quartz with a leathered finish for added texture.
White 3″x6″ subway tile covers the walls, extending from the countertop to the windows and beyond. Its undulated surface offers a rippled appearance while its stark light color juxtaposes against the blackness of the shallow-depth soffit on the ceiling.
“I thought the kitchen stopped too abruptly in the corner,” notes Berkemeyer in reference to the soffit. “I suggested that we add the soffit, extending it to the refrigerator on one wall and across the length of the windows on the other. It really helps pull the whole kitchen together.”
Additional dark-hued accents include the deep blue paint that adorns the window trim. “She really likes to include the unexpected!” she says.
Overcoming storage challenges
To make better use of the kitchen’s footprint and gain a few extra feet of space, the designers removed walls between the living room and kitchen, eliminating a hallway in the process. To provide visual differentiation between the two spaces without adding a physical barrier, they added reclaimed antique beams in the ceiling, extending them into the living room.
“Previously, her home had an enclosed little kitchen with separate living room,” says Berkemeyer. “Now, the kitchen is more open and looks so much larger. Taking down the wall also made it possible to include the island.”
Even with the additional space gained by removing the hall, storage was a challenge for the relatively petite kitchen. “When spaces are smaller, like in this kitchen, the biggest design challenge is usually storage,” she says. “It’s important to make the most of whatever space you have, and to make everything accessible, especially focusing on corners. Taking cabinets up to the ceiling maximizes the space. It’s important, too, to pay attention to clearances, ensuring that walkways are technically correct and easy to maneuver.”
To overcome storage concerns in Dunn’s kitchen, Berkemeyer included specialized corner organization accessories, recycling bins, pull-out drawers and several large drawers to make contents easy to access.
Glass panels in the wall cabinets provide a brief glimpse of their contents and keep the space visually ‘light.’ “Like the rest of the kitchen, the glass is kept clean, without any mullions, to maintain the desired look for the space,” she concludes. 
The post Collaboration Transforms Kitchen appeared first on Kitchen & Bath Design News.
Did you miss our previous article…
https://www.conduithardware.com/?p=874
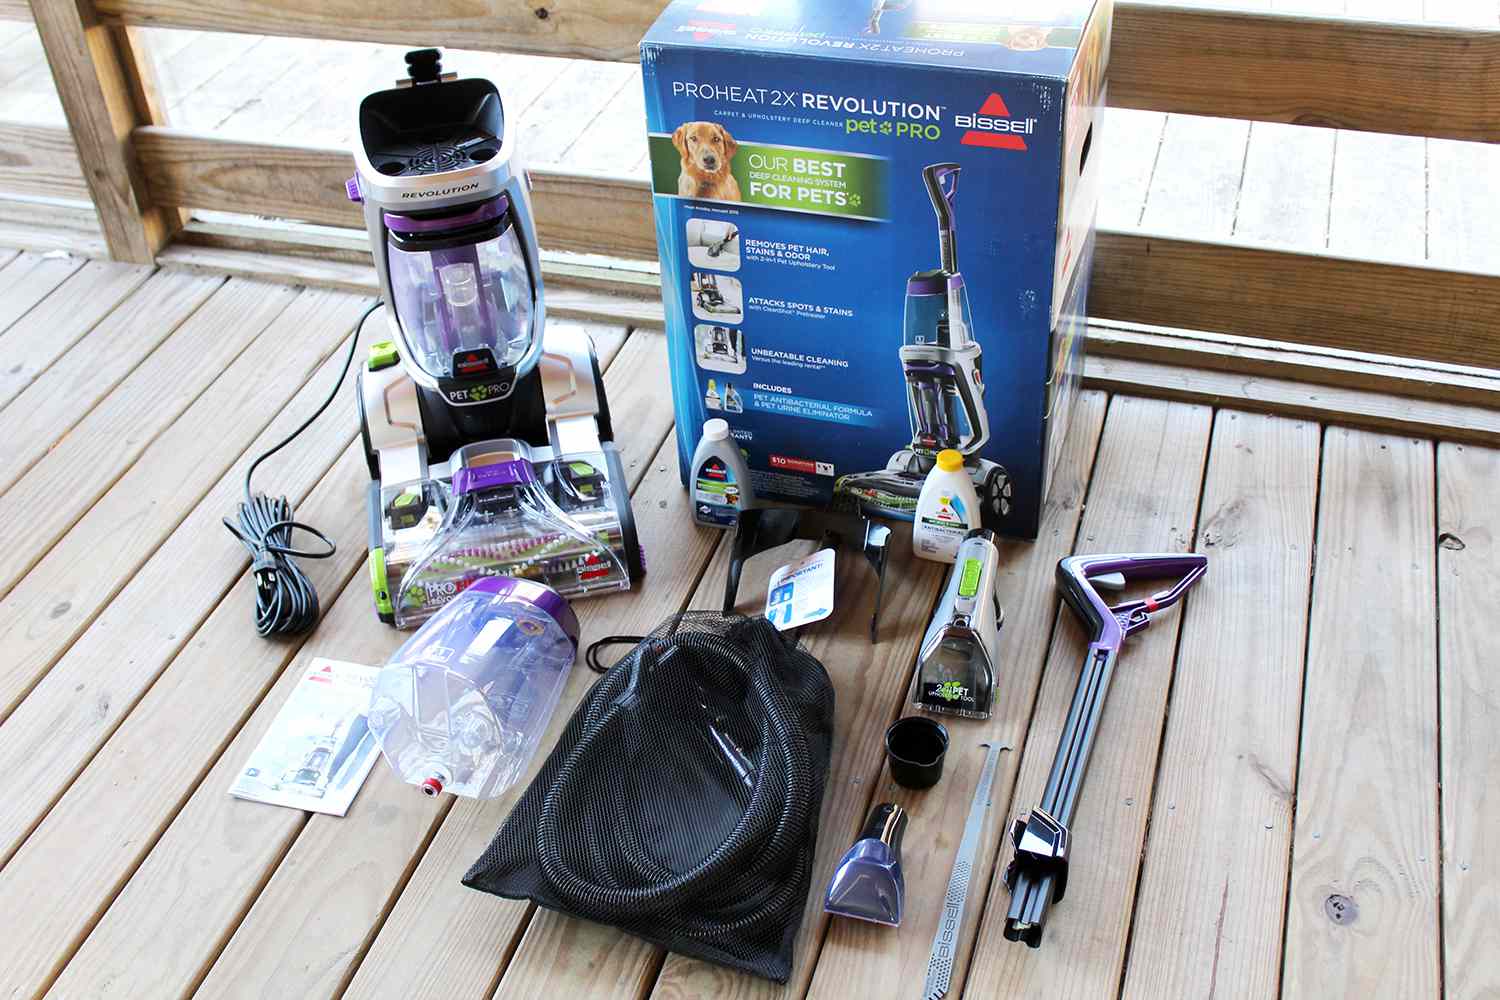
Bissell Proheat 2x Revolution Pet Pro Carpet Cleaner Review
If you have pets and your house is carpeted, you know better than anybody that these two can be hard to maintain. But not if you have the Bissel proheat 2x revolution pet pro carpet cleaner. According to those who’ve tried this carpet cleaner, pet hair, pee, and other pet stains are no match for it.
But does it really live up to its name? Is this carpet cleaner worth the price? Well, in this review, we’ll look at the key features, pros and cons, and value of this carpet cleaner. Read on to see if it’s worth your penny.
What Is Bissell Proheat 2x Revolution Pet Pro Carpet Cleaner?
Bissell proheat is the latest high-tech carpet cleaner from Bissell, a company widely known for its quality cleaners. In the age of digital everything, this cleaner is not just your usual machine that sprays water onto your carpets and sucks it back up again with a dirty waste tank also filled with water after being filtered. This cleaner uses hot tap water to clean your carpets and then recycles the water into the tank with little to no wastage.

This little machine may be small, but it packs a punch. Not only does it offer the perfect carpet cleaning solution, but with its built-in stain remover, it can also remove most pet stains and odors without you having to scrub at them yourself.
Bissell Proheat 2x Revolution Pet Pro Carpet Cleaner Features
This is the best Bissell carpet cleaning machine for pet owners, but what has made it so popular? Here’s a quick overview of this machine’s key features:
Express Clean Mode
The Bissell proheat 2x revolution pet pro carpet cleaner has a one-touch mode specifically for pet stains. Just press the button, and the machine does all the work for you, including heating the water to the perfect temperature. This feature is indeed a time saver for all homeowners who don’t have much time at their disposal. It also has a deep cleaning mode that you can switch to remove stubborn stains.
Heatwave Technology
This Bissell cleaner also comes with Heatwave technology, which helps maintain the cleaning temperature. With this, your carpets are always being cleaned at the right temperature, no matter how long the job takes. You don’t have to worry about always adjusting the temperatures, which can be time-consuming.
Dual DirtLifter PowerBrushes
These PowerBrushes help you dig deep down into the fibers of your carpets and extract all the dirt, dust, and pet hair. The brushes loosen all the dirt before actually removing them and leaving your carpet as clean as new. Not only will this leave your carpets cleaner, but it will also extend their lifespan. This feature comes in handy for anyone who wants to deep clean a carpet.
Antibacterial Cleaning
If pet odor takes over your carpet, no need to worry if you have this machine. With its built-in antibacterial cleaning, this machine will eliminate the stench that comes with pet stains and odors. The technology controls all the bacterial that could be hiding in your carpet, living it clean and fresh.
2-in-1 Upholstery Tool
Another thing you’ll love about this machine is the 2-in-1 upholstery tool. This tool lets you clean furniture, stairs, and other delicate surfaces easily. The narrow width of the tool means that you can get into tight spaces and remove all the dirt, dust, and pet hair with little effort.
Comes Complete
If you buy this pet carpet cleaner, you won’t need to buy anything else separately as it comes fully equipped for the job. The machine comes with an 8-ounce bottle of Bissell’s professional Deep Cleaning formula, a trial size of their SpotBot Pet stain remover, a crevice tool, and a dirty water tank to collect dirty water that comes from carpet cleaning. In addition, the machine features a generous 3-year warranty.
Bissell Proheat 2x Revolution Pet Pro Carpet Cleaner Pros and Cons
Pros:
Here are some things that you’ll love about Bissell proheat 2x revolution pet pro carpet cleaner:
- Hot tap water is used to clean your carpets: This means less wastage, so you’re being eco-friendly when using this machine. It saves time and effort by having a pre-programmed one-button mode for pet stains.
- Made specifically for pet owners: If you have pets, this machine comes as a huge relief as it has tons of features that are perfect for pet owners. These include the Express Clean Mode, Heatwave technology, and antibacterial cleaning. It also comes with a 2-in-1 upholstery tool for delicate surfaces.
- 3-year warranty: This machine is built to last, and in case anything does go wrong, you’re covered with a generous 3-year warranty.
- Easy to Use: The machine also comes with a user guide, making it easy for you to set up and start using it.
- It offers powerful cleaning: The Dual DirtLifter PowerBrushes help to dig deep into the fibers of your carpets and extract all the dirt, dust, and pet hair. This leaves your carpet as clean as new.
- Easy to clean: This carpet may be bulky, but it’s one of the easiest to use even for those learning how to clean a carpet. You have to plug it in, wait till the Ready indicator light turns on, and press the Express Clean button.
- Comes complete: All you need to get started is included when you buy the Bissell carpet cleaner. This includes a 32 oz bottle of their professional deep cleaning formula, a trial size of their SpotBot Pet stain remover, a crevice tool, and a dirty water tank at no additional cost.
Cons:
Here are some things you might not like about Bissell proheat 2x revolution pet pro carpet cleaner:
- Heavy and bulky: The machine is heavy and bulky, making it difficult to move around when cleaning. The cord is also short compared to other machines.
- Makes noise: The machine makes quite a bit of noise when used, which might be a problem for some people.
- Only cleans carpets: If you’re looking for a machine that can also clean your furniture and stairs, then this is not the one for you.
- Not easy to set up: The machine is not as easy to set up as some other machines on the market. However, it comes with a detailed instruction manual that you need to keep nearby.
Bissell Proheat 2x Revolution Pet Pro Carpet Cleaner Performance Comparison
The Bissell proheat 2x revolution pet pro carpet cleaner is a clear winner when it comes to performance comparison with many other carpet cleaners. It has many perfect features for pet owners, such as the Express Clean Mode, deep clean mode, Heatwave technology, and antibacterial cleaning. In addition, it comes with a 2-in-1 upholstery tool for delicate surfaces. The machine also offers powerful cleaning with the Dual DirtLifter PowerBrushes.
So, if you’re looking for a powerful and efficient pet carpet cleaner, the Bissell proheat 2x revolution pet pro is a perfect choice. It comes with a generous 3-year warranty and is easy to use. Plus, it’s perfect for removing pet stains and hair from your carpets.
Should You Buy Bissell Proheat 2x Revolution Pet Pro Carpet Cleaner?
So, are you asking if this carpet cleaner is really worth it? Well, you have the answer in the review above. But to be sure, we can guarantee that the carpet cleaner is worth the money considering all the features and the advantages. Bissell proheat 2x revolution pet pro carpet cleaner is a perfect choice for pet owners who need to deep clean their carpets. And if you’re looking for a machine that’s easy to use, this is just what you need.
Not to mention that it’s not as expensive as other carpet cleaners out there. So, if you’re looking for a powerful and efficient pet carpet cleaner, the Bissell proheat 2x revolution pet pro is a perfect choice. It comes with a generous 3-year warranty and is easy to use. Plus, it’s perfect for removing pet stains and hair from your carpets.
Well, we won’t fail to mention the downsides, which are, as we have already said, the weight and noise. Plus, it’s not easy to set up and not suitable for cleaning stairs and furniture.
To sum it all up, this is a good buy if you’re looking for a carpet cleaner that can solve your pet hair problems. So, if you have the money, go ahead and buy it.
What Users are Saying About Bissell Proheat
Bissell proheat rates well online as most users give it a 4 to 5-star rating. Most positive reviews praise the carpet cleaner for its powerful cleaning performance. However, some negative comments say that it’s heavy and bulky, just as we’ve stated.
One reviewer said they love the carpet cleaner because it gets rid of pet stains in just minutes. They also mentioned that their pets love to drink from a certain area of their home, which has resulted in tough stains over time. Overall, most users love this carpet cleaner and won’t hesitate to refer others.
Our Verdict on Bissell Proheat 2x Revolution Pet Pro Carpet Cleaner
We think you won’t find a better carpet cleaner for pet owners than Bissell proheat. The reasons are obvious. First, the rug doctor has a unique design that makes cleaning easy and efficient. Second, the Dual DirtLifter PowerBrushes make deep cleaning a breeze. Plus, it comes with a generous 3-year warranty and lets you clean carpets as well as furniture and stairs.
So, if you’re looking for a powerful carpet cleaner that’s perfect for pet owners, Bissell proheat 2x revolution pet pro is the one you need. It’s easy to use and efficient, making it a great choice for busy pet owners. You can’t go wrong with this carpet cleaner if you want to always have a clean carpet.
The post Bissell Proheat 2x Revolution Pet Pro Carpet Cleaner Review appeared first on Kitchen Infinity.
Did you miss our previous article…
https://www.conduithardware.com/?p=870
29 Christmas Table Decorating Ideas
You want to add some Christmas spirit to your table, but you don’t know-how. The best way to get into the holiday mood is by adding a variety of colors and decorations that will make everyone feel merry and bright at dinner time.
Adding color can be as easy as changing up your tableware and adding seasonal patterns or textures. There are so many things you can change around on your table, from napkin rings, placemats, glassware, candles.
Having a colorful place setting with beautiful details will help set the tone for an enjoyable evening with friends and family. To help you out, we have put together this quick guide with everything you need to know about decorating your Christmas table.
1. Wreath Christmas Table Runner & Napkin Rings
For a simple yet elegant table setting, you can place a green wreath with red berries at the center of your plate. This is one of the easiest ways to incorporate festive details into your decor while combining textures and varying levels for an exciting tabletop.
The naturalness of the materials used makes this table runner very easy to match with most decor styles. Using mini wreaths as napkin rings is one of the best Christmas decorations you can bring to the table setting.
2. DIY Mason Jar Centerpiece
If looking for a festive centerpiece idea, look no further than the classic Mason jar. If you like this idea but are not really into DIY projects, we found some easy and affordable premade mason jars that we think are perfect for your holiday table.

3. Add Dimension and Height to Your Decor
Bring your Christmas table decor to life by adding dimension and height. This is very easy with flowers, garlands, and candles on your table. These items can be easily found at your local craft store or big-box retailer.
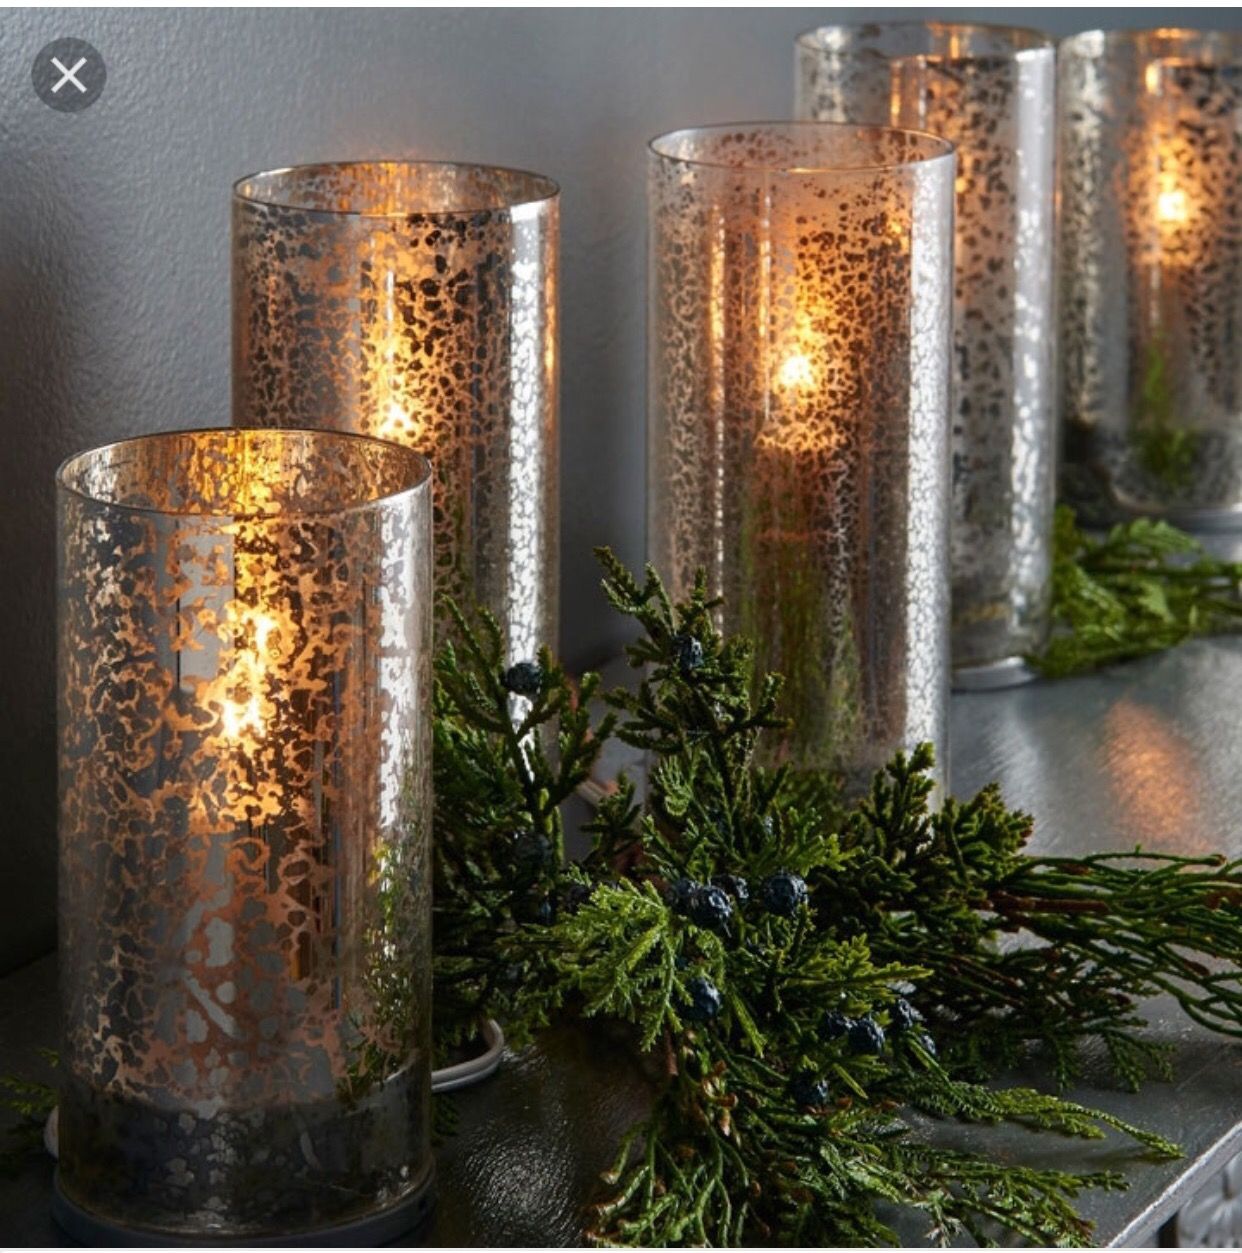
4. Bring Mercury Glass Candles
Create a Christmas tablescape design using mercury glass holders. The mercury-looking finish is a big trend right now, so you’ll be able to find this kind of table decor in different shapes and sizes. It will add an interesting detail that catches the eye.
5. DIY Garland Runner
Keeping your Christmas tablescape nice and simple is a great way to uncomplicate holiday decorating. Incorporating a no-fuss garland runner with white candles combined with cinnamon sticks and a holly place setting is the perfect way to decorate your Christmas table without spending too much time or money.

6. Farmhouse Style Christmas Table Decor
This is a perfect example of how to use rustic Christmas decor. Farmhouse style is all about shabby chic and handmade details, so your Christmas table will look warm and inviting in no time.
7. Vertical Garland Ideas for Christmas Tables
Vertical garlands are the new trend in Christmas decor, and this modern take on a traditional wreath is stunning. You can add it to any empty wall space in your home; the staircase, behind the front door, or above your mantelpiece, for example. The garland feels festive but not overly Christmassy, creating a conversation piece to anchor the holiday dining area that you won’t feel pressured to take down too soon. Use dramatic green and white garland hung on the wall behind the dinner table.
8. Woodsy Christmas Table Decorations
This chic rustic motif is all about keeping it real. These holiday centerpieces are made with natural elements that you probably already have on hand at home or can acquire easily enough. This is a great theme if you want to mix modern and traditional, using fresh flowers for height and fallen tree branches to display your lovely vintage ornaments.

Details like forest green candles and napkins, a striped linen table runner, a vase full of white flowers and seasonal greenery, olive wood napkin holders, and chargers will add a homey look to your Christmas table.
9. Mint and Gold Holiday Table Decorations
A touch of mint gives this table a fresh feel, but the pure white flowers and soft gold cutlery decorations keep it from looking too cool and contemporary. The result is a pretty backdrop that feels romantic and elegant mixed without being stuffy or overbearing.
10. DIY Mini Cranberry Wreaths
These mini wreaths are quick and easy to whip up, but they pack a major visual punch. Make them in minutes with simple craft supplies like ribbon, twigs, berries, and glue. Decorating your Christmas table doesn’t have to be an elaborate affair to make a big impact.

Bring in cranberries, tree trimmings, and stamped brown Kraft paper name tags to create a festive Christmas brunch place setting that will make your guest feel welcome and special.
11. Mini Birch Branch Trees as Christmas Table Decoration
Add a rustic and natural element to your Christmas table setting with these simple yet elegant DIY mini trees. These easy Christmas centerpiece ideas can be finished in just minutes, and they add a natural touch of elegance to any holiday season.
Brighten up the season by mixing red, green, blue, and silver when decorating your Christmas table! A great way to do this is by using a favorite Christmas ornament as the centerpiece and filling your table with red, green, and silver plates, glasses, and chargers.
12. Cake Stand Centerpiece
Using a cake stand as the base of a table centerpiece is one of the ways of decorating your table while hosting a Christmas dinner. Bring group candles and sprigs of greenery atop a cake stand for an easy Christmas table.
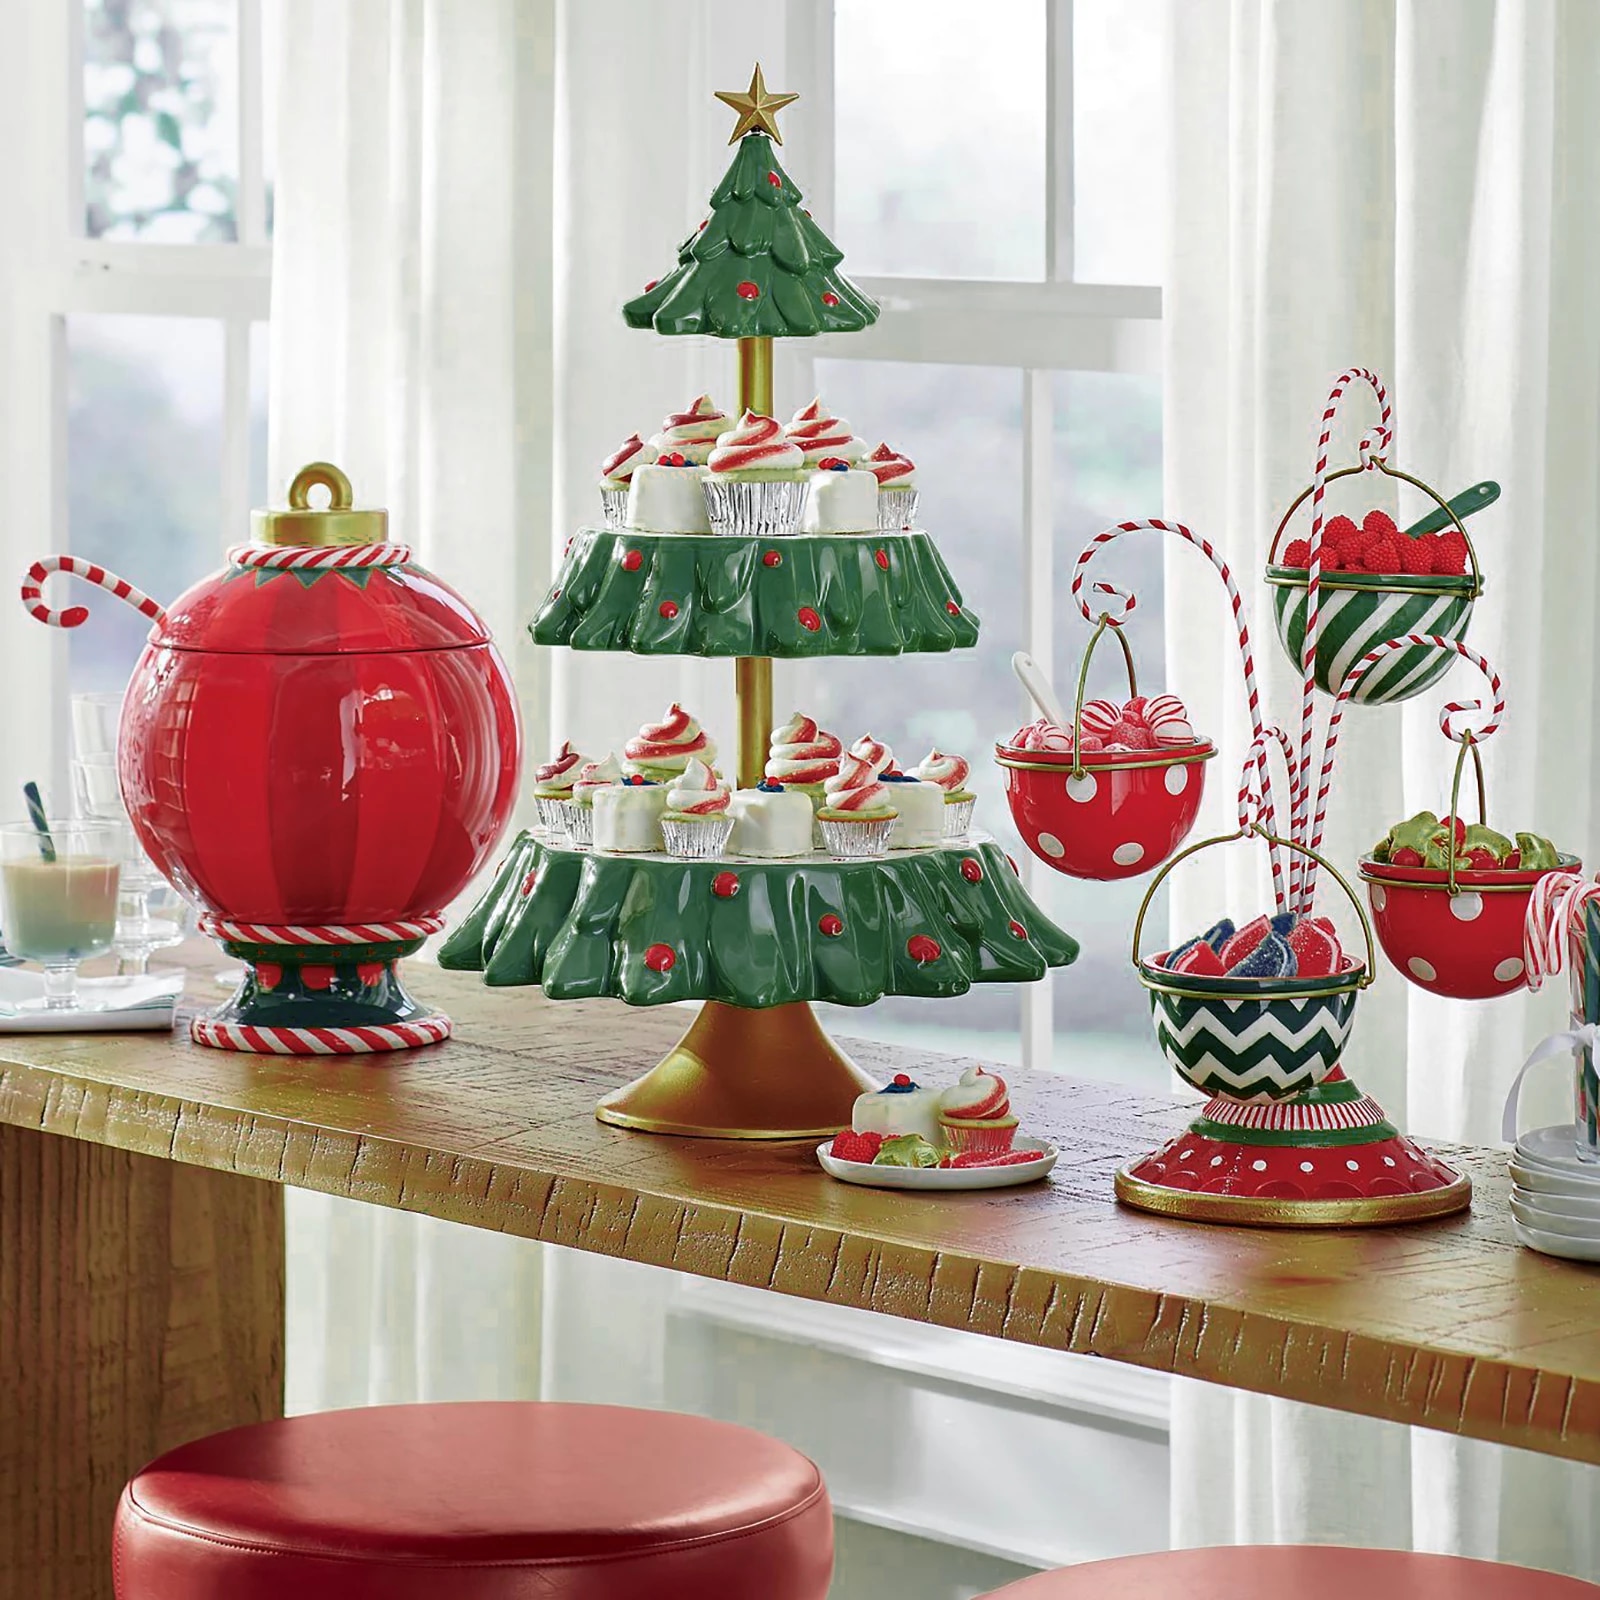
13. Outdoor Christmas Table Decorations
Add a touch of whimsy to your holiday dinner table with these festive ideas for outdoor Christmas table decorations. Outdoor-friendly centerpieces, place settings, and more. You can mix vintage candlesticks, wood plates, and a natural centerpiece of leaves and flowers to create a non-traditional, laid-back festive vibe.
14. Chandelier Hanging Christmas Centerpiece
Think way outside the box with these unique Christmas table decorations. Hang a chandelier over your dining room table and attach candles to it for a sparkly gold atmosphere.
15. Table Runner
A table runner is another great idea for adding warmth to your Christmas decor. Pick one that features holly or bows, or go for a classic red-and-green color scheme. The table runner should be a few inches wider than your table to leave room for plates and other items.
16. Consider Royal Purple
Mixing a pale green and natural red centerpiece with unexpected royal purple accents can be an eye-catching and modern approach to your holiday dining table decor. Plus, the unexpected royal purple napkins can create unexpected twists on holiday table decorating.
17. Natural Gold
Try to play with pale golden wood tones in your modern dining room table by creating a gold and white Christmas brunch table with gold flatware, white and gold dishes, white napkins, faux snow, and a fuzzy white table runner. You can also line it up with gold and white vases filled with flocked greens.
18. Consider Candy Cane Centerpiece
Grab the mini candy canes that didn’t make it onto your Christmas tree and put them to use as Christmas centerpieces.
19. Consider Icy Blue
Blue and silver is a wintery color combination, which can be used to create an elegant feel on your festive table. Keep the rest of the decoration simple by adding white candles, silver cutlery, and white flowers. Bring in vases holding bright pinkish flowers to add a more traditional Christmas note.
20. Kitchen Island Ideas
If you love to cook, you can create a rustic atmosphere for your holiday table by adding pinecones, fresh cranberries and even tiny LED lights on the tablecloth. While some people prefer simple looks for their Christmas tables, you can use wooden spoons as decor. Set them on top of napkins folded like Christmas trees.
21. Pretty Peninsula
If you are looking for a more modern approach, visit glamorous homes on the web to find out how they decorate their Christmas tables. Decorate your table with all white flowers in elaborate vases. If you love trinkets, this is the best time of the year to bring them out. The kitchen peninsula can also stay up all season, making even small meals or coffee breaks feel festive, and the kitchen comes alive with holiday spirit.
22. Oranges, Cedar, and Walnuts
Another modern table runner is to light your table with candlesticks instead of vases. Set an orange on the center of each plate, and lay dried cedar springs or bay leaves all around it. Finish this arrangement by adding walnuts, apples, or napkin rings
23. Consider Starlight Season
The night is not only the best time to view stars but also a wonderful time to deck your table with them. You can hang small white lights from the bottom of tall silver vases and fill each one up with water. Next, add starlight garlands from these tall vases to the tabletop. Finish by placing votive candles around the table.
24. Create Extra Comfort by Using Ribbon Tied Chairs
Chair ties are always a great option for table decorating ideas. If you have chairs that do not feature these, use ribbon wrapped around them to create bows at the back or front of each chair.
25. Use Taupe
Use a chic and understated color palette of taupe, black and white to complement your decor while creating a holiday theme. Add some nicoly leaves and grasses from your garden to add a festive look and a subtle scent. Finish it off with a mix of votive candles and candlesticks for a candlelit glow.

26. Add Christmas Vibe with Stripes and Checks
Opt for stripes and check-in contrasting colors if you do not want to go with a solid and chic color like taupe. Match them with your tablecloth or runners to create a unified theme. Try red and green, black and white, or even blue and beige; the choice is yours.
27. Create Dazzling Christmas Centerpiece with Twisted Ribbon
Why not try a ribbon centerpiece if you want something striking and exceptional? It is easy to make too. Just take some colorful ribbons of different sizes and wrap them together in a loose twist before securing them around the base of your candlesticks or votive candle holders. You can add some pine cones for extra appeal.
28. White and Silver is Always in Style
Just bring in the metallic theme if you prefer a more glamorous look. White evokes crisp cleanliness, while silver gives an opulent appeal. Just add some pine cones or berries to break the monotony of the color scheme. This might seem too simple, but it can create a huge impact when you consider that minimal effort is needed to create this look.
29. Christmas Tree Table Decorating Ideas
If you want a more dramatic effect, go for a Christmas centerpiece. It can make a huge difference and be a conversation piece. Just get your artificial tree and dress it up with some colorful ornaments in silver or white colors. You can leave it as it is or add some pine cones or berries.
If you are into miniatures, this might be your thing for table decorating ideas. Of course, there’s a lot of preparation involved, so if you have the budget and time, go ahead and do this. Different themes are available, but you can choose your favorite or mix and match. You can either focus on the human-sized miniatures or go for the tiny trees.
FAQs on Christmas Table Decorating Ideas
Why is tableware important in table setup?
The right tableware helps to set the mood by complementing both the food’s visual aspects and the general theme of the dinner.
Final Thought on Decorating Christmas Table
There you have it. While decorating your Christmas table, you have to pick one or two that you like and then go ahead with it. This will help in making the dinner more memorable for years to come.
The post 29 Christmas Table Decorating Ideas appeared first on Kitchen Infinity.
Did you miss our previous article…
https://www.conduithardware.com/?p=861
Acidic Soil: What It Is, How You Can Change It
Finding the right soil pH is important for the health of your plants. A proper pH balance helps plants develop strong root systems and uptake vital nutrients. While many gardeners focus on adding organic matter to their soil, testing soil pH levels is equally important.
Once you find your soil’s pH level, you can add things like limestone or elemental sulfur to balance it out. Acidic soil can be a real problem for your plants. It can stunt their growth and prevent them from absorbing basic nutrients needed for healthy plant development.
In this article, we’ll explain all about the importance of pH levels in your soil and how you can adjust them to help keep the plants happy and thriving. Let;’s get started.
What is Acidic Soil?
Acidic soil is soil that has a pH level of less than 7.0. This means that the soil is more acidic than neutral and can challenge plants to grow. The most common causes of acidic soil are high levels of rainfall, pollutants, and chemical fertilizers. The soil pH scale ranges from 0 to 14 with 7 as neutral.

Acidic soil can have a harmful effect on plant growth by inhibiting nutrient uptake, damaging root systems, and causing leaf discoloration. It can also be a haven for pests and diseases.
Evaluating Soil
Identify Your Soil Type
Before testing your soil or adding anything to it, it is important to know what type of soil you have. Understanding the ecology of your land will help you determine if acidic soil is a result of natural conditions or something that you can fix.
For instance, well-drained soil and loose soil will be easily altered, while compacted soil with lots of clay in it will be difficult to change.
Understand Your Soil pH
Soil pH is a measure of how acidic or alkaline your soil is. A pH of 7 is neutral, below 7 is acidic, and above 7 is alkaline. The lower the pH, the more acidic the soil. Soil pH value can be affected by many things such as rainfall, organic matter, minerals in the soil, and the types of plants growing there.
Consider What You’re Planting
Some plants prefer more acidic soil than others. For example, blueberries and azaleas thrive in acidic soil, while rhododendrons and dogwoods prefer more alkaline soil. If you’re trying to grow a plant that prefers a different pH than your current soil, you’ll need to adjust the pH.
Test the soil’s pH
Testing the soil’s pH is as simple as buying a kit at your local nursery, or you can ask your county extension agent for a soil sample and testing instructions. Once you’ve tested the pH, make plans to raise or lower it depending on what kind of plants you want to grow and their preferred pH level. The good news is that there are simple DIY soil tests that you can do.
Have Your Water Tested
Your water supply might be what is affecting the soil’s pH level, so have a sample of your well or tap water tested to see what its pH is. If you don’t test the soil and the water, you’re not going to know whether your problem is with your soil or your water supply.
How to Change Soil pH
Make sure you check your soil’s pH every year by sending a soil sample to your local extension office to have them perform the test for you.
Increasing Soil pH
To make soils less acidic, the common practice is to apply a material that contains some form of lime. Ground agricultural limestone is also frequently used. Here are other ways of increasing the pH level of your soil:

Pick a Liming Material
There are many liming materials on the market, and they come in different forms. These ground limestone products include pulverized, granular, pelletized, and hydrated. Depending on your soil type and the amount of moisture in the ground, one of these products might be a good option.
Pulverized lime is finely ground and easily absorbed by the soil. However, it’s more difficult to spread because it can clog the applicator. Granular and pelletized lime is less likely to clog when spread with a fertilizer spread over turf areas.
However, it’s not as effective at altering the soil pH. Hydrated lime should be used with extremely acidic soils because it’s more water soluble and can quickly increase the soil’s pH. Some lime sources contain micronutrients like dolomite, a mixture of calcium and magnesium carbonates.
However, you should only use dolomite lime if your soil is magnesium deficient. Do not add more magnesium to soils that are already high in it.
Consider Adding Wood Ashes
Wood ashes can also be used to increase the pH of acidic soils. The potassium, calcium, phosphate, and boron in wood ashes help to make the soil more alkaline and provide some nutrients to plants.
When using wood ashes, it’s important to take into consideration the amount of sodium present. However, wood ash is not as effective as lime, but it can dramatically increase a soil’s pH over time.
Due to this, you should closely monitor your soil as you apply wood ash. Keep the ash from contact with any plant roots or germinating seedlings because it may damage them.
Apply the Liming Source
Once you’ve determined that your soil is acidic, the next step is to add a liming source. A liming source is an agent that helps raise the pH of acidic soils. There are many different liming sources available, but the most common are limestone and lime.
Water the Soil Regularly
Putting a liming source into your soil is not enough. You must water it to help it move through the soil to where you want it. Lime moves through the soil very slowly, so be patient; wait at least one growing season before testing your soil again.
Decreasing the Soil pH
Some types of fertilizers can also help acidify the soil and most of them are safe to apply. These acidifying fertilizers include monoammonium phosphate, ammonium sulfate, diammonium phosphate, urea, and ammonium nitrate. Make sure you read the label on the fertilizer bag to determine if it’s acidifying fertilizer.
Use Organic Materials
Over time, organic matter such as pine needles, compost, or composted manure can acidify the soil. If you have added organic mulches to your soil in the past, test your pH annually. Organic matter is also good in improving soil drainage and aeration.
Consider Applying Sulfur to Lower Soil pH
Sulfur can help adjust the soil’s pH to desired levels. It is especially helpful for high-pH soils. However, sulfur does not last as long as lime, so you may have to reapply every few years. You should use elemental sulfur rather than sulfate or sulfite forms of sulfur that can be harmful to plants.
An excellent way to lower the pH value of small beds or garden areas is the addition of sphagnum peat. Sphagnum peat is also a good source of organic matter. Granular sulfur is also the safest, least expensive, but the slowest acting product to use when lowering your soil pH. The addition of sphagnum peat to large areas would also be cost-effective.
Apply Aluminum Sulfate if Soil pH Is too Low
If the soil pH value is too low, you can apply aluminum sulfate to increase the acidity. This compound makes the soil more acidic due to a chemical reaction involving aluminum. Be sure to read the product label to ensure that the aluminum sulfate you are using is specifically for agricultural use. Also, avoid applying aluminum sulfate if the soil is already too acidic.
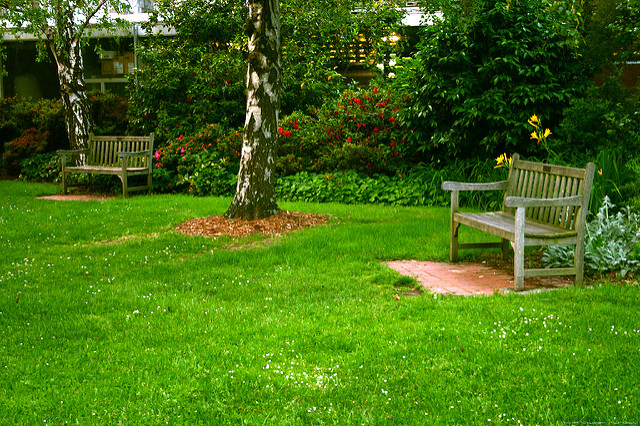
Till the Materials into the Soil and Water Well
When applying lime, sulfur, or aluminum sulfate to the soil, be sure to till them into the soil and water well. This will help the materials to dissolve and move through the soil so that plants can absorb them. If you do not water your fertilizer well, plants may not receive all of its benefits.
Rinse Your Plant After Application
If you are applying any fertilizer to your plants, be sure to rinse them off with water after application. This will help to remove any residue that may remain on the foliage and prevent any damage from occurring.
If sulfur or aluminum sulfate gets on the leaves of your plants, you’ll need to rinse it off with a hose. Failure to rinse them off can result in burns to the leaves and damage to your plants. Watering your plants will also help the compounds.
FAQs on Acidic Soil: What it is and How You Can Change it
What happens when the soil is acidic?
Soil acidity decreases the availability of plant nutrients such as phosphorus and molybdenum. It also increases the availability of some toxic levels, such as manganese and aluminum.
Is acidic soil good for plants?
No, it’s not. Acidity can stunt a plant’s growth and make it more susceptible to pests and disease. However, most plants thrive in slightly acidic soils because that pH affords them good access to all nutrients.
Why is it important to control the pH of the soil?
A soil’s pH is one of its most important characteristics because it influences the availability of essential nutrients for plants. By managing the pH, you can ensure your plants have what they need to thrive, increasing yields and decreasing inputs.
Final Thought on Acidic Soil: What it is and How to Change it
There you have. Taking your soil acidity into account is an important part of gardening, whether you’re trying to grow acid-loving plants or not. Luckily, it’s not difficult to manage the pH of your soil, and most soils can be brought into a desirable range with a little effort.
The post Acidic Soil: What It Is, How You Can Change It appeared first on Kitchen Infinity.
Did you miss our previous article…
https://www.conduithardware.com/?p=856