Home » Articles posted by James Hern (Page 13)
Author Archives: James Hern
How to Treat Bedbugs in Furniture
Bed bugs are the worst nightmare for many people. These tiny creatures can really make life unbearable if they find their way into your furniture. You have to get rid of bedbugs in furniture quickly before they multiply and spread throughout your house.
So, how do you get rid of bed bugs in your furniture? Laundering, bed bug traps, diatomaceous earth, couch encasement, and steamer are some of the ways to remove bedbugs from your furniture.
But for any of these methods to work, you have to follow the right steps. Here is a simple guide on how to get rid of bedbugs in your furniture.
Signs of Bedbugs in Your Furniture
Signs of bedbugs in your furniture are pretty straightforward. They never vary as homes with bedbug infestations always have the same signs.

The first thing you need to do is check underneath your couch cushions. Flip your couch and check underneath. Here are some of the signs of bedbug infestation in your furniture or home if you’re not sure of what to look for:
Bed Bug Eggs and Shells Easily Detectable
Bed Bug shells are not easily detectable because they look just like your regular furniture’s dust. However, it would be very hard to find them in plain sight when you have an infestation. So, the best way is to use a magnifying glass and check for bed bugs by focusing on nooks and corners where they are commonly discovered.
After that, look for easily detectable shells because they are translucent and milky white. For bedbug eggs, you can easily notice them because they’re slightly larger.
Bed Bug Feces and Blood Stains
By using a magnifying glass, you can easily spot feces and bloodstains. These are very tiny, so be careful when inspecting the area. You can determine whether it’s just dirt or something else through further observation by checking for specks of black spots surrounding the area.
If there are many dark spots in the area, it’s likely that the specks are bloodstains or feces. Also, try to check for possible bed bug excrement by looking at the stains closely.
Dead Bed Bug
Another sign of bedbug infestation is that when you apply some treatment, you’ll see many of them dying from your treatment. They’ll be scattered all over your wooden frame. Dead bugs look exactly like the living bedbugs, but the only difference is that they’re not moving. When it comes to size-wise, they’re also the same and color-wise, which is the color of an apple seed.
Living Bed Bugs
The bedbugs that are still alive will be reddish-brown because they will feed on your blood. These bed bugs also tend to scurry away from you or hide in their cracks when you go near them, which would make it difficult for you to get a good look at them. They’ll only go when they’re hungry, but that’s rarely daytime. They’ll only go for a meal when you’re on the couch sleeping.
Ways of Getting Rid of Bed Bugs in Your Furniture
Start with Laundering Your Furniture
The easiest way to kill bed bugs in your furniture is to start by laundering them. Start with washing everything that’s machine washable. Learn how to clean your upholstery while employing hot water while doing so, or at least boiling them for an hour.

Before laundering, put them in a large plastic bag or box, then wash them smoothly and quickly to avoid disturbing bed bugs, which can scatter them all over your house.
Use regular or high heat for at least one hour. After laundering, dry them up in your clothes dryer. Make sure you set up a high temperature to let it dry for half an hour and kill all the bed bugs. While it’s drying, clean and wipe down your frame, and look for holes in the structure.
Then, leave the frame to dry and put back the dried cushions and fabric to your furniture. If you have bulkier cushions, you can dry them at your local Laundromat at a high temperature.
Use Bed Bug Couch Cover
If your couch is a pull-out or a hideaway, you can invest in a bed bug cover. You can find them online and at some furniture stores. These covers are zip-closed and have tiny mesh holes to let air through while keeping the bugs out. They aren’t 100% effective, but they’re better than nothing.
Make sure you treat your frame and cushions before moving to this step and ensure all the bloodsuckers are dead. Then, use a steam cleaner along the edges of your couch. After that, use the vacuum cleaner to vacuum all the sides of your furniture. Now that your furniture is clean and dry, wrap it with a bed bug couch cover and zip it properly.
Use Bed Bug Traps to Catch Bed Bugs
If you don’t have enough time to buy a couch cover, you can always rely on bed bug traps. These are sticky pads that catch the bedbugs whenever they try to climb up your bed or sofa. The bugs get stuck to this pad and are unable to move again. You should put these under the couch and chair legs to make sure you keep your bed bug problem under control.
Use the Right Insecticide Spray
No matter what, using chemical sprays is never recommended. But in times like these, when there is no other option left, you might depend on these insecticides. Before spraying any of these chemicals on your furniture, make sure you are wearing the right clothing.
Wear gloves and the right kind of mask to block your nose from any chemicals that might be harmful to you. Keep the kids away from this place when you are spraying insecticides, especially around the house. Use natural bed bug sprays instead of these chemical treatments.
The only disadvantage with natural spray is that it can only kill these pests when in direct contact and cannot provide continuous protection. You can also use dusting sprays instead of insecticides to dust your furniture legs.
Usage of Vacuum Cleaner
Vacuuming is not only good in eliminating bed bugs, but it also keeps the bed bug numbers down. It does this by picking up a lot of bedbugs and their eggs. So you should vacuum the dust, cobwebs, and other places where these bugs are most likely to hide.
Vacuuming also helps to control bed bugs by eliminating their signs such as their shed skins and fecal matter. Make sure you dispose of your vacuum bag in a tightly sealed plastic bag and throw it outside where none of the bed bugs can infiltrate your home again. This will drive away all the bugs from your home.
Kill the Bed Bugs with Steam
Steam cleaning is a great way to kill the bed bugs, and it also helps get rid of their eggs and nymphs, which can be difficult to remove manually. The steam kills them on contact, so you need not worry about any residual effect. But make sure that the steam does not reach such high levels that it might damage your furniture or belongings.
Use Diatomaceous Earth
If possible, place diatomaceous earth in cracks and crevices and behind bed frames and headboards. Do the same inside electronic devices such as radios and televisions. If your furniture has joints with gaps, go ahead and apply some diatomaceous earth in those joints as well. The dust prevents the bed bugs from reaching maturity and feeding on you.
You can also scatter this powder on the outside of your bed frame. Go for food-grade diatomaceous earth that is safe for you and your kids.
Invest in Non-Upholstered Furniture
Upholstered furniture is the most challenging because of the fabric that it is made of. Instead, get yourself some wooden furniture if you are serious about ridding your home of bedbugs for good. Make sure you treat upholstered furniture by applying pesticides and encasing the furniture in a large plastic bag. Heat treatment can also help you get rid of bed bugs from upholstered furniture.
When using pesticides, be careful and follow all safety guidelines from the manufacturer. Their labels should have detailed information on how to use and protect yourself when using these products. On the other hand, non-upholstered furniture is the best bet because you don’t have to worry about bed bugs hiding in the fabric.
FAQs on Different Ways of Eliminating Bed Bugs in Your Furniture
How long do bed bugs live on furniture?
Bedbugs can live for over a year without feeding on blood. It’s important to remember that not all bedbugs will be seen in your mattress or bedding. Some may stay in cracks and crevices in the walls and behind your furniture.
How long will my bedroom remain bedbug-free after I spray?
It may take up to two weeks before the last of the bedbugs have been wiped out from your home. It’s advisable to carry out a repeat application after two weeks to get rid of everything.
Final Thought on Different Ways of Treating Bed Bugs in Your Furniture
As you can see, bedbugs can infest your furniture anytime, it doesn’t matter whether you’re house is clean or not. Another thing you must know is that getting rid of bed bugs is not as easy how to get rid of ants. But with a few tools and methods mentioned in this article, you can be sure of protecting your furniture from these annoying bugs and have a bed bug-free home.
The post How to Treat Bedbugs in Furniture appeared first on Kitchen Infinity.
Did you miss our previous article…
https://www.conduithardware.com/?p=100
How to Apply Venetian Plaster
Are you looking for a new way to decorate your home? Venetian plaster is an ancient decorative technique that has been around for centuries. The process involves applying multiple layers of plaster onto walls and ceilings, which gives them a unique look.
You can use this type of decoration on any surface in your home or office, including furniture and floors. It goes well with many types of home decor, so there are no limitations in using Venetian plaster in your space. You can also blend lime plaster and marble dust to create this durable compound.
But for you to do all the above, you need to know how to apply Venetian plaster. Wondering how that goes? This article takes you through a comprehensive guide on how to apply Venetian plaster.
The Required Materials
- Eye protection
- Paintbrush
- Roller
- Paint tray
- Work gloves
- Steel trowel
- 400 to 600 grit sandpaper
- Drop cloth
- Venetian plaster
- Roller cover
- Painting primer
- Topcoat or paste wax
- Universal colorants
- Dust mask
Instructions
Sharpen Your Skills
Before you start rolling on the Venetian plaster, it’s good to get an idea of what your skills are. Get a few practice pieces together for this project. Some sheets of drywall, plywood or fiberboard will work well. Spread some newspaper on the floor and cover up any objects you don’t want paint on.
Then, practice your plastering techniques on these pieces of wood. Use a paintbrush to get your Venetian plaster onto the piece, then smooth it out with a trowel or spatula.
Choose a Plaster to Apply
Venetian plaster comes in two varieties, which include synthetic paint and lime-based plasters. The one you choose depends on your budget and your level of expertise. Lime-based plasters are considered true Venetians because, with time, they’ll turn to stones.
Lime-based plasters are more durable and retain their beauty longer, unlike the homemade finish of synthetic plasters. They’re also natural and are considered environmentally friendly rather than synthetics. Lime plaster is naturally resistant to molds and mildews.
On the other hand, synthetic Venetian plaster is inorganic, and its color is limited to the few offered by the manufacturer. It’s not easy to tint it either because it requires a special machine. Make sure you choose authentic Venetian plaster for your project.
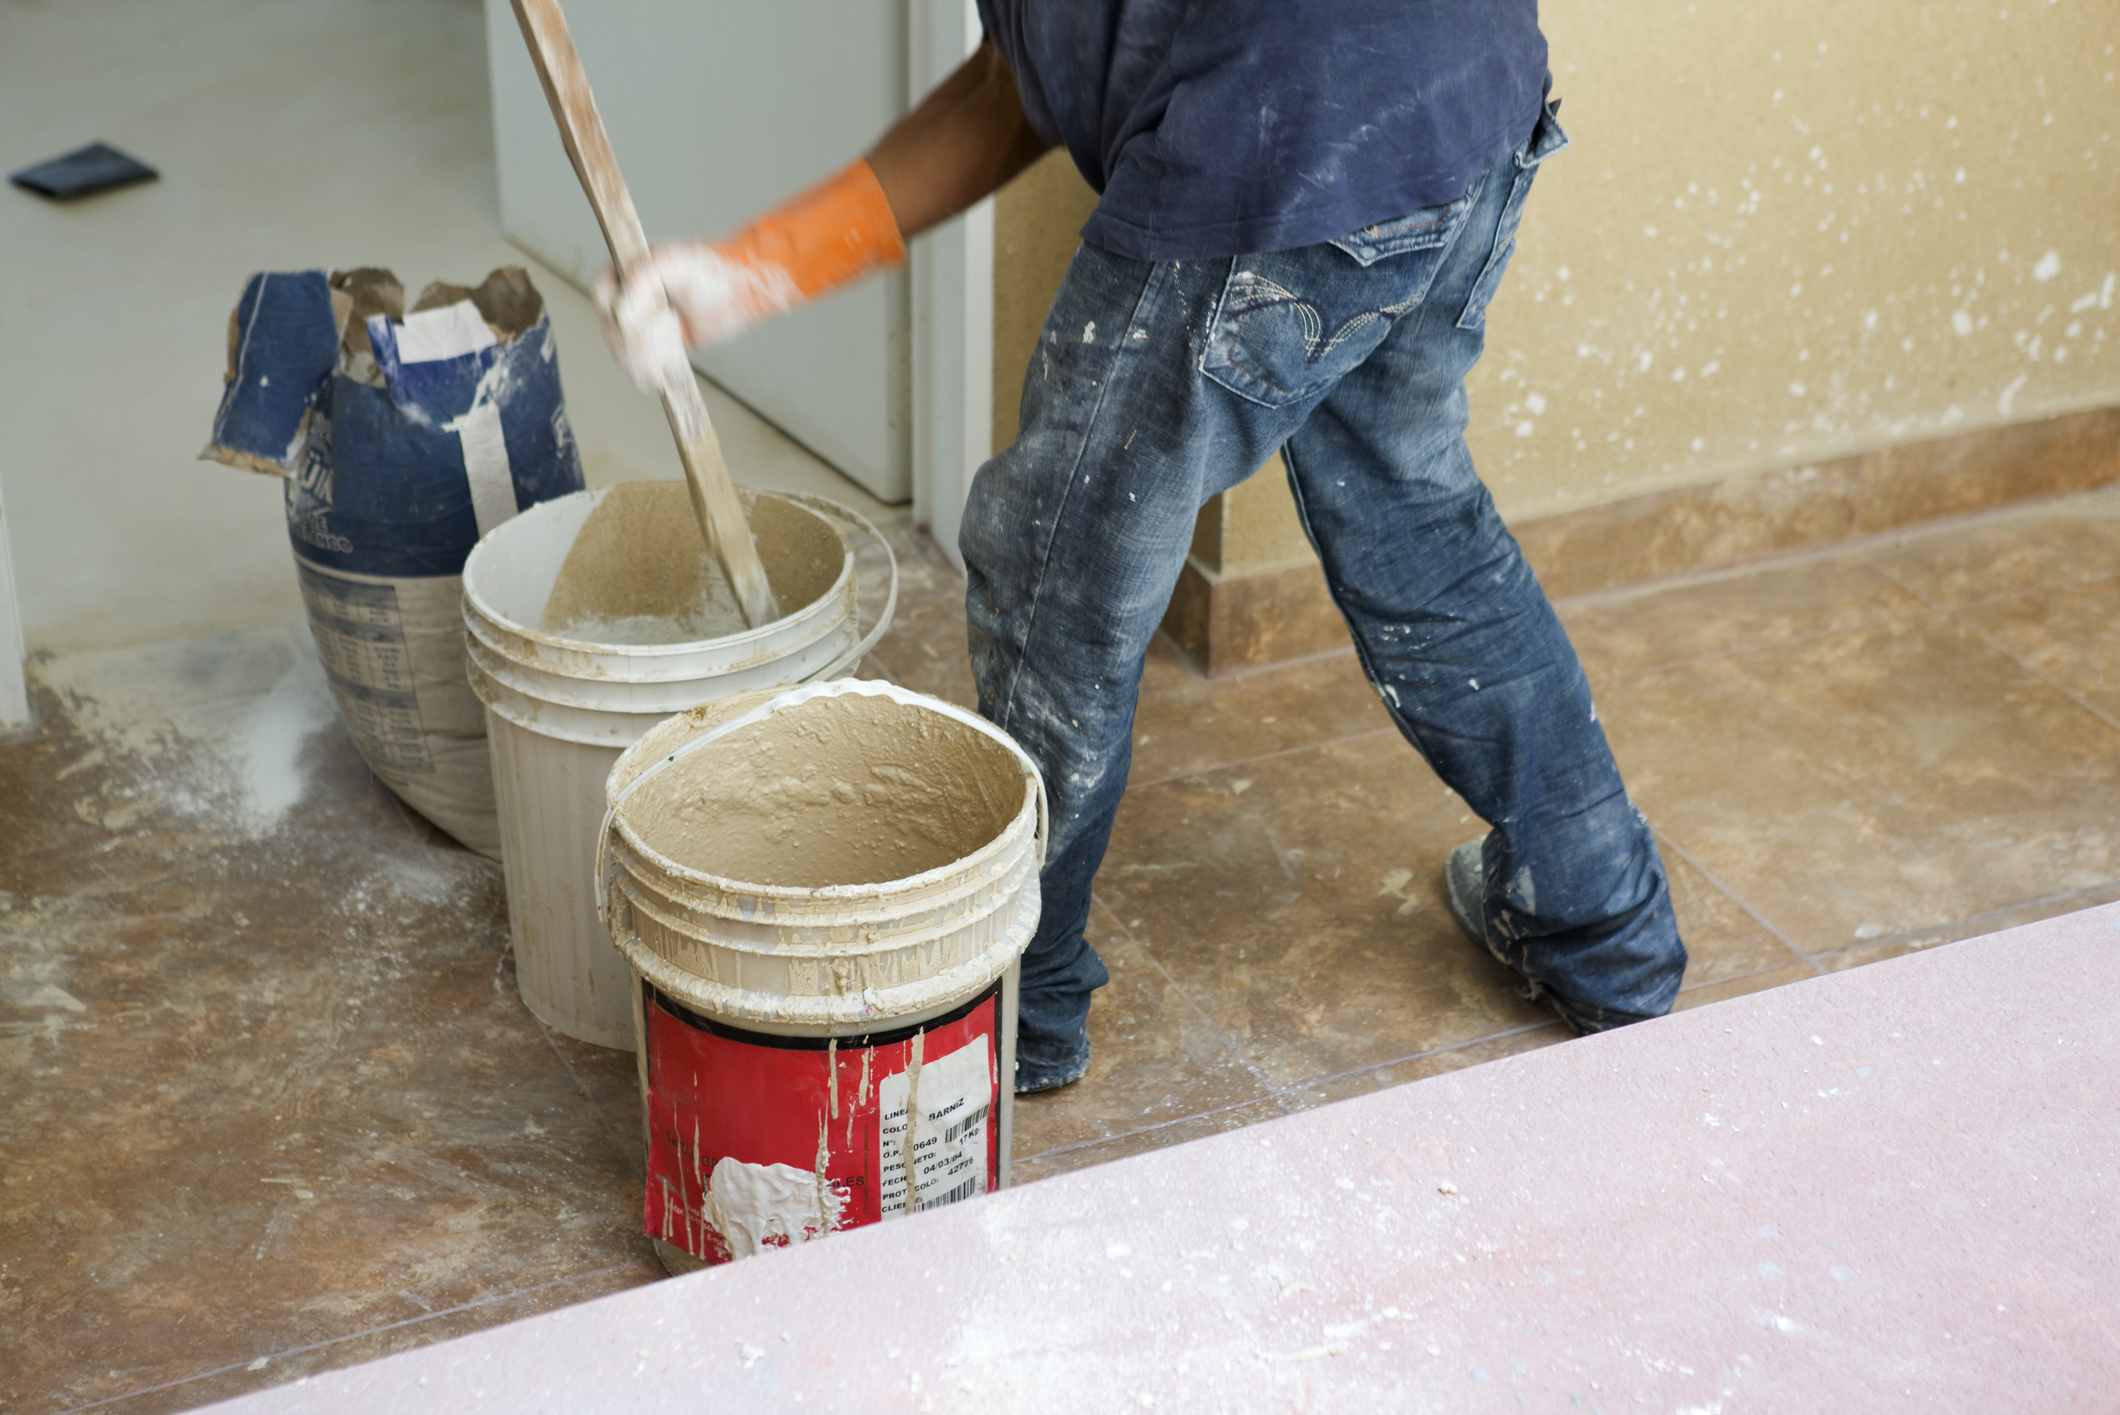
Gather Your Tools and Lay Down Tarps
Make sure you protect the floor in your work area by laying down plastic sheets, so the dust from your work doesn’t get all over. You should also have buckets, a trowel, a grout sponge and a paint roller with a long handle at the ready. Do not use painter’s tape to protect molding or other walls that you’re not plastering.
Remember that plaster is not paint, so it can bond to the tape and crack or flake when you remove it, especially if you’re using lime-based plaster.
Prepare Your Room
Clear your room as much as possible and wipe down the entire surface with a clean rag saturated in soap solution. Take a few minutes to learn how to mop your floor before you proceed. Next, drape the tarp over the molding and lower part of the wall.
Of course, you apply Venetian plaster to most walls and ceilings, but the surface must be flat and smooth. If there are any holes and cracks, the plaster will seep through them when you apply Venetian plaster, so fill them in with spackling before applying the coating.
If you’re applying Venetian plaster to an existing wall that has paint on it, remove all of the old paint first, and then repair any holes or cracks with spackling and lightly sand the spackled area with 100-grit sandpaper. Wash off any dirt and grease, then prime the surfaces before applying the Venetian plaster. Avoid using steel trowel and drywall knives as they can leave lines and scratches in your plaster.
If you plan to plaster a bumpy surface, sand the entire surface or scrape it with a putty knife. If you’re using synthetic Venetian plaster, make sure you fill the holes and cracks with plaster as you go.
Apply Primer to Discolorations
If your wall has been painted with flat paint, apply a primer that you can tint to the color of Venetian plaster. Spread the primer across the wall evenly and lightly using a paint roller. Depending on the walls you’re plastering, you may leave it dry before applying a second coat to get a smooth, even coat.
If you’re using lime-based plasters, you can apply the plaster directly to the stucco or masonry. You can also use a special primer called Fondo. Note that natural Venetian won’t adhere well to standard primers. Let it dry for 24 hours before applying the plaster.
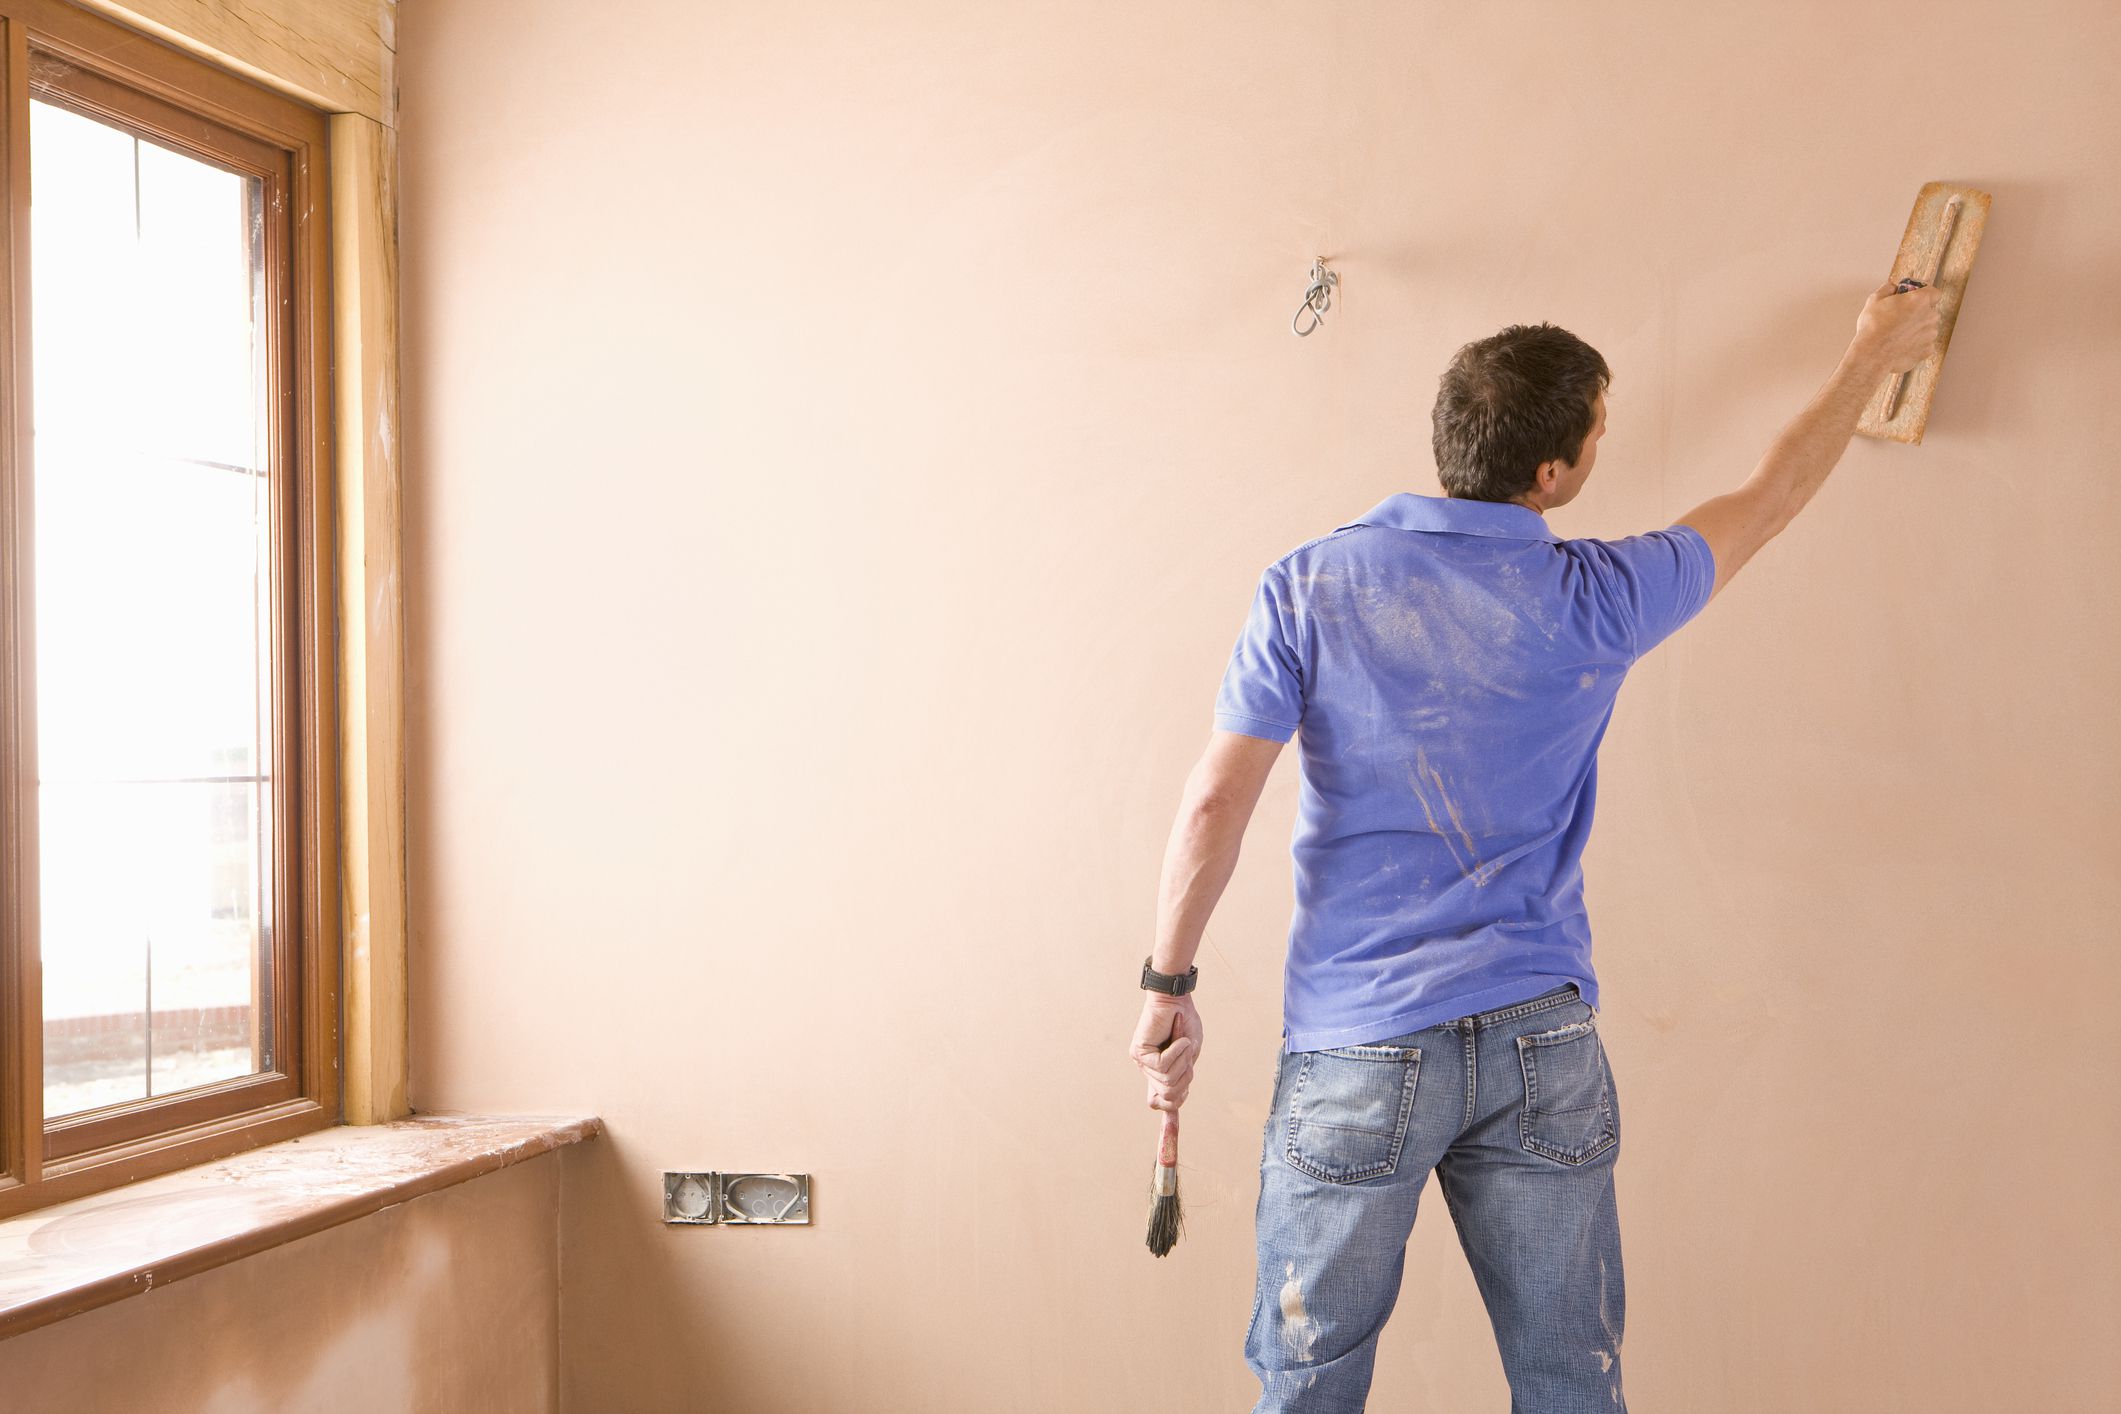
Apply the First Coat
Wear gloves while mixing Venetian plaster to achieve an even color. Load your trowel with the hot-dog compound of the hawk, then apply an eighth of an inch thick coat of joint compound over the surface. Use short, gently curved, x-shaped strokes at different angles.
Starting at the top left corner of your room, use a flexible steel trowel to apply a thin layer of plaster while holding your trowel at a 15 to 30-degree angle of the wall. Gradually work your way out toward the other end, covering approximately 8 feet at a time until you’ve covered all four walls. Try not to apply too much pressure on the trowel, or it may cause ridges in your wall.
Clean off your steel trowel from time to time to remove any hardened plaster that may be clinging to its surface. Leaving these on can cause damage to your wall, later on, so always take the time to remove them before applying more plaster onto the wall.
Apply the Second Coat
If you’re using synthetic plaster, wait for at least four hours for the base coat to rest before applying a second coat. But for lime-based plaster, you can wait for as long as ten days between the coats. Start in the same way you applied the first coat. Hold your trowel or drywall knife at a 60 to 90-degree angle, then apply your plaster in long and short overlapping strokes to get an irregular look to the final finish.
As you work your way across, check your progress to ensure that all the ridges and depressions have been filled. If you see some small areas with deep pits or ridges, use a thin trowel to smooth it out before the mixture becomes too dry.
If you’re not satisfied with the final result after applying a second coat, you can apply the third coat if you wish. If you’re using lime-based plaster, add a tinted topcoat of lime dust, linseed oil, soap, and coloring agent. Let your plaster dry for 24 hours before proceeding to the finish treatment.
Burnish the Surface
After the second coat has dried, you can burnish it with a dry sponge. This gives your surface a nice, polished sheen that’s slightly matte. To burnish synthetic plaster, use 400 to 600 grit paper if you wish. After that, clean the surface with a damp cloth.
You can also make the surface look more polished by rubbing the surface with your fingers. You can also rub the surface with a clean cloth or putty knife for an even more glossy sheen. When you’re finished, wipe down your wall using soap and water to get rid of dust particles.
Proceed to Waxing
Dip your clean trowel in tinted paste wax and spread it in light coats over your plaster. Let each coat dry before applying another one. It’s best to put on several thin coats instead of one thick layer. A good rule of thumb is to let the wax dry for ten minutes after each coat, then buff it with a clean rag or soft cloth until you get a nice shine that resembles a freshly waxed car.
You can also deepen the color variations by brushing pre-tinted glaze over the lighter areas of your surface using a paintbrush. Remember that real marble has a high contrast between light and dark tones. So, choose the darker tone if you’re looking to recreate the look of the marble. Check the pros and cons of marble flooring to learn more.
Apply a Topcoat
This final step is optional. You can apply a topcoat to add durability, color and help seal the surface. For this step, it’s best to use 100% acrylic latex paint instead of wax if you want your finished product to last longer. Applying a topcoat is most recommended in rooms with high humidity, like bathrooms and kitchens. Otherwise, it’s optional though recommended for a nice finishing touch.
You can also preserve the texture of your Venetian plaster finish by covering it with one coat of clear water-based sealant. And if you’re looking for polished marble, go for a sealant with a semi-gloss or satin finish. You can also choose a matte sealant if you want a limestone finish.
FAQs on How to Apply Venetian Plaster
Can you Venetian plaster over drywall?
Yes, you can, but keep in mind that you’ll have to skim coat the whole thing. This means after applying a scratch coat, you’ll have to apply a ‘skim’ coat over it with drywall compound and sand smooth.
Can Venetian plaster be applied over paint?
Yes, as long as the paint is well cured. If it hasn’t been, the moisture in the air will create bubbles, and it won’t look good.
Final Thought on How to Apply Venetian Plaster
As you can see, applying Venetian plaster finish takes a little bit of skill and some extra work, but it’s well worth it in terms of quality. Make sure you keep your sealed Venetian plaster clean by dusting the surface weekly with an electrostatic duster.
The post How to Apply Venetian Plaster appeared first on Kitchen Infinity.
Did you miss our previous article…
https://www.conduithardware.com/?p=95
Guide to Standard Drywall Sizes and Thicknesses
When building your own house or making repairs, you’ll need to decide what type of wall and ceiling surfaces you want. Drywall is widely used for interior walls and ceilings because it’s very economical and easy to install. The flat white and clean appearance makes it ideal for ceiling finishes and residential construction.
But choosing the right sizes and thicknesses for drywall isn’t an easy thing, but you definitely won’t need professional help. This guide shows different types of drywall sheets in various sizes and thicknesses. So, you can easily compare them by size, making it easier for you to choose which ones would work best for your project. Let’s get started!
Drywall Thickness
Drywall comes in 3/8″, 1/2″ and 5/8″ thicknesses or in metric 6, 9.5, or 12.7mm. Standard US drywall is 1/2″ (12.7mm) thick, while the other two are called “non-standard.” Building codes also have some requirements when it comes to standard thickness. The building code dictates the thickness of each application.
1/4 Inch-Thick Drywall
This is not very common, and it’s used as a skimming material for placing over an existing surface. You can also use these thin drywall sheets to install drywall on the slightly curved surface. If the drywall is not meeting the curve, you need to add a layer of mesh tape and compound before applying another thin sheet.

1/2 Inch Drywall
This is the most common type of drywall used in construction, and it can be found in all building and construction material stores and outlets. Thanks to their standard thickness, the regular 1/2″ (12.7mm) sheets are suitable for interior walls.
They’re very easy to carry and hang. It’s the most versatile board and common thickness for the 16-inch on-center interior walls. It provides a great balance between strength and weight.
5/8-Inch drywall
If your ceilings or walls require a prescribed fire-resistant rating, then this is the right drywall thickness for you. It’s a heavier product that can resist sagging in your ceilings and 24-inch wall. It’s also the thickness standard for fire-resistant or fire-code drywall, mostly found in garages. This added thickness also improves soundproofing.
Due to its excellent soundproofing qualities, 5 8 works well in bedrooms and living areas. However, you’ll have to pay more for this type of drywall than 1 2 inches thick and smaller.
3/8-Inch drywall
When you’re looking to fix drywall patches or if your drywall is damaged and worn out, this is a great drywall thickness you need to consider. It’s the best option for home remodeling projects. Note that it doesn’t offer the strength of 1/2-inch panels.
Drywall Sizes
The length and width of drywall sheets usually come in 4x. The most common ones include 4-foot by 8-foot, 4-foot by 12-foot, and 4-foot by 16-foot sheets. The building codes don’t dictate the requirements for drywall sizes. The sizes are determined by the needs of the architect, builder, and client.
4-Foot by 8-Foot drywall
This is the most common size of drywall. It’s commonly used because it’s easy to carry. Working and installing this type of drywall is very easy. However, it’s not the best option for remodeling jobs because its small size is limiting. You can’t use this type of drywall in rooms more than 8-feet wide and 12-feet long.
A drywall board size with these dimensions together with the thickness of 1 2 makes it manageable. It’s the biggest sheet ideal for a DIY project because you can easily carry and lift it into place. It allows for both vertical and horizontal installation.
4-Foot by 12-Foot drywall
For long and tall drywall, you can find drywall in lengths of 12 or 16 feet. So, if you have long and tall walls, go for this size of drywall. If you also want an unbroken line from floor to ceiling and prefer a smooth surface when working with a long and high wall, this is the best solution.
These longer sheets also produce fewer butt joints than 8-foot-long sheets. However, they are heavy to carry by a single person, so if you’re going to install them at your home, make sure you have people around to help you.
2-Foot by 2-Foot drywall
This type of drywall size is best when you have small spaces. When you also need to do some patchwork around your stairs, alcove, and nooks, opt for this drywall size. It’s not the standard size of drywall, but you’ll find it at local hardware stores and home improvement stores.
Alternatives to Drywall Sizes
When your wall panels come in lengths and widths instead of four feet multiples, then those are not drywall panels. They are cement board or drywall alternatives such as DRIcor Smartwall. 4-1/2-foot wide drywall sheets are not very common in the consumer market, but you can get them with special orders. They are rarely available in home improvement centers and are only used by professionals.
Types of Drywall
While standard drywall works well for bedrooms and living areas, there are other types of drywall for special purposes. Here are the types of drywall that you should consider on your next home project. They are excellent in humid areas such as bathrooms, kitchens, and laundry rooms.

Fire-Resistant Drywall
Fire-resistant drywall contains glass fibers and other materials, enabling them to endure flames more than any other type of drywall. You can use it in the laundry room, near furnaces, stairwells, and garage ceilings. It will help reduce flames from spreading in case of fire break out.
In addition, they enable the walls to generate less smoke and are also good for sound control. When renovating your home, the building codes will request you to use a fireboard with fiberglass in areas where you have rooms with wood studs. You’ll also be required to install this type x drywall if you have furnaces, garages, and utility rooms.
Abuse-Resistant Drywall
This is the type of drywall that can withstand any abuse. It has a polystyrene layer that bonds well to the non-decorative gypsum board.
Mold and Moisture-Resistant Drywall
Both mold and moisture-resistant drywall panels are paperless panels with a special coating that blocks moisture and helps prevent mold growth. So, if you’re wondering how to get rid of mold from your home, installing this drywall will be your first solution. This combination is an excellent choice for bathrooms, kitchens, and laundry rooms. As it reduces mold, it extends the appearance and lifespan of surfaces.
Cement Board Drywall
Cement board drywall is durable drywall that’s designed to be installed on plywood or studs. It is available in 1/2-inch and 5/8-inch thicknesses. The cement board is made by sandwiching a cement core between two layers of fiberglass mat. You can use this type of drywall behind ceramic tile and marble for high moisture areas. It’s the hardest material to cut.
It’s also known as a backer board and can also be used under floors and counters. Its moisture-resistant quality makes it ideal for high-moisture areas.
Standard Sheet Drywall
This is the common type of drywall. It is ideal for residential remodeling and basements. It doesn’t have any interesting features and can be used for ceilings and residential interior walls.
Square-Edged Drywall
This type of drywall is most common, and it’s fitted into standard studs 16 inches apart. If you’re looking to plaster your ceiling or wall, here is the drywall solution for you.
Fire Code Drywall
Fire code drywall is thicker than half-inch material. It has a special gypsum core that resists heat and provides fire protection. Despite having a heavier core, it’s still easy to cut.
Tapered-Edge Sheets
This type of drywall sheet is great for finishing walls. The tapered ends allow the compound fillers between gaps.
Foil-Backed Drywall
They don’t offer much moisture resistance like moisture-resistant boards. But, it’s suitable for areas with less moisture but more for colder temperatures.
FAQS on Guide to Standard Drywall Sizes and Thicknesses
What is the best thickness of standard drywall?
Most drywall measures 1/2-inch thickness, which is the most common for interior walls. This is because they are easy to carry and hang, unlike other types of thickness.
What sizes does drywall come with?
The standard size of drywall includes 8, 9, 10, 12, 14, and 16 feet. However, 8, 12, and 16 work well for residential construction, so you’ll find it in most retail hardware stores.
Is it better to hang drywall vertically or horizontally?
Fire codes require seams to fall on the length of the framing, especially on commercial jobs, so ensure you hang your drywall horizontally. If your walls are 9 feet higher or shorter, hanging your drywall horizontally will leave you with more benefits.
Final Thought on the Guide to Standard Drywall Sizes and Thicknesses
As you can see, it’s very important to be careful when choosing drywall because choosing the wrong size and thickness can break your project. You don’t want to spend a lot of money and time on your home improvement project only to end up with losses.
The post Guide to Standard Drywall Sizes and Thicknesses appeared first on Kitchen Infinity.
Did you miss our previous article…
https://www.conduithardware.com/?p=89
How to Clean Silver with Frugal Silver Cleaner
How to Clean Silver with Frugal Silver Cleaner
Cleaning your antique and silver jewelry is very simple and easy. But only if you use the right products. The best way to ensure your pieces’ longevity is to use a frugal recipe for cleaning silver.
Instead of using harsh chemicals that might damage the finish or cause it to darken, this frugal silver cleaner uses common household ingredients like baking soda and vinegar. This method of cleaning sterling silver is simple, cheap, and doesn’t use any heavy chemicals.
But how do you do it? This article will teach you how to clean sterling silver with a simple method that’s easy on your hands, as well as saving you money.
What You’ll Need
- Aluminum foil
- Glass baking pan
- Baking soda
- Soft, clean white rag
- Hot water
- Two tablespoon salt
- Tea kettle or coffee pot for boiling water
Instructions
Line the Baking Pan with the Aluminum Foil in the Washtub
Lay down a layer of aluminum foil in the bottom of a large wash-tub for easy cleanup later. Fill your container with hot water, especially the boiling water from a coffee pot or any other container from which you can pour it safely. After that, place your jewelry on top of the aluminum foil.
Don’t worry if you don’t have aluminum foil, instead, use a clean aluminum lasagna-style baking dish. Make sure you throw away your dish after using it to clean the silver.
Cover Baking Pan with Boiling Water
Pour some boiling water into the baking pan that’s large enough to hold your silverware, until it’s more than halfway full. You will need more water if you’re cleaning heavily tarnished silver. This will help restore the shine to your silver, and it will also help the boiling water dissolve the grime.
Add Salt and Baking Soda
Sprinkle in two tablespoons of salt and two tablespoons of baking soda. After sprinkling baking soda, pour some boiling water to cover the jewelry in the pan and allow it to sit for a few minutes.

Your solution will bubble and smell. The chemical reaction will cause a sulfur smell, but will not be too strong as it will go away quickly once it’s done. You can also achieve a great silver polish by adding washing soda to hot water.
Add the Silver
Place your silver into the water and ensure they are touching the aluminum foil. However, the silver pieces should not touch each other. Add the dishwashing soap and let the silver set for about 12 hours. Use wooden or plastic utensils to turn over your solver pieces.
Do not use metal and avoid using your fingers in hot water to allow as many surfaces of the item to touch the aluminum foil. The chemical reaction taking place in the container should be able to eliminate dirt and stains.
Soak the Silver
Allow your silver to soak for about two to three minutes on each side. For lightly tarnished silver, you’ll require several minutes for it to be restored. But for heavily tarnished silver, you may require a few treatments. So, soak heavily tarnished items for as long as five minutes and if the water cools down, don’t hesitate to add more hot water, plus salt and baking soda.
Remove the Silver
Take your silver items out of the water. The tarnish should have already started to peel off, which means it’s time to clean the item with a gentle brush or towel. You can use a soft cloth or paper towel for this task in case you prefer not to use your hands in hot water.
Once your silver is clean, remove it from the pan then rinse it with clean water. Let it air dry before storing away. Never use gloves when you’re cleaning silver as this may cause the items to become scratched.
Tips for Keeping Your Silver Clean for Long
Shine and Polish
You need to keep your silver jewelry shiny all the time with a quick and routine washing using warm water and mild dishwashing soap. Swish your jewelry around in the water for some minutes, rinse, and then buff dry.

Avoid Bleach and Harsh Chemicals
You must not use your silver jewelry with cleaning detergent and bleach that can ruin their surface. Some jewelers suggest using vinegar and baking soda for brightening the silver’s finish when cleaned at home. Vinegar is also safe for all metals, including sterling silver, but if you do not feel comfortable using it, commercial silver cleaners are also good.
Store Your Silver Jewelry in a Dry Location
Never expose your jewelry to direct sunlight or heat because it can cause tarnishing when the metal reacts with sulfur and other chemicals in the air. Store your items in a dry location if you are not wearing them regularly to stop tarnishing too.
Also, do not put your silver pieces away when they are still damp. Moisture causes silver to tarnish faster, so make sure your pieces are completely dry before storing them.
Soak the Naturally in Sea Salt
Leave the metal pieces in sea salt overnight, especially if you have already tried all-purpose cleaning products and have not noticed any improvements. Seawater is known for its high volume of natural salts that can help remove tarnish very easily. This helps clean silver naturally without damaging it.
Salt and baking soda are great cleaning products to use when you want to make your own silver polish. Combine one part salt with two parts baking soda, put them on a cloth or paper towel, and apply the mixture directly onto tarnished silver pieces.
Rub the piece gently to remove any signs of tarnishing, rinse off all the mixture, and dry the piece with a clean cloth. This homemade silver cleaner will remove tarnish without harming your silver plating.
Use Toothpaste
Toothpaste also can be used in a pinch when a silver cleaner is not available. Apply a small amount of toothpaste onto a dry cloth or paper towel and apply it directly to the piece that you would like to clean. Gently rub the silver in a circular motion, rinse with water, and dry with a clean cloth. This method will remove tarnish from the silver piece without scratching it.
After you are finished cleaning your silver, make sure to properly store them so they do not tarnish again. Keep the pieces in air-tight containers and place a piece of tissue paper on top of the container before sealing it. This will help absorb any moisture that may seep into the container and cause tarnish.
Use Your Silver Jewelry
It’s recommended to use silver jewelry and silverware more often as this will prevent them from tarnishing. Be sure to wipe each piece before you put it away and seal it properly in a container. If your silver is already tarnished, it may be too late for simple cleaning. If this is the case, consider taking a trip to see a professional who can remove the tarnish from your silver effectively.
FAQs on How to Clean Silver with Frugal Silver Cleaner
Can you use silver cleaner on sterling silver?
Yes, you can use silver cleaner on sterling silver. This silver cleaner quickly removes tarnish and restores shine and brilliance to your silverware.
How often do you clean your silverware?
You should be cleaning your silverware at least once per week in order to prevent tarnish. This is not only for aesthetic reasons, but because the chemicals used in most silverware can actually eat away at your skin and cause reactions that will be costly to treat.
Final Thought on How to Clean Silver with Frugal Silver Cleaner
Improper cleaning of your antique silver plate and good-quality silver jewelry can make it lose value. Therefore, it’s important to know how to clean silver and the correct way of cleaning it. If you’re in doubt about how to clean your valuable silver, it may be best to call in professional help.
The post How to Clean Silver with Frugal Silver Cleaner appeared first on Kitchen Infinity.
Did you miss our previous article…
https://www.conduithardware.com/?p=85
SEN to Host Four-Day November Business School

CHARLOTTE — SEN Design Group, the Charlotte, NC-based buying group and business education resource, has begun accepting registrations for its industry-specific Business School, to be held in-person Nov. 8-11 at theMART in Chicago.
The four-day event, sponsored by Custom Wood Products and Bridgewood Cabinetry, is aimed at empowering owners and executives in the kitchen and bath industry with business management tools aimed at growing their businesses, according to SEN.
“The Business School is the kitchen and bath firm owner’s opportunity to move the needle in their organizations. It’s a truly transformational, poignant program that brings industry owners and partners to the next level,” said Dan Luck, SEN Design Group’s senior v.p.
“The program covers critical topics to maximize returns, master financials, leverage marketing strategies, improve personnel relations and implement proven methods to quickly and profitably grow kitchen and bath businesses,” Luck said.
According to SEN Business School, attendees “will develop strong strategic planning skills and learn how to manage business financials, build a successful commission system, learn how to forecast sales, create an effective pricing formula, increase profits, build a powerful sales team, win bank financing requests, develop a three-year budget and more.
Additional information can be obtained by visiting www.SENDesignGroup.com.
The post SEN to Host Four-Day November Business School appeared first on Kitchen & Bath Design News.
Did you miss our previous article…
https://www.conduithardware.com/?p=82
Top 6 Best Thermoelectric Wine Coolers for 2021

The post Top 6 Best Thermoelectric Wine Coolers for 2021 appeared first on Kitchen Infinity.
Did you miss our previous article…
https://www.conduithardware.com/?p=79
An Incredible story from our Client
Hey there. My name is Anna. I live with my husband, David, in Vienna in Northern Virginia. For years and years, we just rented apartments together. We worked hard and saved up to get our own place. He works as a cashier in the local bank, and I’m a corporate administrative assistant. On the side, he does some gardening work, and I teach English online for extra cash. We never had the big bucks but always had enough to pay our way. I would say that we are the epitome of good, honest Americans, determined to make our way in the world without handouts or dishonesty.
The dream we shared, though, was to have our own place. Renting apartments was always fine, but we longed to have our own space. Having control over decorating decisions and whether or not we had a pet always seemed like such an improvement. In any case, we are both thirty years old now. Apartment living is okay for a young couple, but now we are older, we might want kids. With that in mind, we just needed more space. It was better for us to get our own place before we had kids anyway. We didn’t want the pressure of finding somewhere while I was pregnant, nor did we want our children growing up on a building site.
So, we set about looking. It was a long process. So many places priced us out. We weren’t averse to paying to have work done on any property, but it had to come to the right price to begin with. Anyway, after months of disappointment and anxiety, we found the place and our offer was accepted.
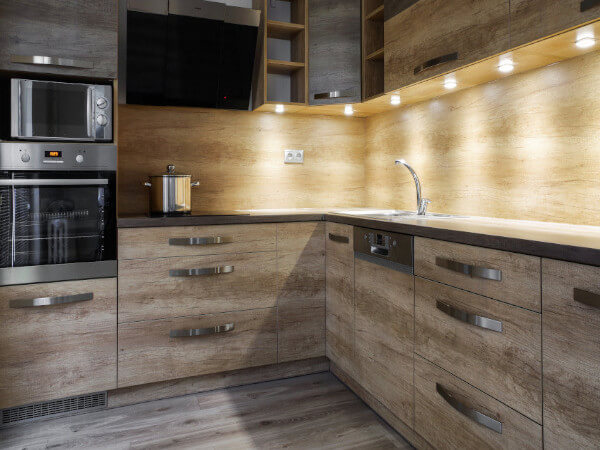
It was an old-fashioned single-story house with three bedrooms. The interior decoration was so outdated. I think the previous occupier had been living there since it was built in the 1970s and had never bothered to decorate. For example, the kitchen was a disgrace. The entire thing was covered in lime green tiles. The concrete floor had a thin carpet over it. Anybody who has ever cooked anything in their life knows that no one needs carpet in the kitchen. The cupboard doors were coming off their hinges, and the entire space was illuminated by just one hanging lightbulb.
To make matters worse, the kitchen looked like it had barely been cleaned in its entire existence. Grime appeared to be embedded into the surfaces. Both David and I agreed that the whole thing would have to go. We would rip it out and start again, build our own creation. This was effectively our decision with the whole property. The only thing that we wanted to leave in place was the roof and the walls. Everything else had to be changed and rebuilt to our specification. Sure, this would cost a little bit of money, and our budget was fairly tight, but by the end, we would have the house of our dreams.
The kitchen was the starting point. First of all, because we wanted to live in the house right away. If we started on the bedrooms or living areas, then our lives would be disrupted significantly from the get-go. The kitchen, on the other hand, presented the least amount of inconvenience. Sure, there would be an uncomfortable period of eating takeaway every night, which would be expensive too, but that pain would be worth it. Once it was done, we could move onto the rest of the property.
It seemed like a good plan at the time. It wasn’t. The nightmare that ensued around that kitchen taught me a lesson that I will never forget. I will never forgive those responsible for what happened, including myself. It was a total disaster, and I am now writing this as a warning. Do not make the same mistakes we did. We made blunder after blunder. It ended up costing us thousands beyond what was reasonable. To make matters worse, the emotional cost was so much more than that.
Before I can properly describe what went wrong, I have to tell you what we were trying to get done. We wanted the kitchen to be extended. It was not really big enough for our needs, especially if we were going to raise a family in it. So, we needed to carry out some home additions knocking out a wall and extending the space into the garden a little bit. We needed the kitchen remodeled completely. It was open plan and decorated in the most grotesque way possible. Instead, we wanted a clean, classy look with an island in the center where my family and I could eat and socialize.
Once the kitchen was done, all three bedrooms and the lounge needed to be done. They were decorated with discolored white wallpaper that had turned a sort of yellow over the years. We did not need much done in them other than a redecoration, with the walls getting replastered and painted a new shade of white. A lick of paint would have solved many of the problems in the house, making it seem brighter and less dated. This was something that we identified the moment we moved in and wanted to get started with as soon as the kitchen was done.
The bathroom was the final issue. Perhaps one of the biggest inconveniences of the property is that it only had one bathroom to begin with. The style of the bathroom was the next issue. Although it was a good size, the bathroom’s décor was not dissimilar to the kitchen. Everybody knows that the best color for a bathroom is white. Why the designers decades ago decided that lime green was the best shade, I will never know. Of course, the area has dilapidated over the years, but I cannot imagine that it ever looked any good to begin with. Even being in there at all made me feel nauseous.
Given my description of the house, you might be wondering why we even bought it at all. That is understandable, as I can see that I have been less than complimentary about the state of the property. The simple answer is that it was within our budget. If we could have purchased somewhere cheap that was also our dream home, then, of course, we would have. The plan was to get this place for a low price and then have a relatively low-cost renovation, meaning we had our perfect house for less than we could have paid. Of course, we were willing to spend some money, but we intended to be as frugal as possible.
The first issue we ran into was getting a contractor to do the work. I can now see that choosing the right contractor is potentially the most important part of any project. At the time, we did not choose the right contractor. We chose the one that was cheapest and available at the earliest opportunity. We should have spent time doing research, looking at a variety of contractors across the surrounding areas like McLean, Great Falls, Reston and Arlington. Instead, we just chose the cheapest one from Vienna. I won’t name them out of courtesy, but we made a huge mistake. We ignored their bad reviews because of their low pricing and willingness to do the job straight away. We were just so desperate to get the job done immediately (yesterday would have been preferable) and for a low cost. In the end, it cost us more time and money than it would have done if we’d have just done our research properly.
The company turned up two hours late on the first day of the job. Both David and I had taken a day off work to oversee the first day and welcome the workmen. Already, we had lost two precious hours of time on the project, as well as two hours that we could have been at work. To their credit, the workmen did start work as soon as they got there, beginning to process of demolishing the wall to extend the kitchen’s area. Although, by the end of the day, they had caused unwanted damage to the roof, which we intended to keep largely intact. Already, after just a few hours, the additional costs had started to rack up.
The extension took what felt like forever, almost the entire amount of time we had budgeted for the whole project. Every day, it felt like we were running into a new issue. It did not matter what was happening, there was always something to make it worse. The builders we had chosen charged a cheap rate but charged by the day. Every day, they were late. Sometimes, they would not work at all if the weather was not perfect. I cannot describe to you how many coffee breaks were had. It is not healthy to have that much coffee, surely. Then, occasionally, they would tell me that some material or tool they needed was not available or had increased in price for some obscure reason. All of this meant extra time and extra money being added to the job.
Both David and I felt humiliated by the time the first stage of the project was completed. We had burned through almost our entire budget on what was supposed to be just a small part of the project. So angry were we that we decided to complain to the contractor’s management. In fairness, they were understanding and helpful, although I now realize that this is because they were accustomed to dealing with complaints on a regular basis. All of their customers were disgruntled and for the same reasons as we were.
The management offered us a discounted rate for the rest of the kitchen, as well as their personal assurance that the levels of professionalism would increase and that they would use only the finest and highest quality materials on our job. I cannot believe how stupid we were. We believed them. We swallowed the sales pitch, the lie: hook, line, and sinker.
The kitchen design they gave us for the remodeling was good. Well, it looked good in the pictures, which had undoubtedly been edited beyond recognition. Maybe they were made on a computer in the first place. I cannot tell. Suffice to say, the final version did not look like what we were promised.
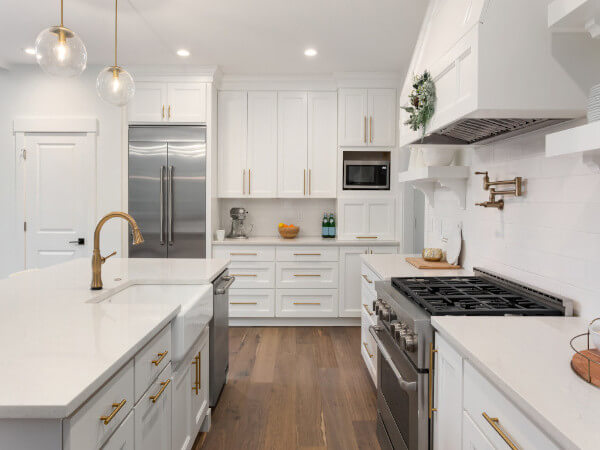
As I have said, we wanted a clean, white kitchen, with an island in the center. More than anything, we wanted to reduce clutter and have a place that was practical for kitchen tasks but also comfortable enough to spend time in every day. We received neither of these things.
The issues around timeliness did not resolve themselves, despite the resolution from contractor management. They still turned up late. They still did not turn up in bad weather (even though the job was now primarily inside). They still had issues with tools and materials. Their problems obtaining the correct apparatus for the job led to us accepting cream furnishings for the kitchen instead of white. We now have cream tiles and cupboards, with a white sink. The cream tiles remind me of the original faded white wallpaper in the bedrooms and lounge. The very aesthetic we were trying to avoid is the one we had installed.
I still cannot believe this, but one of the cabinets actually fell off before the kitchen was fully remodeled and installed. This is a particularly impressive example of shoddy workmanship, considering we had not even used the kitchen cabinets yet. Surely these people cannot have been professional kitchen cabinet installers. Any person with any experience could have surely fitted a cabinet without it falling off before the conclusion of the project! I still cannot get my head around it.
At the end of the kitchen remodeling, it looked nothing like the model we had been shown. It was a different color. None of the finishing was done properly. Bits of grouting between the tiles had been spread over the lines and had not been cleaned up at all. The light fittings were done how we asked but occasionally flickered when we turned them on. The sink was a different color from the cabinets and tiles. David put a spirit level on the counter of the island and realize it was not even straight. If you filled a glass of water to the brim, it would spill. We were devastated. We had gone so far over budget that we may as well have used one of the more expensive professionals. Our quick job had become protracted, and we had barely started, there was still the rest of the house to do.
We could not carry on with this contractor. Even though we had come so far with them, we could not do any more. We decided to change contractor and cut our losses. This time, we did our research and looked for an experienced professional with a degree of integrity and skill. We looked at reviews and pricing. Eventually, we decided to go with Explore Kitchens, who are based not too far away, in McLean, VA. They were able to come out to us straight away to price up the job. The project was priced honestly. The quote was more expensive than the previous company, but we were more confident that it would not be exceeded and that we could depend on them to keep to their promises. Similarly, the job was predicted to take a little bit longer, but this was okay. A longer deadline that is actually met is better than a short one that is missed.
We chose them to undertake the bathroom remodeling work and the home remodeling tasks. They did an excellent job, with everything being done as promised and within budget. They used high-quality materials that I am confident will be durable and not need repairing for a long time to come. It is a shame that they were not around to do the original home additions and kitchen remodeling because they would have done such a better job.
Although the kitchen is not what we wanted, Explore Kitchens have done an amazing job with the rest of the place. They were truly professional and greatly exceeded our expectations. In all likelihood, when we have saved up a little more, we will go back to them to realize our kitchen dream and get it back to how it should be. It is a shame that we have to get Explore Kitchens to remodel somebody else’s work, but we will feel better once it has been done.
I think we were naïve in our hope that we could get a perfect job for such a low cost. We looked at other projects that had been expensive although well crafted and thought we could get the same result for a low price. We thought that we could outsmart the system, that everybody else was stupid for following the status quo. We thought that the more expensive and reputable companies were conmen, keen to make extra money off unsuspecting and gullible customers. As it turned out, we were the gullible ones. My face still turns red with embarrassment just thinking about it now.
I cannot overstate how much we recommend Explore Kitchens for anyone in Northern Virginia. Please, learn from our experience. If you try to go cheap, you will end up paying twice. If you want it done yesterday, you should be prepared to wait a year. If you’re in McLean, Vienna, Great Falls, Reston, Arlington or Virginia, you should use them. Whether you’re after kitchen remodelers, kitchen design, kitchen cabinet installers, or just tile and flooring, they are certainly the company for you. I am happy to write this recommendation for them so that other people do not make the same mistakes that David and I did.
The post An Incredible story from our Client appeared first on Explore Kitchens – Kitchen Remodeling in McLean, VA.
Did you miss our previous article…
https://www.conduithardware.com/?p=76
New CA Law Requires Use of ‘Lead-Free’ Plumbing Fixtures

ONTARIO, CA — A new plumbing code signed into law in California will mandate strict new limits on the manufacturing and sale of plumbing fixtures that leach lead, a toxin that has been tied for decades to drinking water, state officials announced.
California Gov. Gavin Newsom last week signed into law AB 100, legislation that establishes new lead leaching standards for the state, according to the International Association of Plumbing and Mechanical Officials (IAPMO), an organization that coordinates the development and adaptation of plumbing, mechanical, swimming pool and solar energy codes in the U.S. and abroad.
The new law, effective Jan. 1, 2023, prohibits the manufacturing and sale in California of any plumbing fixture, fitting or faucet that does not meet NSF/ANSI/CAN 61-2020, the IAPMO said. The law also requires that product packaging and labeling of any device that’s intended to convey or dispense water for human consumption must indicate compliance with the “lead-free” standard.
“AB 100 will help reduce the risk of lead exposure in the built environment through certified, ‘lead-free’ endpoint devices,” said Robyn Fischer, director of government relations for the Ontario, CA-based IAPMO. “This new law will complement the larger-scale efforts underway to help protect Californian’s water infrastructure and underscores the state’s commitment to uphold public health and safety.”
“We’re grateful that California’s new law promotes the industry standard for lead reduction, so that drinking water fixtures and faucets are accurately labeled,” added Tom Palkon, IAPMO’s executive v.p.
The post New CA Law Requires Use of ‘Lead-Free’ Plumbing Fixtures appeared first on Kitchen & Bath Design News.
Did you miss our previous article…
https://www.conduithardware.com/?p=73
Continued Growth Forecast for U.S. Building Products

INDIANAPOLIS — The U.S. building products market will continue building on its “exponential growth” of the past two years, gaining an additional 2.9% from 2023 through 2025, with the professional sector increasing by 4.6%, according to a newly released forecast by the Home Improvement Research Institute (HIRI).
The Indianapolis-based HIRI predicted that the total U.S. building products market will increase by 13% in 2021 over the previous year, with the professional sector growing by 18.2%. The total building products market is forecast to grow an additional 2.3% in 2022, with the professional sector growing by 7.1%, HIRI added.
“The home improvement industry had explosive growth during the coronavirus pandemic, due primarily to DIY projects, but that may now be driven by pros,” said HIRI Research Director Matthew Craig, adding that growth in the DIY sector is expected to decline as an overall share of home improvement product sales in 2022, since “many homeowners completed planned projects throughout this year and the last.”
However, growth “will continue further in the professional products market as COVID-19 restrictions ease and projects put on hold resume, HIRI said.
“The strong home improvement outlook provided by pandemic behavior has been given new life by improved employment gains, increased access to vaccinations and additional stimulus measures,” said HIRI. “A continuing strong economy suggests that spending (in the professional sector) will improve, as households feel more comfortable with contractors in their home.”
The post Continued Growth Forecast for U.S. Building Products appeared first on Kitchen & Bath Design News.
Did you miss our previous article…
https://www.conduithardware.com/?p=70
18 Best Dual-zone Wine Cooler Reviews in 2021

The post 18 Best Dual-zone Wine Cooler Reviews in 2021 appeared first on Kitchen Infinity.
Did you miss our previous article…
https://www.conduithardware.com/?p=67